
Japanese Fried Rice Recipe (4 Easy Variations)
If you’ve ever ordered fried rice expecting something salty and saucy, this might surprise you.
This is the kind of Japanese fried rice I grew up eating — simple, quick, and made with whatever we had in the fridge. It’s not heavy or overloaded with soy sauce. Instead, it’s lightly seasoned, with soft, separate grains of rice and just a hint of soy aroma at the end.
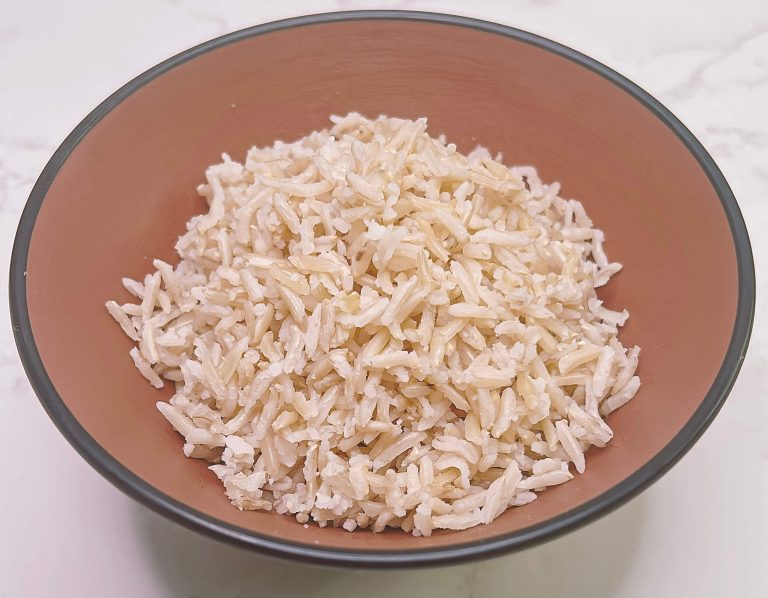
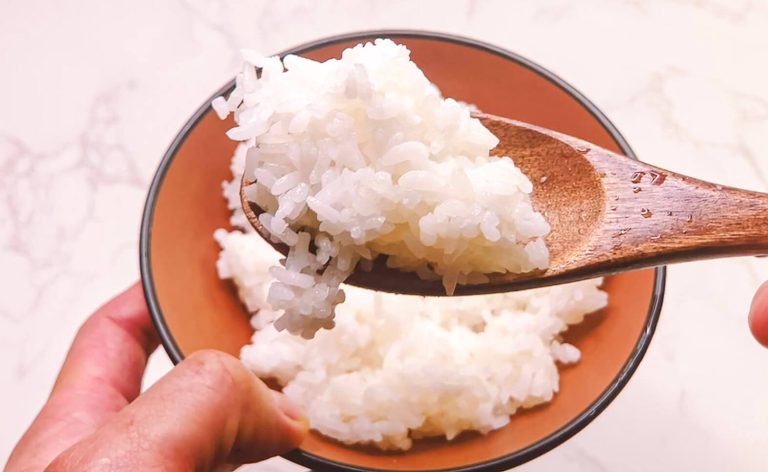
Short or medium grain rice works best for this. If you’re not sure how to cook it properly, you can follow my white rice guide, or use brown rice or cauliflower rice depending on your preference or dietary needs.
The biggest difference is this:
👉 We mix egg into the rice before cooking.
It sounds small, but it changes everything — every grain gets lightly coated, helping the rice separate while staying soft and slightly chewy.
This is one of the simplest techniques, but it makes a big difference in texture.
In this post, I’ll show you the base method and four easy variations:
- Plain Japanese fried rice
- Garlic butter fried rice
- Takana (Japanese mustard greens) fried rice
- Chicken fried rice
Once you understand the base, you can make it with anything.

Light, fluffy Japanese fried rice with perfectly separated egg-coated grains 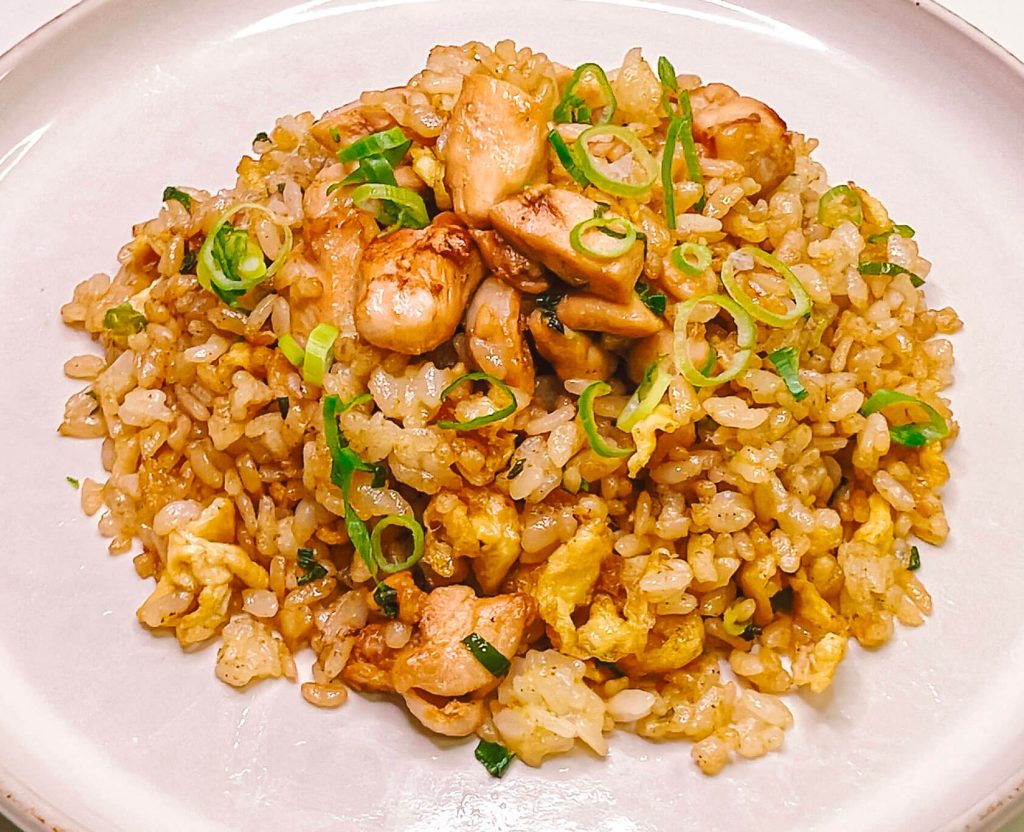
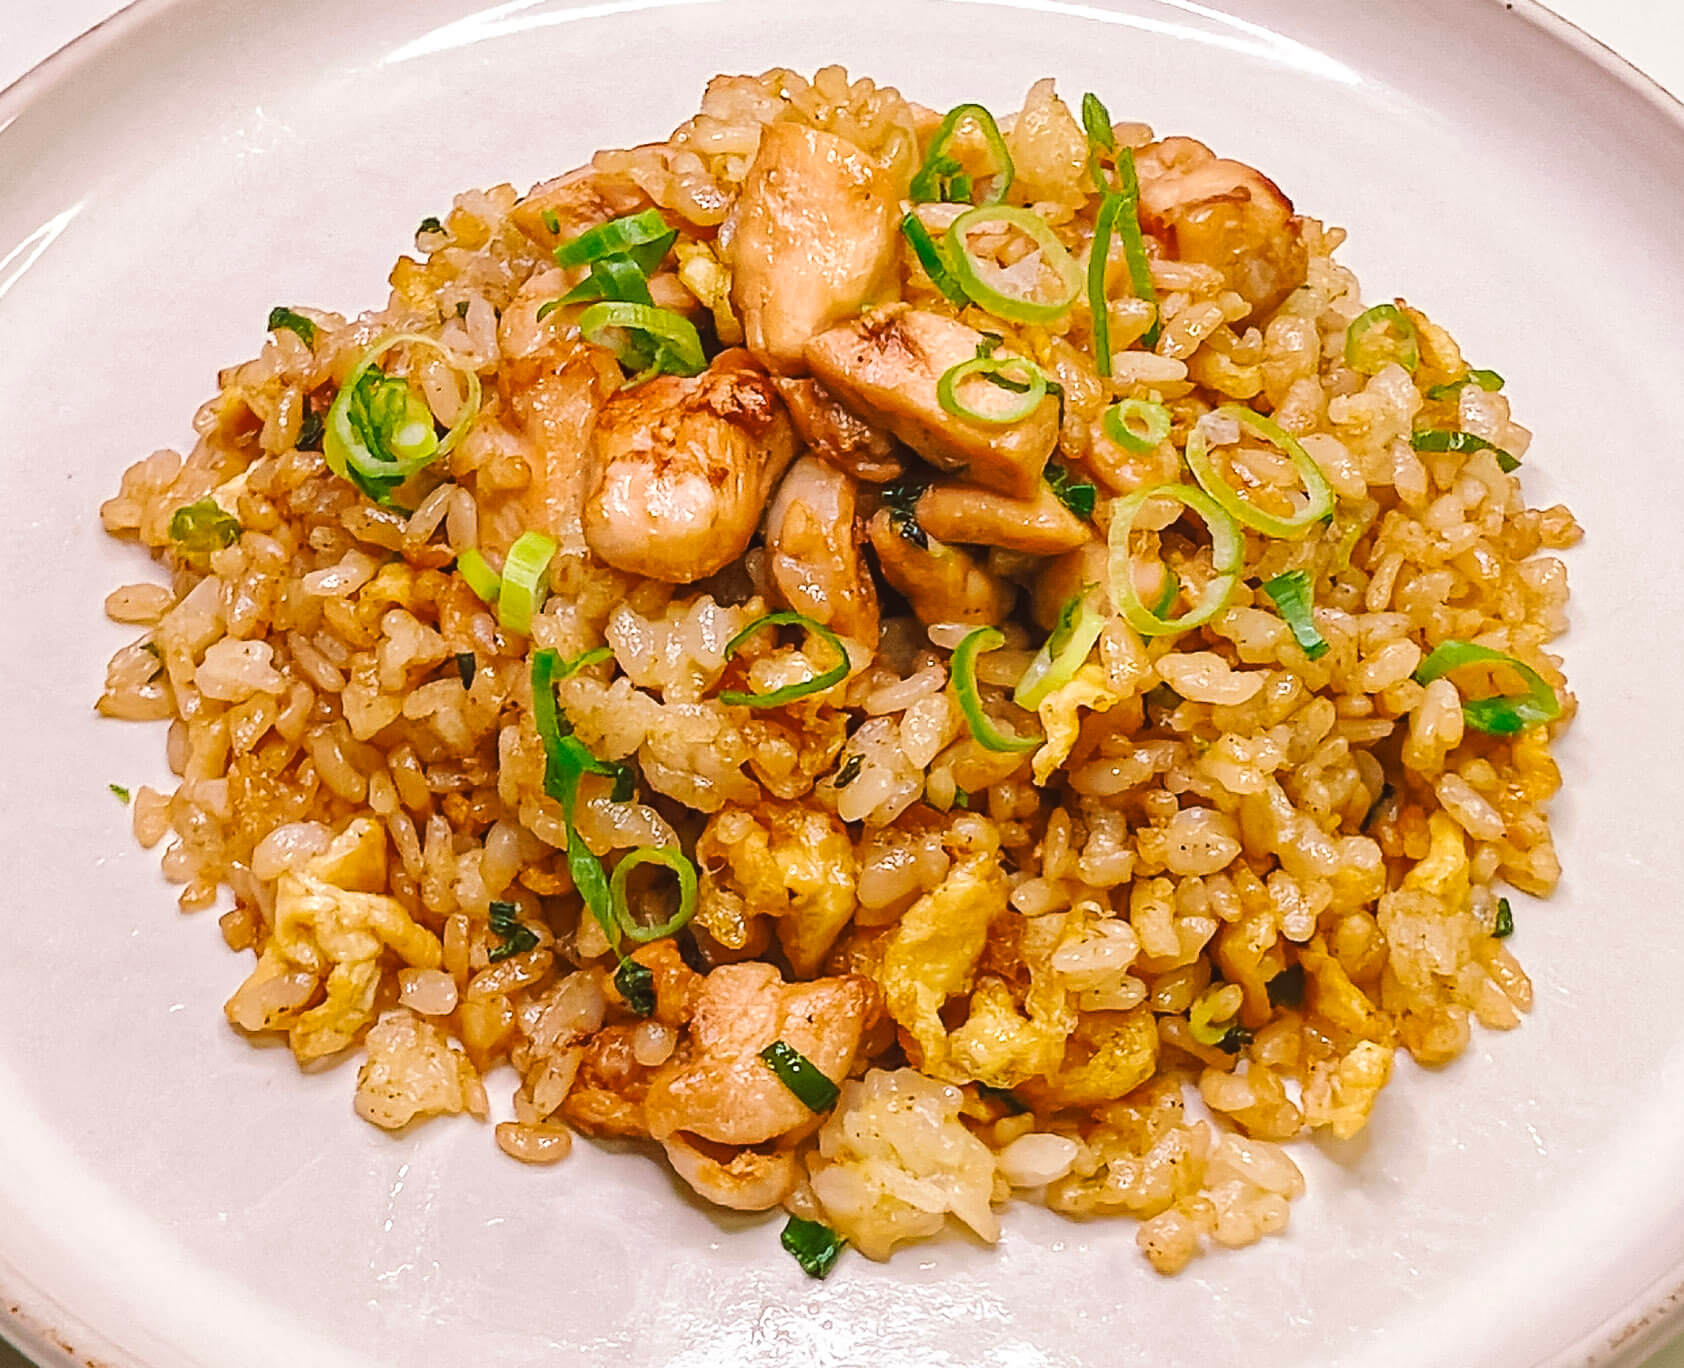
Japanese-style chicken fried rice with soft, separated grains and juicy chicken 
Takana fried rice with fluffy, separated grains and a light tangy flavor
Why You’ll Love This Japanese Fried Rice
- Simple and quick – ready in under 15 minutes
- Light, not greasy – no heavy sauces or oily finish
- Better texture – egg-coated rice keeps grains soft and separate
- Flexible – works with whatever protein or leftovers you have
- True Japanese home-style – lightly seasoned, not soy-heavy
What You’ll Need for Japanese Fried Rice
Classic Japanese Fried Rice

- Cooked rice (150g) – short or medium grain works best
- Egg (1 large, ~50g) – divided for coating and texture
- Japanese salt & pepper (shio kosho) – main seasoning base
- Soy sauce – added at the end for aroma, not heavy flavor
- Neutral oil – for frying and separating the rice
- Shallot / spring onion – adds freshness and light sweetness
Garlic Butter Fried Rice
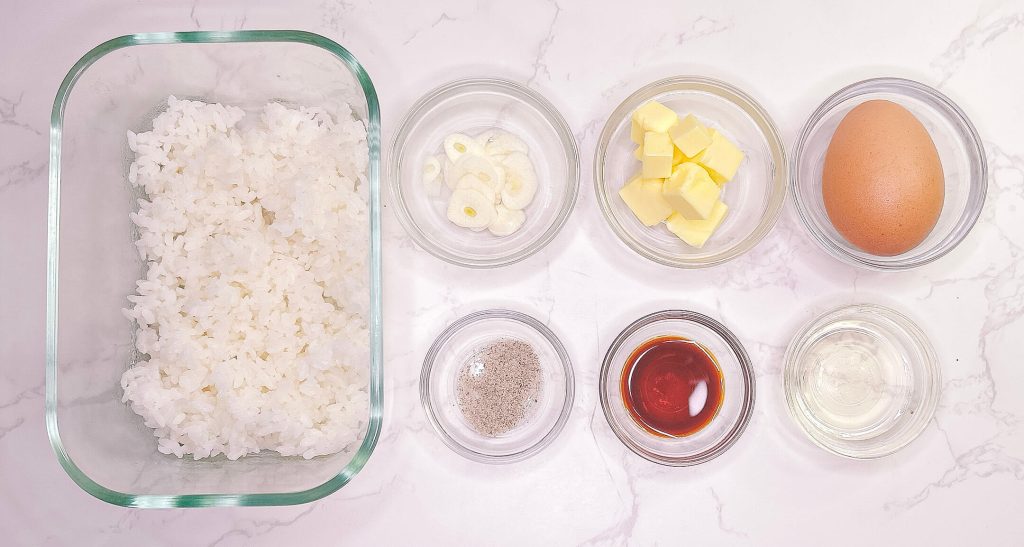
- Cooked rice – same base as above
- Egg – for coating and soft scrambled texture
- Japanese salt & pepper
- Soy sauce – light finishing touch
- Neutral oil
- Butter – adds richness and depth
- Garlic (sliced) – gently cooked for aroma, not burnt
- Shallot / spring onion – balances the richness
Takana Fried Rice
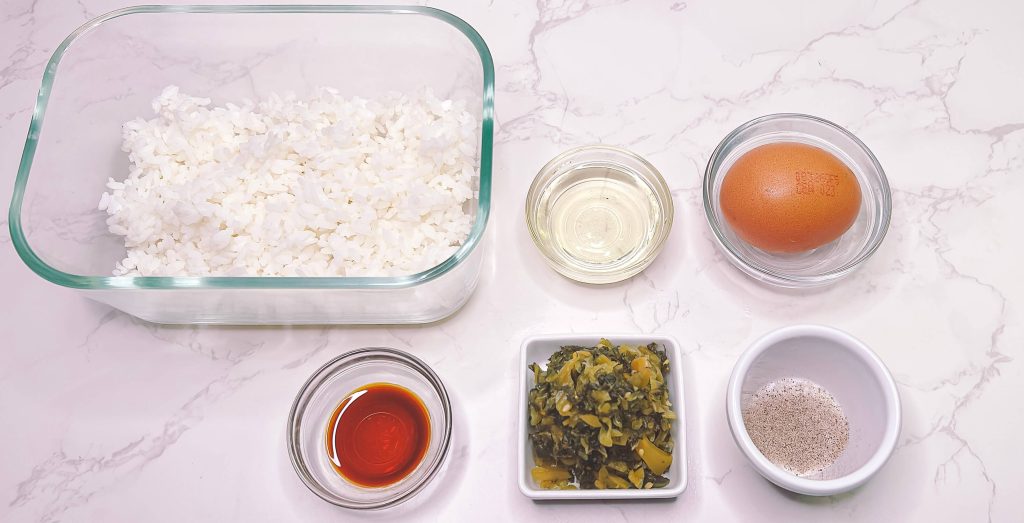
- Cooked rice
- Egg
- Takana (pickled mustard greens) – squeezed well to remove excess moisture
- Japanese salt & pepper – adjust carefully as takana is already salty
- Soy sauce (optional) – often not needed
- Neutral oil
👉 Takana adds a naturally salty, tangy flavor — this version is the most traditional and minimal.
Chicken Fried Rice
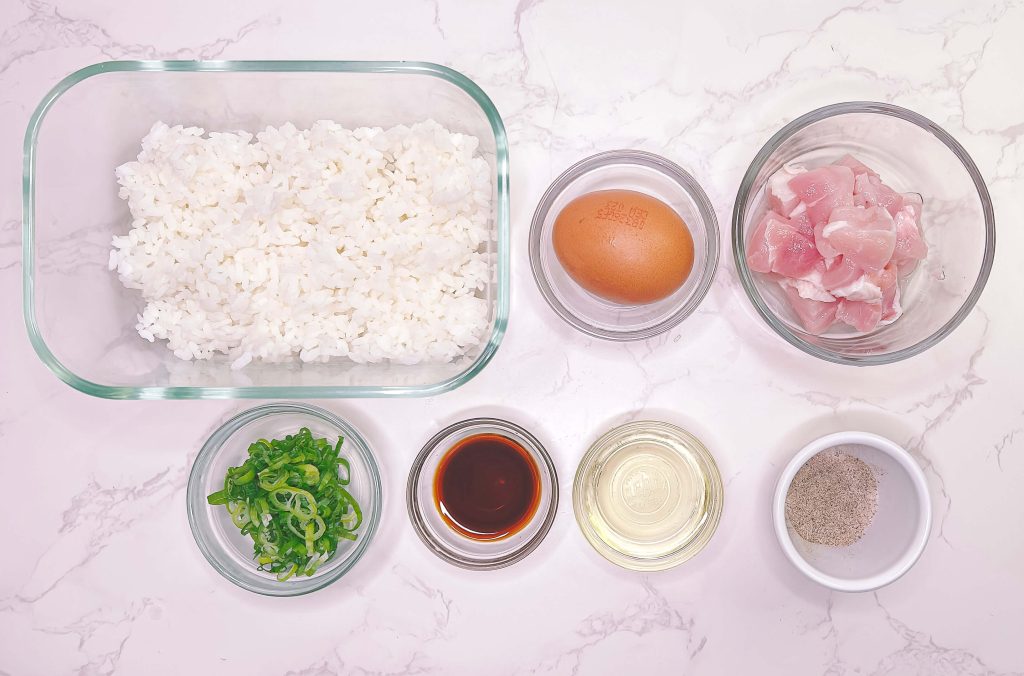
- Cooked rice
- Egg
- Chicken thigh – preferred for juiciness and flavor
- Japanese salt & pepper
- Soy sauce – used lightly on the chicken and again at the end
- Neutral oil
- Garlic (optional) – adds extra depth if you want it
- Shallot / spring onion
👉 The chicken is quickly sautéed with soy sauce for color and flavor — no marinade needed.
Japanese Salt & Pepper (Shio Kosho)
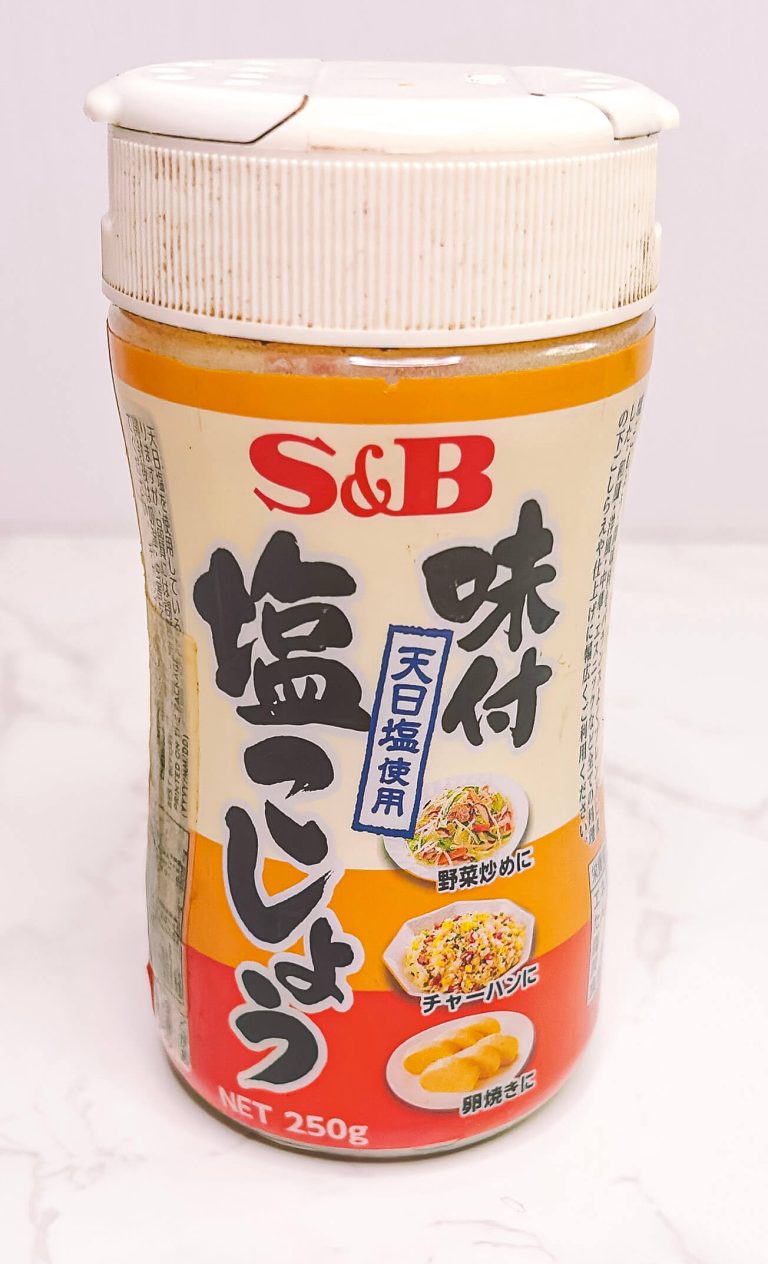
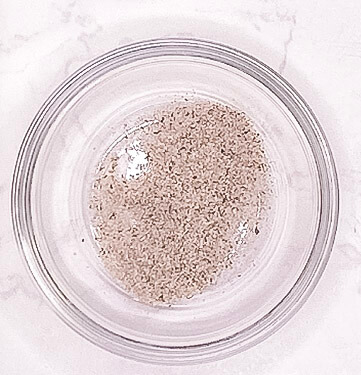
If you want your fried rice to taste like Japan, this is the key.
It’s not the soy sauce — it’s the seasoning.
In Japan, shio kosho (塩こしょう) literally means “salt and pepper,”
but in reality, it’s more than that.
Most Japanese-style salt and pepper blends include:
- Salt
- White pepper
- Black pepper
- A small amount of sugar
- MSG
This creates a more balanced, rounded seasoning that blends into the dish rather than sitting on top.
Why This Flavor Matters
This is the taste that instantly reminds you of Japanese food.
You’ll find it used in:
- Fried rice (チャーハン)
- Karaage (Japanese fried chicken)
- Tonkatsu
- Subuta (Japanese-style sweet and sour pork)
- Simple stir-fries and pan-fried dishes
👉 It’s often added before cooking, as part of the marinade or base seasoning — not just at the end.
That’s why the flavor feels deeper and more “built in.”
The MSG Reality
MSG is very common in Japanese food — even if people don’t realize it.

It’s already used in:
- Shio kosho blends
- Curry roux blocks
- Onigiri and convenience store food
- Many packaged and ready-made products
That familiar “Japanese restaurant” or takeaway flavor often comes from a small amount of MSG.
This isn’t unusual — it’s part of everyday cooking in Japan.
My Simple Shio Kosho Blend (Optional)
If you don’t have Japanese salt & pepper, you can make a quick version:
- 10g very fine salt
- 1g white pepper
- 1g black pepper
- 0.5g sugar
- 0.5g MSG (optional — commonly used in Japan for that familiar savory flavor, often known by the brand “Ajinomoto”)
Mix well and store in an airtight container.
Why This Works
- Salt → main seasoning base
- White pepper → gentle heat (classic Japanese profile)
- Black pepper → aroma and depth
- Sugar → slightly rounds the flavor
- MSG → creates that familiar savory Japanese taste
Chef’s Note
This is my preferred blend for fried rice — slightly more aromatic than typical store-bought versions, which often rely more heavily on white pepper.
It’s designed to work with:
- egg-coated rice
- minimal soy sauce
- quick, home-style cooking
No MSG Option
If you prefer not to use MSG, simply leave it out.
The seasoning will still work — just slightly less rounded and savory.
What Is Takana?

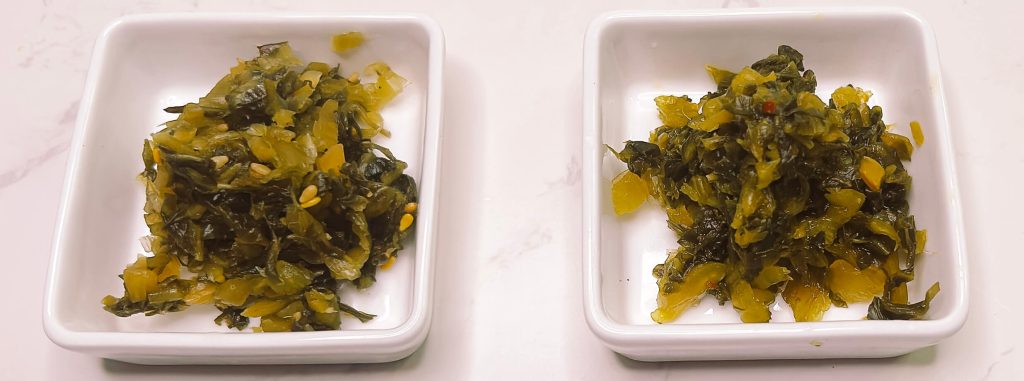
Takana is a Japanese pickled mustard green, known for its salty, slightly sour, and lightly spicy flavor.
It’s commonly used in fried rice, ramen, and simple rice dishes to add instant depth without needing extra seasoning.
👉 It’s also often eaten simply on top of hot rice — a very common, everyday way to enjoy it in Japan.
Think of it as a built-in flavor boost — similar to kimchi or sauerkraut, but milder and more balanced.
Why Use Takana in Fried Rice?
Takana adds three key things:
- Saltiness → seasons the rice naturally
- Acidity → cuts through oil and richness
- Umami → makes the dish taste more complete
Because of this, takana fried rice usually needs less soy sauce or additional seasoning.
How to Prepare Takana for Easy Japanese Fried Rice (Important)

Takana is usually packed with a lot of liquid.
For fried rice, always squeeze the takana well before cooking.
- Take a small handful
- Squeeze firmly to remove excess liquid
- Roughly chop if needed
This step is important for two reasons:
- Too much liquid will make the fried rice soggy instead of light and fluffy
- If you fry wet takana in hot oil, it can splash and make cooking messy
Note: This squeezing step is mainly important for fried rice.
If you’re serving takana on hot rice or as a side, you don’t need to squeeze it as much.
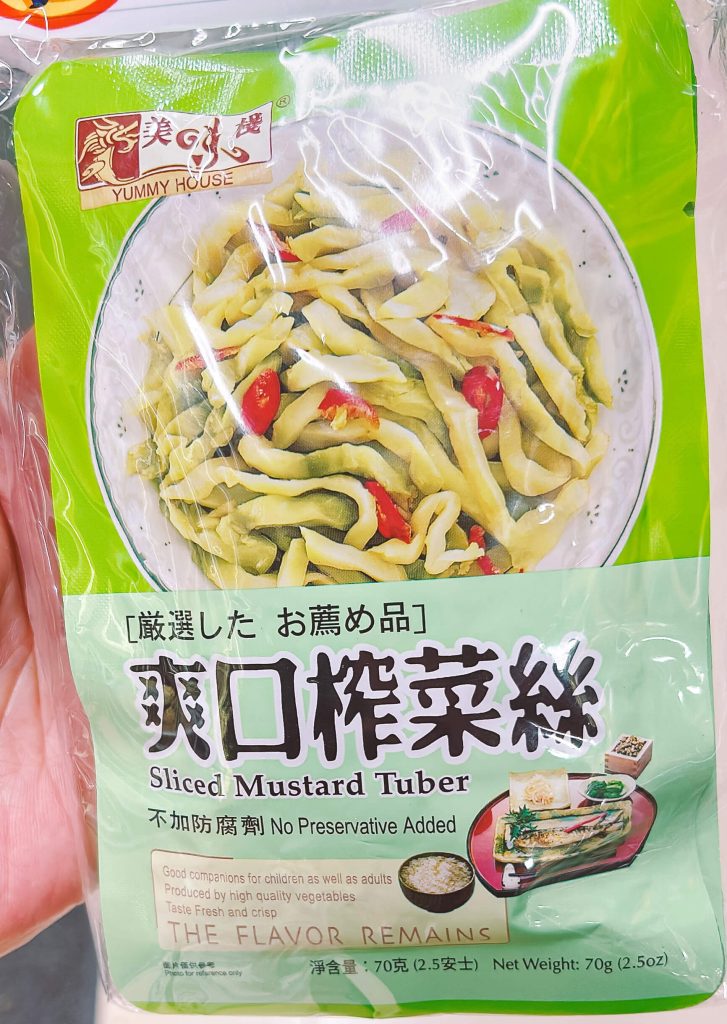
What to Look For (Buying Tips)
You’ll often find:
- Mild (no chilli)
- Spicy (with chilli)
👉 Both work — just adjust based on your preference.
Some packages may be labeled:
- Takana
- Pickled mustard greens
- Mustard leaf pickles
Substitutes
If you can’t find takana, you can use:



- Chinese pickled mustard greens (zha cai / xue cai)
- Light sauerkraut (well squeezed)
👉 The flavor won’t be exactly the same, but it gives a similar salty and tangy effect.
Key Technique: Egg-Coated Rice

Beat the egg before mixing into the rice 
weigh egg for consistent rice-to-egg ratio 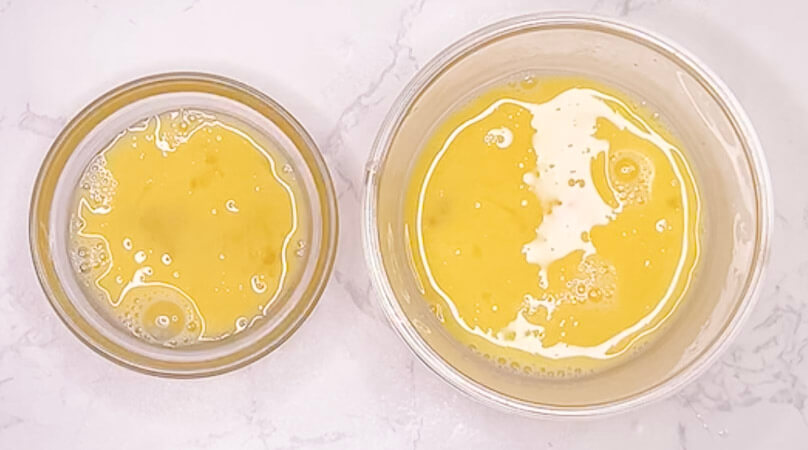
Split egg method: part mixed into rice, part scrambled in the pan 
Mix egg into rice before frying for better separation and texture 
Mix egg and shio kosho into rice before frying 
Rice fully coated with egg before frying 
Each grain lightly coated with egg before frying
This is the technique that makes Japanese-style fried rice different.
Instead of cooking the egg separately, the egg is mixed directly into the rice before frying.
👉 Each grain gets lightly coated in egg, which helps create a soft, separated texture when cooked.
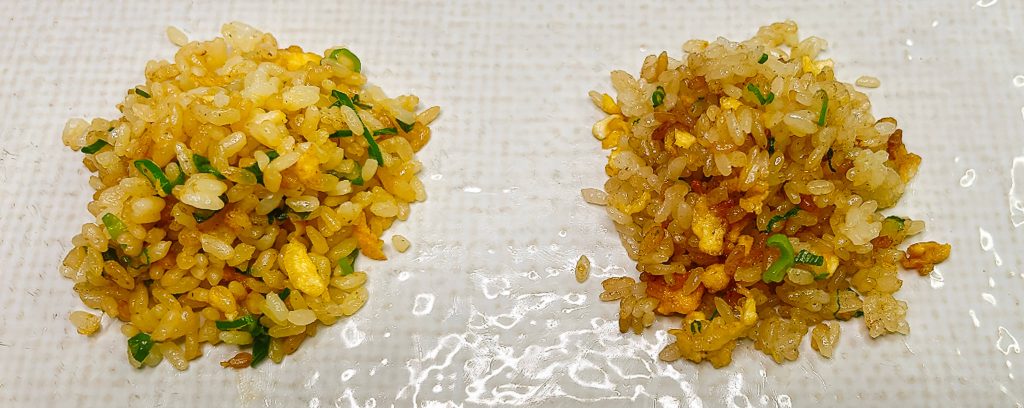
Left: egg mixed into rice (lighter, separated grains) Right: not mixed (slightly clumped and uneven texture)
Why This Works
- The egg acts as a light coating around each grain
- It helps prevent clumping, especially with short or medium grain rice
- The result is fluffy rice with a slightly rich, golden finish
👉 You’ll notice the rice separates more easily compared to adding egg later.
How to Do It
- Use warm rice (not hot, not cold from the fridge)
- Add a small amount of beaten egg
- Mix gently until the rice is lightly coated
👉 Don’t overmix — you’re coating the grains, not turning it into a paste.
Pro Tip (Important)
- Use about 20–30g egg per 150g cooked rice
- Season lightly with shio kosho (Japanese salt & pepper) at this stage
👉 This builds flavor directly into the rice, not just on the surface.
What Happens If You Skip This?

Slightly clumped grains without mixing egg into the rice 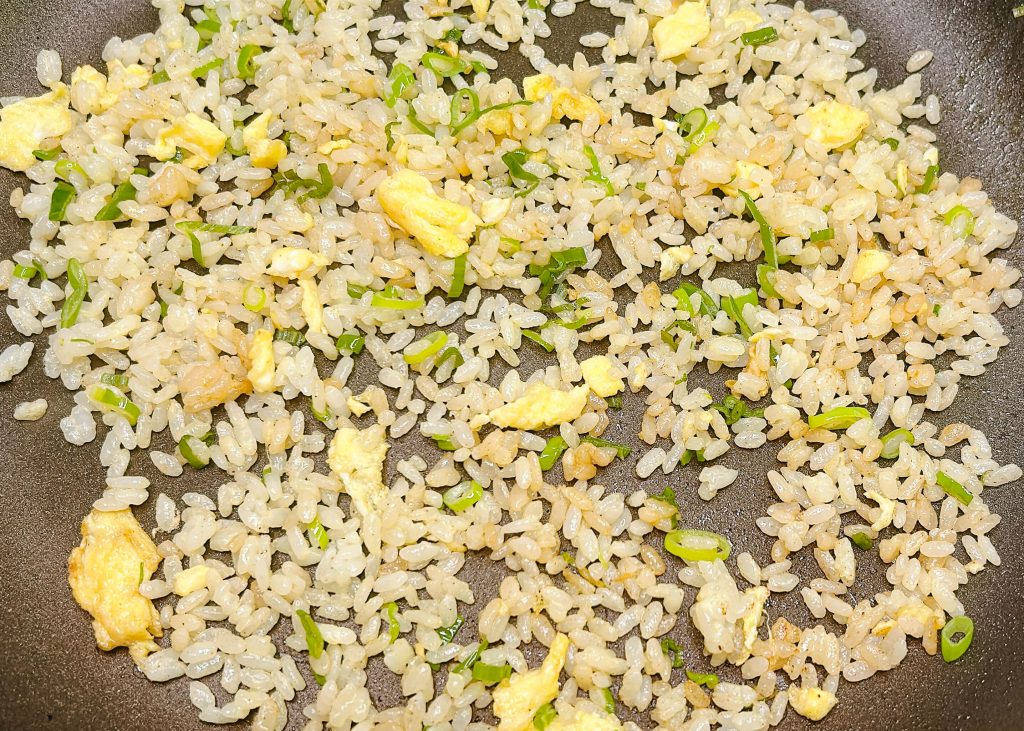
Light, separated grains using the egg-mixed method
You can still make fried rice, but:
- Rice may clump more easily
- Egg becomes separate pieces instead of coating the rice
- Texture is less refined
👉 This method gives you a more even, consistent result.
Japanese Fried Rice vs Chinese Fried Rice
| Japanese Fried Rice | Chinese Fried Rice | |
|---|---|---|
| Rice | Short or medium grain | Long grain |
| Texture | Soft, slightly sticky but separated | Dry and fluffy |
| Seasoning | Light (salt & pepper + soy aroma) | Soy-heavy, bold |
| Cooking style | Simple, quick, home-style | Higher heat, more oil and sauce |
Step-by-Step Japanese Fried Rice
Plain Japanese Fried Rice
The base recipe — clean, simple, and balanced.
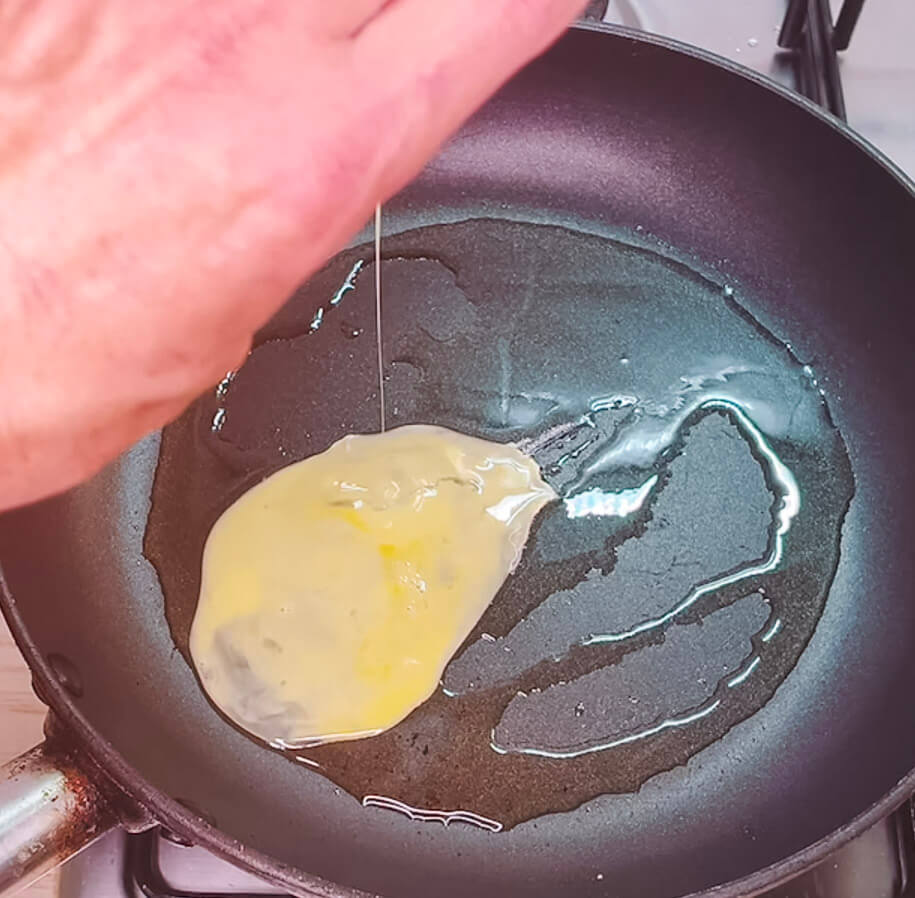
Add the remaining egg to a lightly oiled hot pan 
Lightly scramble the egg until just set 
Add the egg-coated rice into the pan with the scrambled egg 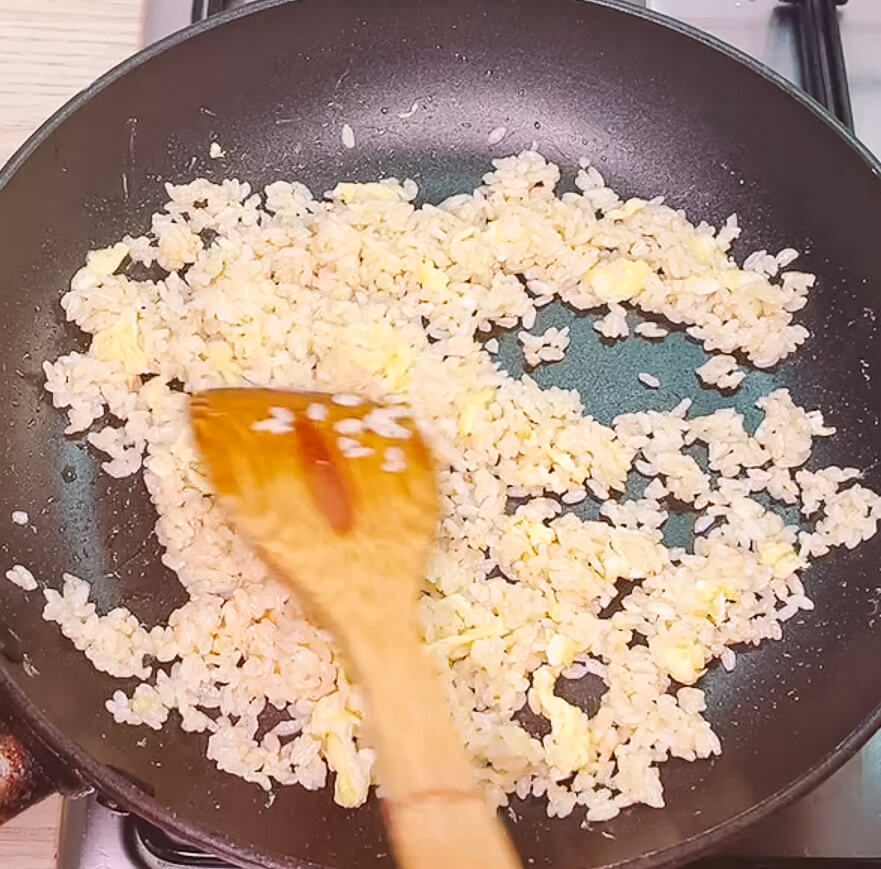
Gently separate the rice grains while stir-frying 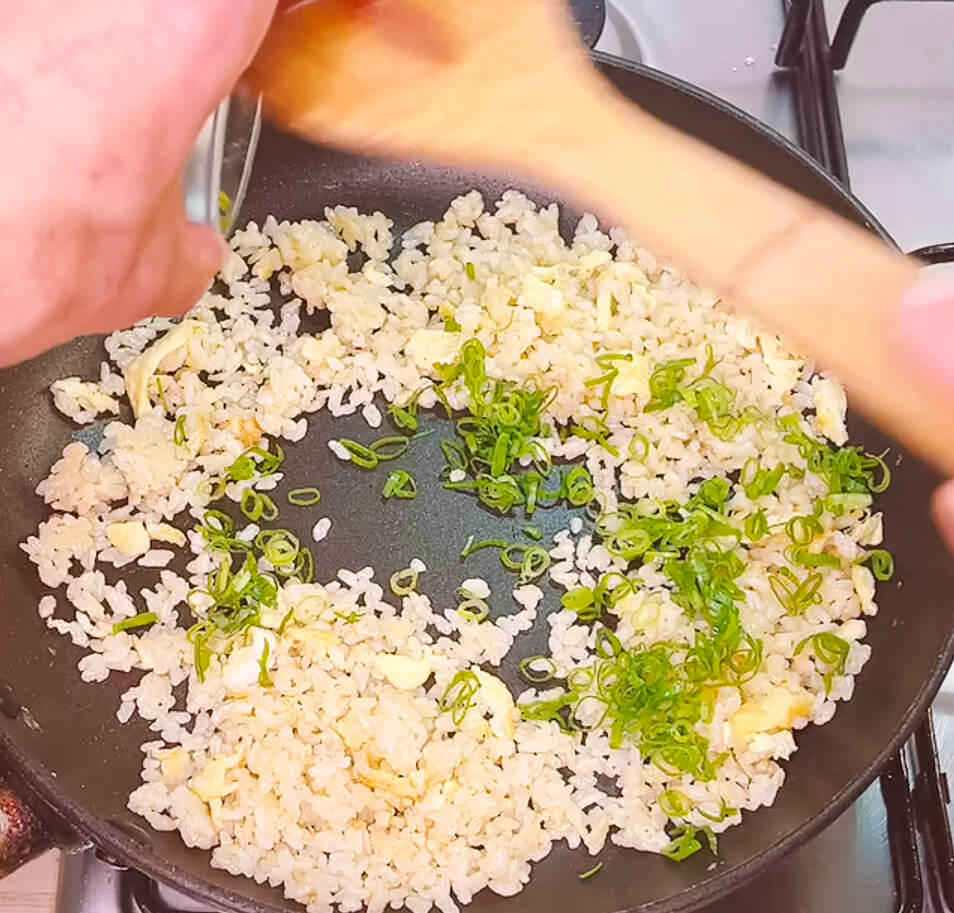
Add green onion just before final seasoning 
Add soy sauce to the hot pan for final seasoning 
Fluffy, separated grains with light egg coating easy-japanese-fried-rice-egg-coated-technique
Garlic Butter Fried Rice
Richer, more aromatic — great as a main dish.

Melt butter with a little oil to prevent burning 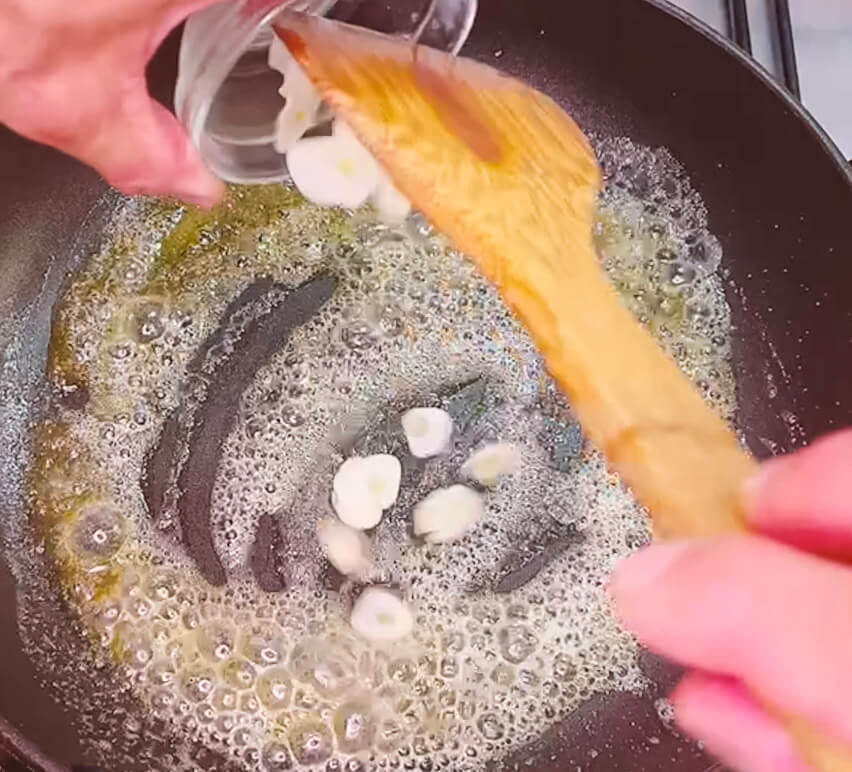
Add sliced garlic and cook gently until fragrant 
Cook garlic until lightly golden and fragrant 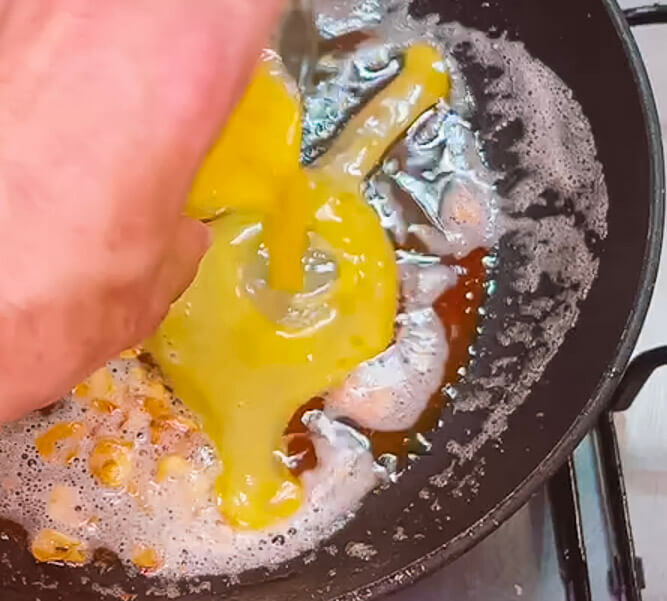
Add egg after garlic is cooked 
Add the rice and gently break it up 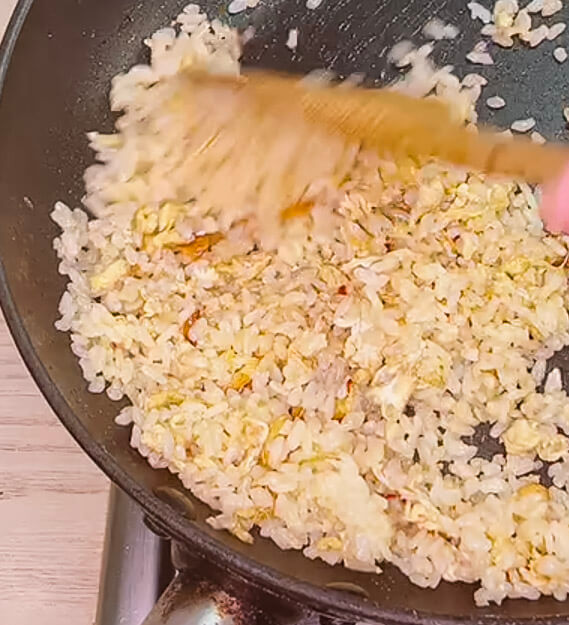
Add the rice and gently break it up in the garlic butter 
Drizzle soy sauce into the hot pan for aroma 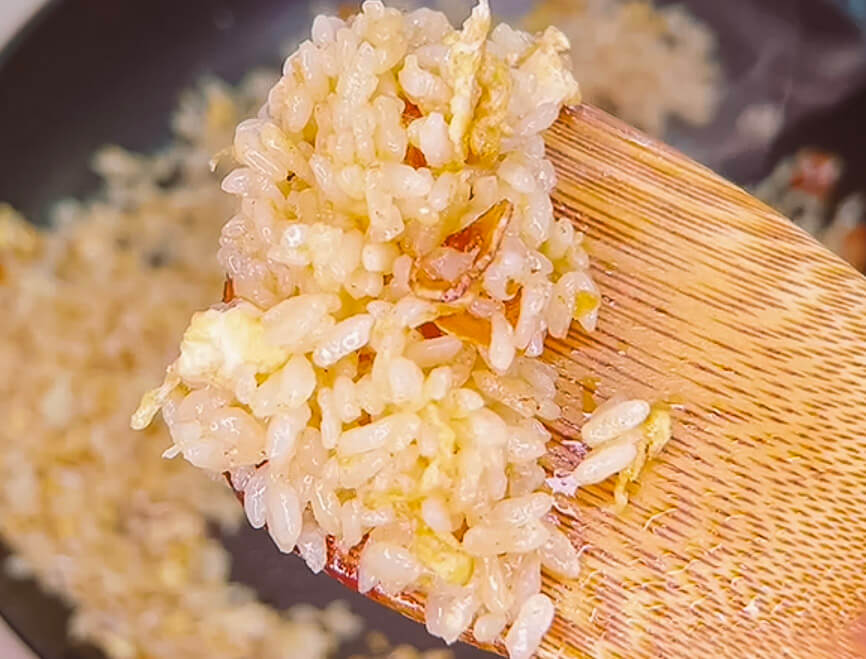
Light, fluffy grains with no clumping 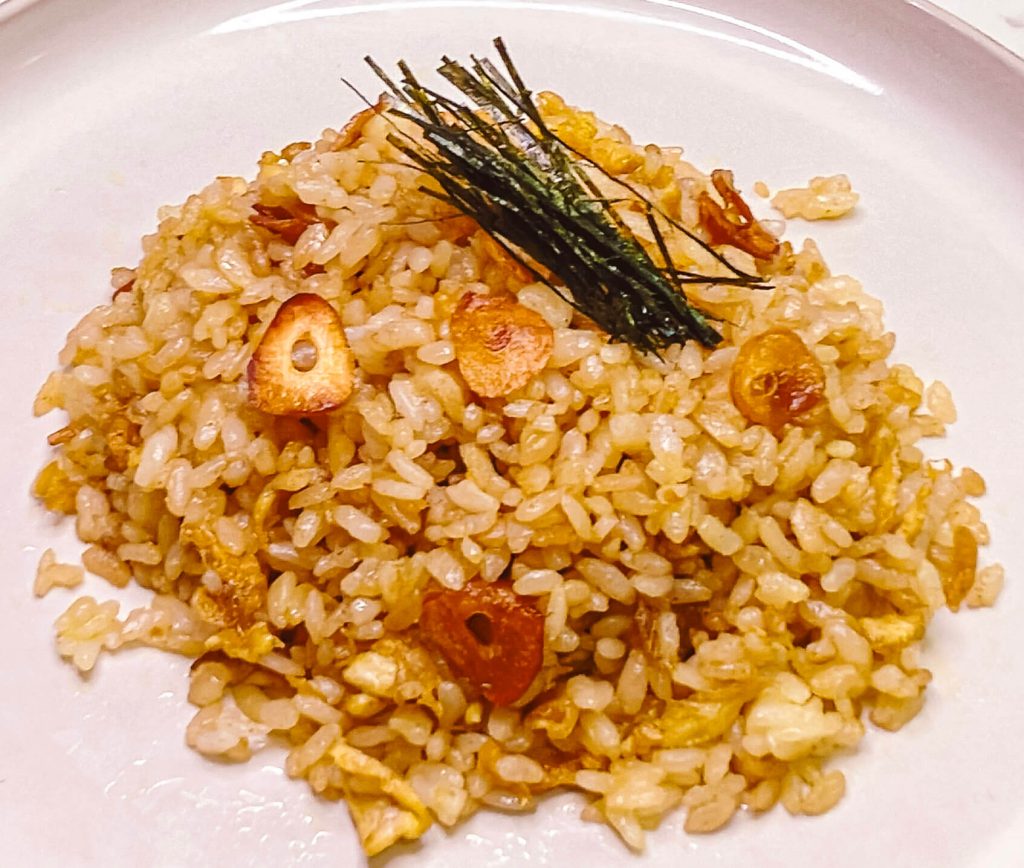
Japanese-style garlic fried rice with crispy garlic and fluffy egg-coated rice
🥬 Takana Fried Rice (Traditional Home Style)
Slightly salty, tangy, and very common in Japan.
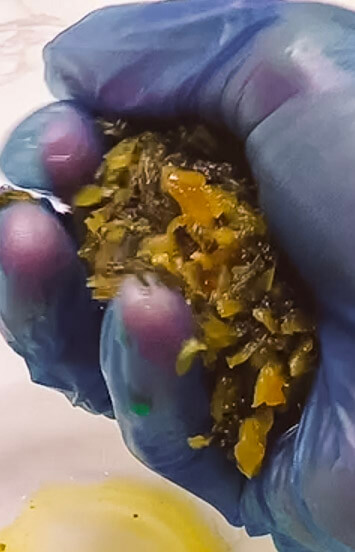
Squeeze takana well to remove excess liquid before cooking 
Squeezed takana (left) and excess liquid removed (right) 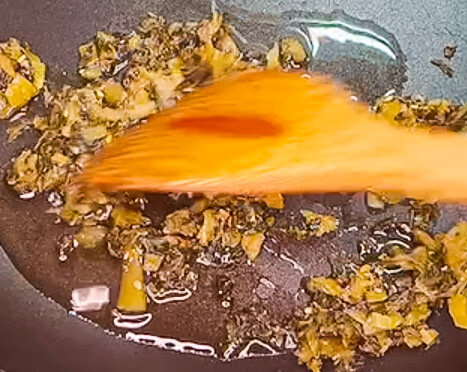
Saute takana first to remove excess moisture 
Add egg after sautéing takana 
Add rice and break it up gently 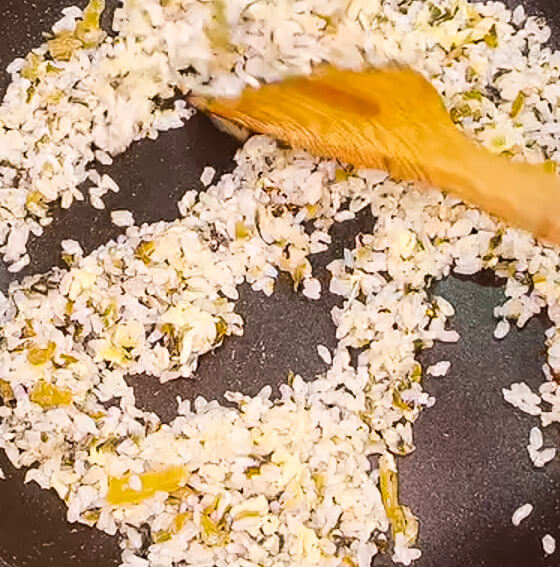
Gently break up the rice without crushing it 
Drizzle soy sauce into the hot pan for aroma 
Fluffy, separated grains with balanced takana flavor Japanese takana fried rice made with pickled mustard greens and egg-coated rice
🍗 Chicken Fried Rice (Quick Protein Option)
You can swap chicken with prawns, ham, or leftovers.

Start cooking the chicken in a hot pan 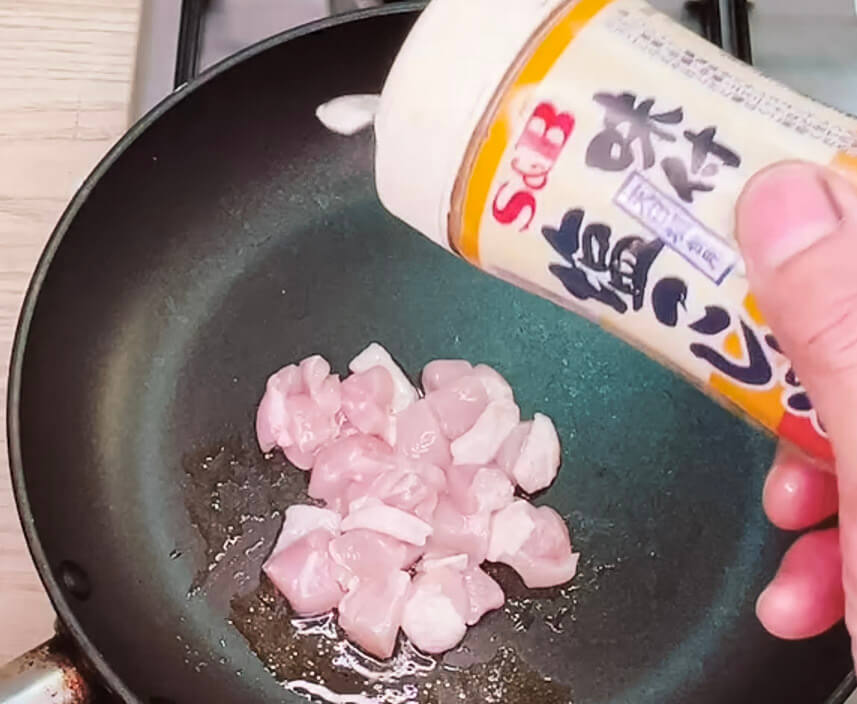
Season the chicken with shio kosho. 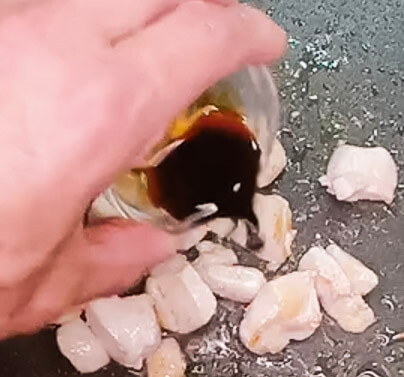
Season the chicken with soy sauce 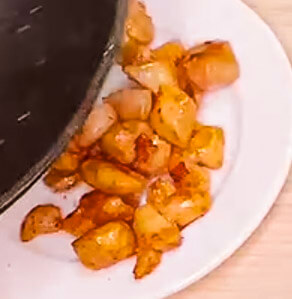
Set the cooked chicken aside 
Add oil and start cooking the egg in the same pan 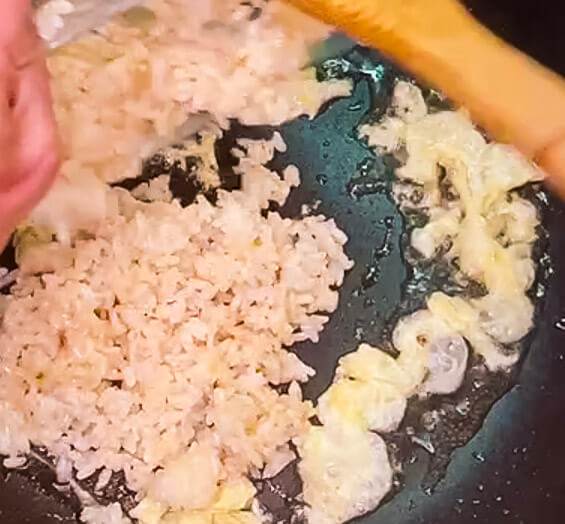
Add rice and start breaking it up 
Add the chicken back into the rice 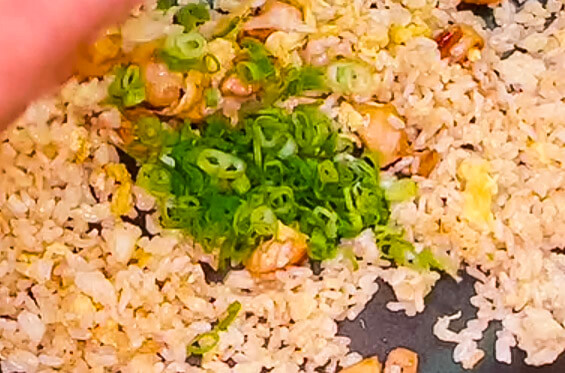
Add spring onion at the end for freshness 
Drizzle soy sauce into the hot pan for aroma 
Fluffy, separated grains with juicy chicken Japanese-style chicken fried rice with simple soy-seasoned chicken and fluffy egg-coated rice
Pro Tips (Important)
- Don’t overuse soy sauce
→ This is not soy-heavy fried rice - Egg ratio matters
→ 30g for coating, 20g for texture - Rice temperature matters
→ Slightly warm is easiest to work with - Medium-high heat is enough
→ No need for extreme wok heat - Add soy at the end
→ Keeps aroma clean and fresh - Adjust seasoning to taste → Taste before adding more soy sauce or salt
How to Plate Japanese Fried Rice (2 Simple Styles)
Two easy ways to serve fried rice, depending on the look you want:
- Moulded → neat dome shape for a clean, restaurant-style presentation (takana, plain)
- Free Fall → loose, casual, everyday style (garlic, chicken)
easy-japanese-fried-rice-egg-coated-technique Japanese takana fried rice made with pickled mustard greens and egg-coated rice Japanese-style garlic fried rice with crispy garlic and fluffy egg-coated rice Japanese-style chicken fried rice with simple soy-seasoned chicken and fluffy egg-coated rice
How to Mould Japanese Fried Rice (Step-by-Step)
Serve in a neat dome shape for a restaurant-style presentation

Pack the fried rice firmly into a bowl 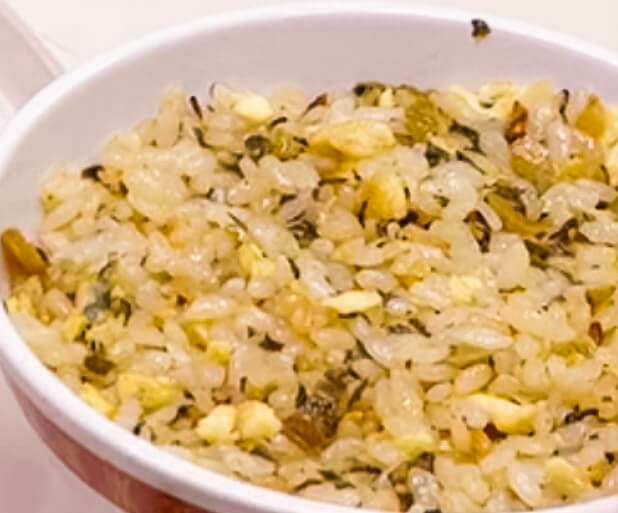
Press the rice gently into the bowl to shape it 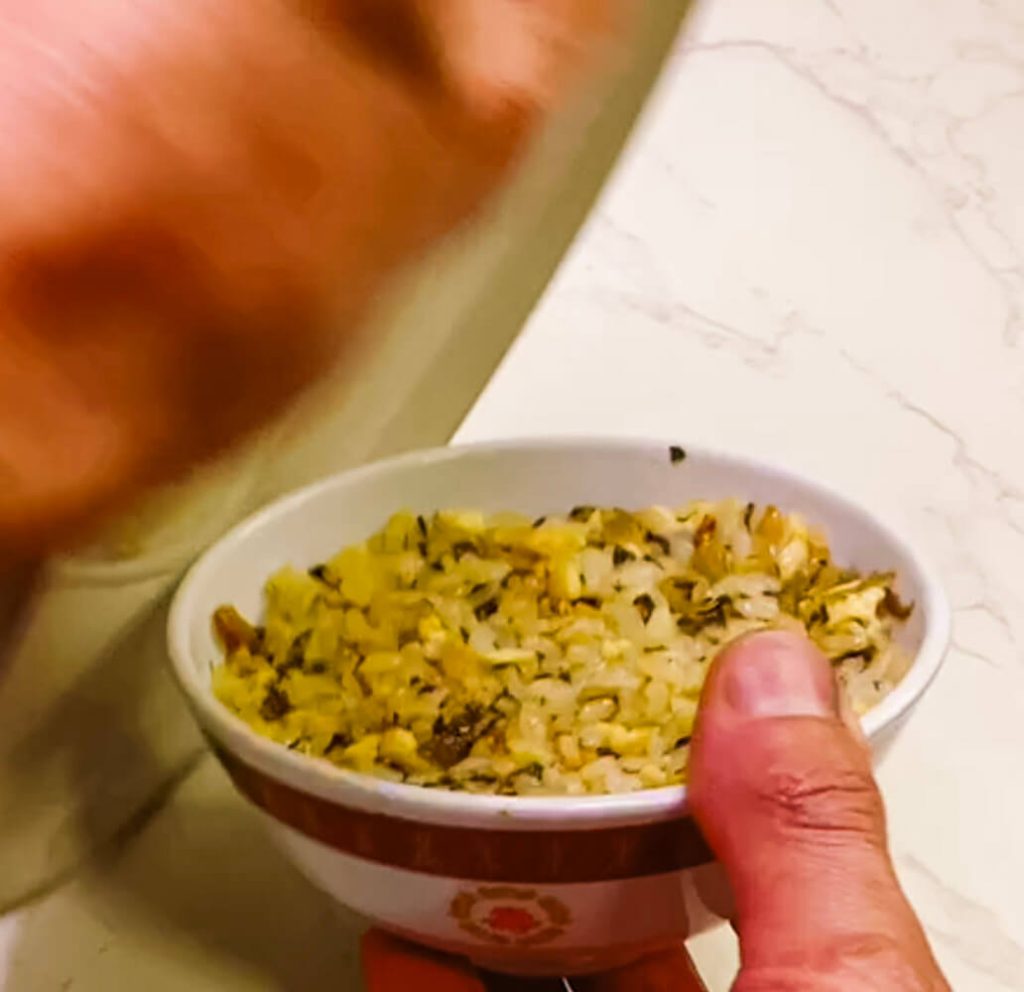
Cover the bowl with a plate before flipping 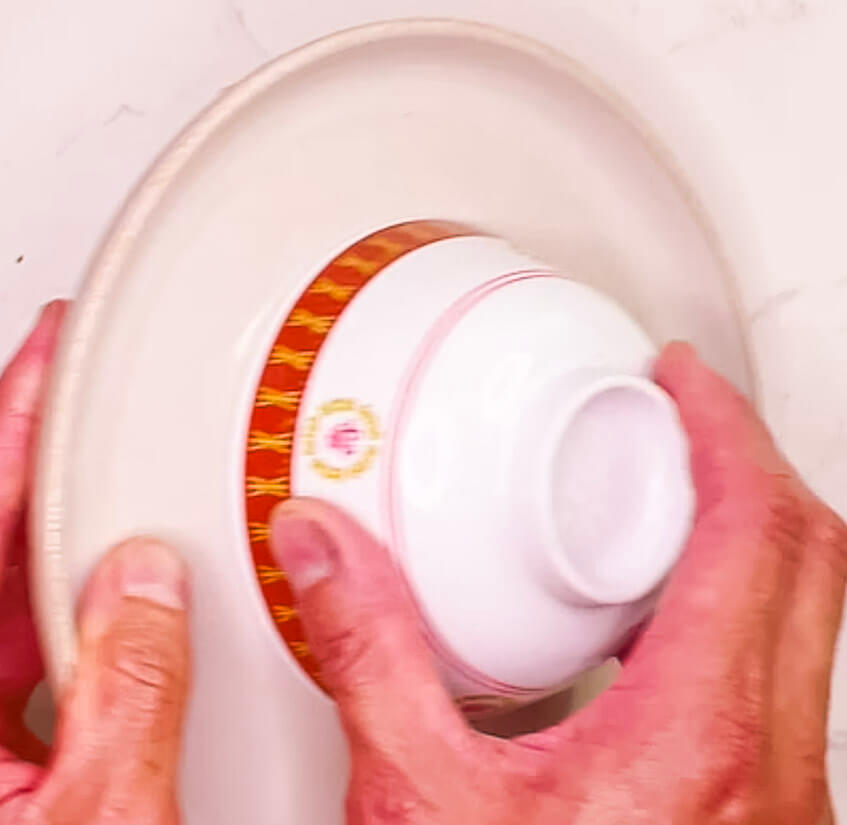
Flip the bowl to release the shaped fried rice onto the plate 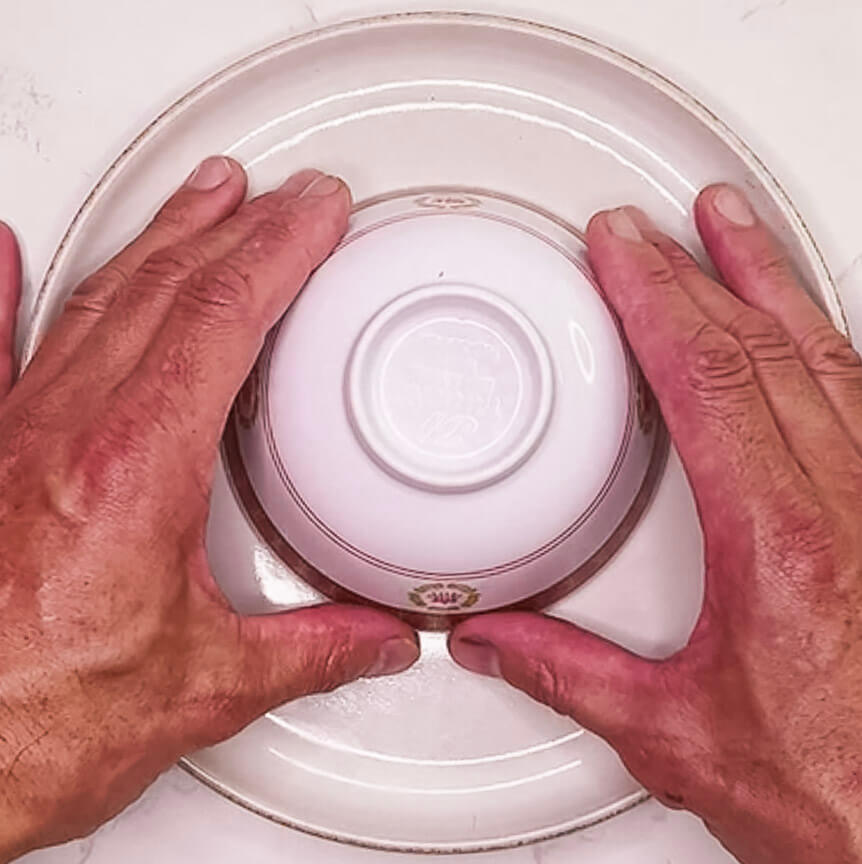
Gently lift the bowl to release the shaped fried rice 
Moulded fried rice shaped and ready to serve
Pro Tip:
Don’t press too hard — the rice should hold its shape while staying fluffy.
A lightly oiled bowl helps release it cleanly.
What Rice to Use for Japanese Fried Rice
Short or medium grain rice works best.
If you need help cooking rice, check these guides:
Final Thoughts
Japanese fried rice is already a simple, everyday dish — the key is getting the texture right.
By mixing egg into the rice before cooking, the grains naturally separate as they cook while staying soft and slightly moist. It removes a lot of the guesswork and makes it easier to get a clean, consistent result.
Once you understand this base, you can build it however you like — garlic, takana, chicken, prawns, or vegetables like zucchini and corn.
Get the base right, and you can make it anytime with whatever you have.

Japanese Fried Rice (Easy 4 Variations)
Equipment
- 1 Frying pan
- 1 wooden spoon
- 2 mixing bowls
Ingredients
Plain Japanese Fried Rice
- 150 g cooked rice
- 30 g egg for mixing
- 20 g egg for cooking
- 15 g neutral oil
- 8 g shallot finely chopped
- 3 g soy sauce
- 2 g Japanese salt and pepper shio kosho
Garlic Butter Fried Rice
- 150 g cooked rice
- 30 g egg for mixing
- 20 g egg for cooking
- 5 g neutral oil
- 15 g butter
- 5 g sliced garlic
- 3 g soy sauce
- 2 g Japanese salt and pepper shio kosho
- Kizami nori optional
Takana Fried Rice
- 150 g cooked rice
- 30 g egg for mixing
- 20 g egg for cooking
- 15 g neutral oil
- 30 g takana well squeezed
- 3 g soy sauce
- 1 g Japanese salt and pepper adjust depending on saltiness
Chicken Fried Rice
- 150 g cooked rice
- 30 g egg for mixing
- 20 g egg for cooking
- 10 g + 5 g neutral oil split use
- 80 g chicken thigh small dice
- 8 g shallot finely chopped
- 2 g soy sauce for chicken
- 3 g soy sauce for rice
- 2 g Japanese salt and pepper + pinch extra for chicken
Instructions
Plain Japanese Fried Rice
- In a bowl, mix rice with 30 g egg and shio kosho until evenly coated.
- Heat oil in a pan over medium-high heat.
- Add 20 g egg and scramble lightly (about 70% cooked).
- Add rice and break it apart while frying.
- Cook until grains separate and lightly dry.
- Add shallot and sauté briefly (no browning).
- Add soy sauce and toss quickly.
- Taste and adjust seasoning if needed.
- Serve immediately.
Garlic Butter Japanese Fried Rice
- In a bowl, mix rice with 30 g egg and shio kosho until evenly coated.
- Heat oil and butter in a pan over medium heat.
- Add sliced garlic and cook until lightly golden (not burnt).
- Add 20 g egg and scramble lightly.
- Add rice and fry, breaking it apart.
- Cook until grains separate and lightly golden.
- Add soy sauce and toss quickly.
- Taste and adjust seasoning if needed.
- Serve and garnish with kizami nori. (optional)
Takana Japanese Fried Rice
- In a bowl, mix rice with 30 g egg and a light amount of shio kosho (optional).
- Heat oil in a pan over medium-high heat.
- Add takana and sauté briefly to release aroma.
- Add 20 g egg and scramble lightly.
- Add rice and fry, breaking it apart.
- Cook until grains separate.
- Add soy sauce and toss lightly.
- Taste and adjust seasoning if needed.
- Shape into a mould for plating if desired
Chicken Japanese Fried Rice
- In a bowl, mix rice with 30 g egg and shio kosho until evenly coated.
- Heat oil in a pan over medium-high heat.
- Add chicken and season lightly with salt and pepper.
- Cook until about 80% done.
- Add soy sauce and cook until lightly caramelized.
- Remove chicken from pan.
- Add remaining oil and 20 g egg, scramble lightly.
- Add rice and fry until grains separate.
- Return chicken and combine.
- Add shallot and sauté briefly.
- Add soy sauce and toss.
- Taste and adjust if needed.
- Serve immediately.
Notes
Pro Tips
- Key Technique: Mixing egg into the rice before frying helps separate grains and creates a lighter, fluffier texture.
- 1 egg = about 50–60 g (without shell)
Use 1 whole egg per recipe. Split into ~30 g for mixing and ~20 g for cooking. - Warm rice works better than cold rice
Slightly warm rice helps the egg coat evenly and cook more consistently. - Using cold rice? Reheat first
If using fridge rice, microwave briefly until just warm before mixing with egg. - Fresh or day-old rice both work
Texture depends more on technique than age — the egg coating helps separate grains either way. - Don’t overuse soy sauce
Japanese fried rice is lighter in flavor compared to Chinese-style. Add just enough to season, not soak. - Cook over medium-high heat
Enough heat to dry and separate the rice, but not so high that the egg burns.
👉 Thanks for visiting! If you try this recipe, I’d love to hear how it turned out.
Leave a comment or tag me on Instagram @seasonedwithflavor — it makes my day!