Juicy Teriyaki Chicken Recipe – Breast or Thigh in 30 Minutes
This juicy teriyaki chicken recipe is quick, glossy, and flexible enough for real-life weeknight cooking. You can make it with chicken breast or thigh, using the same sweet-savory teriyaki glaze.
Most teriyaki chicken recipes focus only on skin-on thigh, which is delicious but not always what people have at home. This version shows you how to keep breast tender, thigh juicy, and the sauce thick and shiny without overcomplicating the method.
As a chef and dad, I wanted a teriyaki chicken recipe that works for busy family dinners, rice bowls, bento-style lunches, and simple meal prep. Once you understand the pan-sear-and-glaze method, you can use it again and again.

Here's everything you need to make juicy teriyaki chicken — simple and pantry-friendly!
Why You’ll Love This Juicy Teriyaki Chicken Recipe
✅ Juicy Results – Whether you use breast or thigh, the meat stays tender and flavorful.
✅ Foolproof Sauce – Balanced, glossy, and better than bottled.
✅ Quick & Weeknight-Friendly – Done in under 30 minutes.
✅ Flexible – Great for bento, salads, or meal prep.
✅ Pro Cooking Tips – Chef-tested tricks for home cooks.
Ingredients You'll Need

Here's everything you need to make juicy teriyaki chicken — simple and pantry-friendly!"
🍗 Chicken Options

Chicken Thigh — Juicy, rich, and more forgiving. Use boneless thigh with or without skin.
Chicken Breast — Leaner and faster-cooking. Slice it evenly so it stays tender.
Optional: Skin-on chicken gives extra flavour and a crispier finish, but skinless chicken works well too.
Teriyaki Sauce Ingredients
This homemade sauce is quick, balanced, and much better than store-bought. It uses the classic Japanese-style base of soy sauce, mirin, sake, and sugar.
No sake option: Replace sake with water or apple juice.
No mirin option: Use the pantry teriyaki sauce from my Ultimate Teriyaki Sauce Guide.
For exact ingredient amounts, see the recipe card below.
How to Make Teriyaki Chicken (Step-by-Step)
Step 1 – Make the Sauce

In a small bowl or jug, whisk together all the teriyaki sauce ingredients until the sugar dissolves. Set aside.
Tip: Make extra sauce if you like drizzling it over rice or vegetables.
Step 2 – Prep & Sear Your Chicken

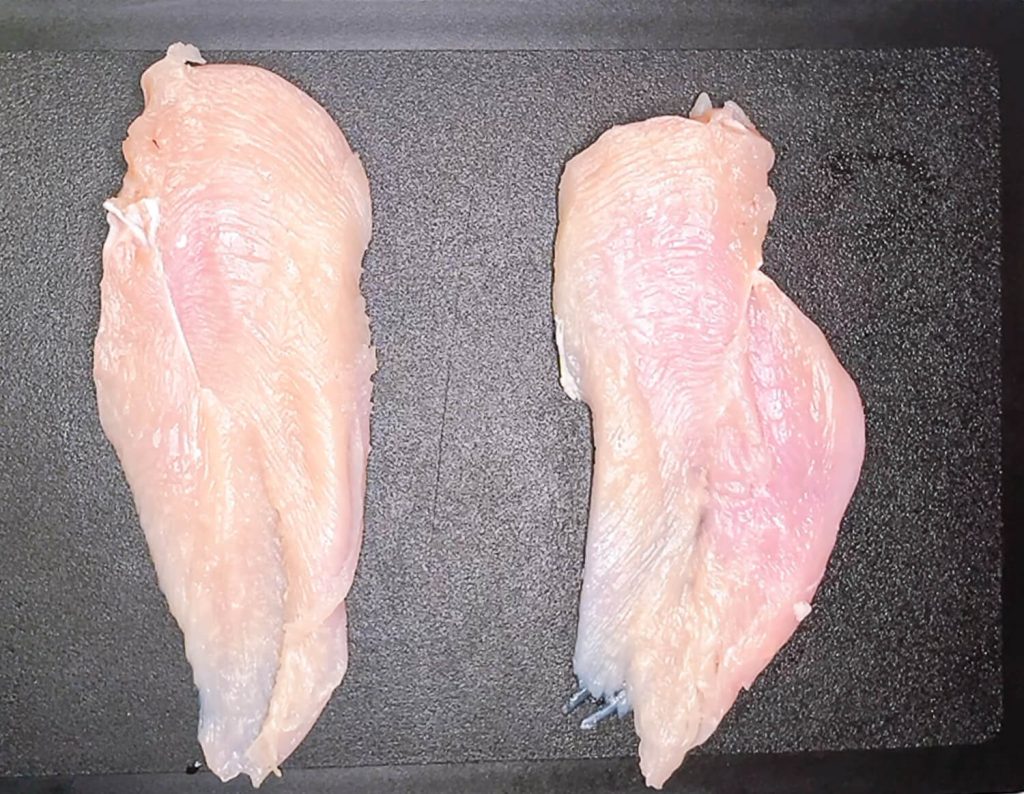

For Chicken Breast
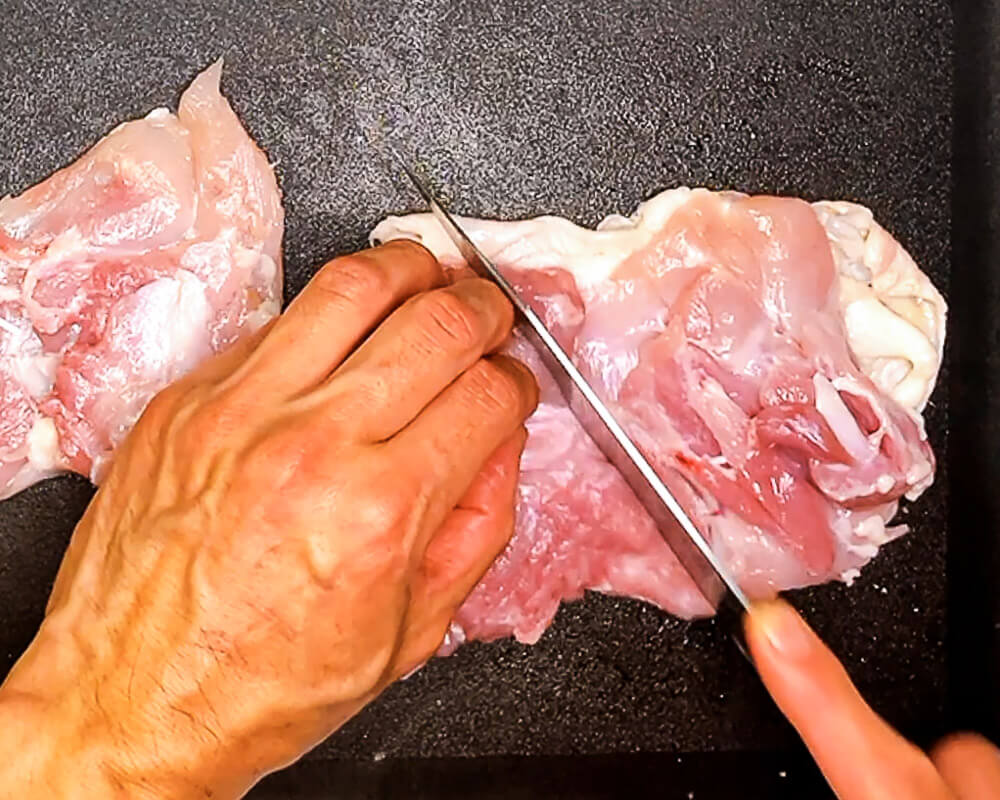
- Slice thick chicken breast horizontally to make even cutlets.
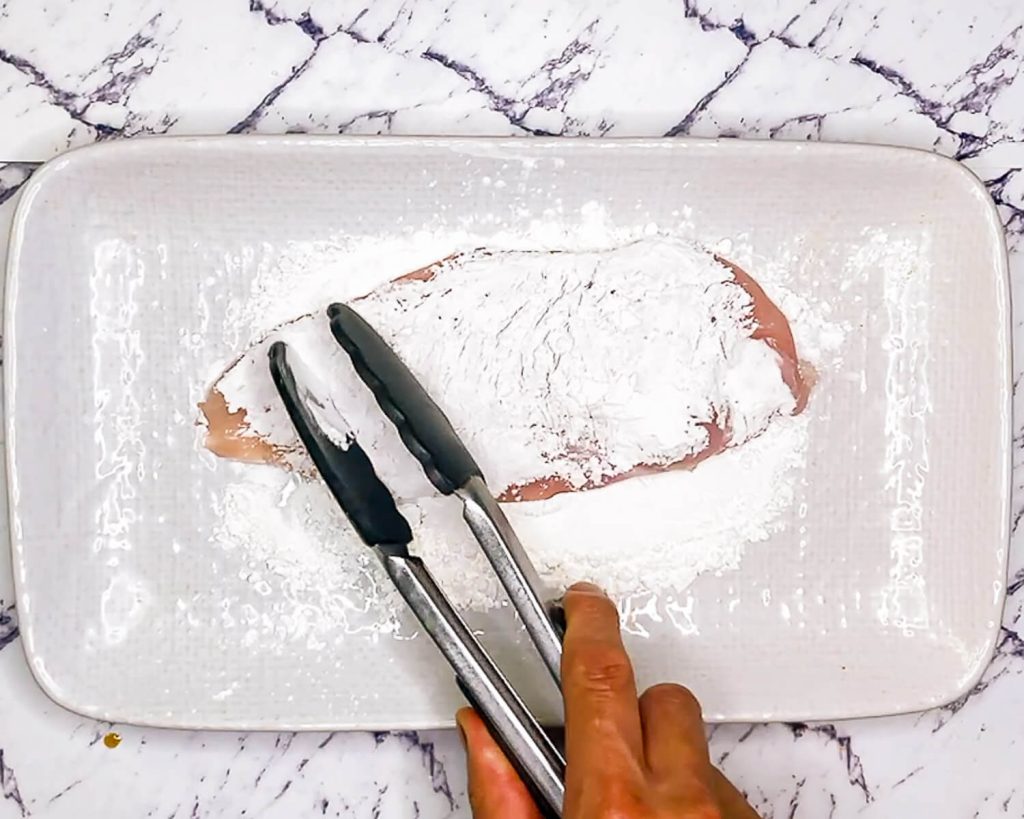
- Dust lightly with cornflour/cornstarch.
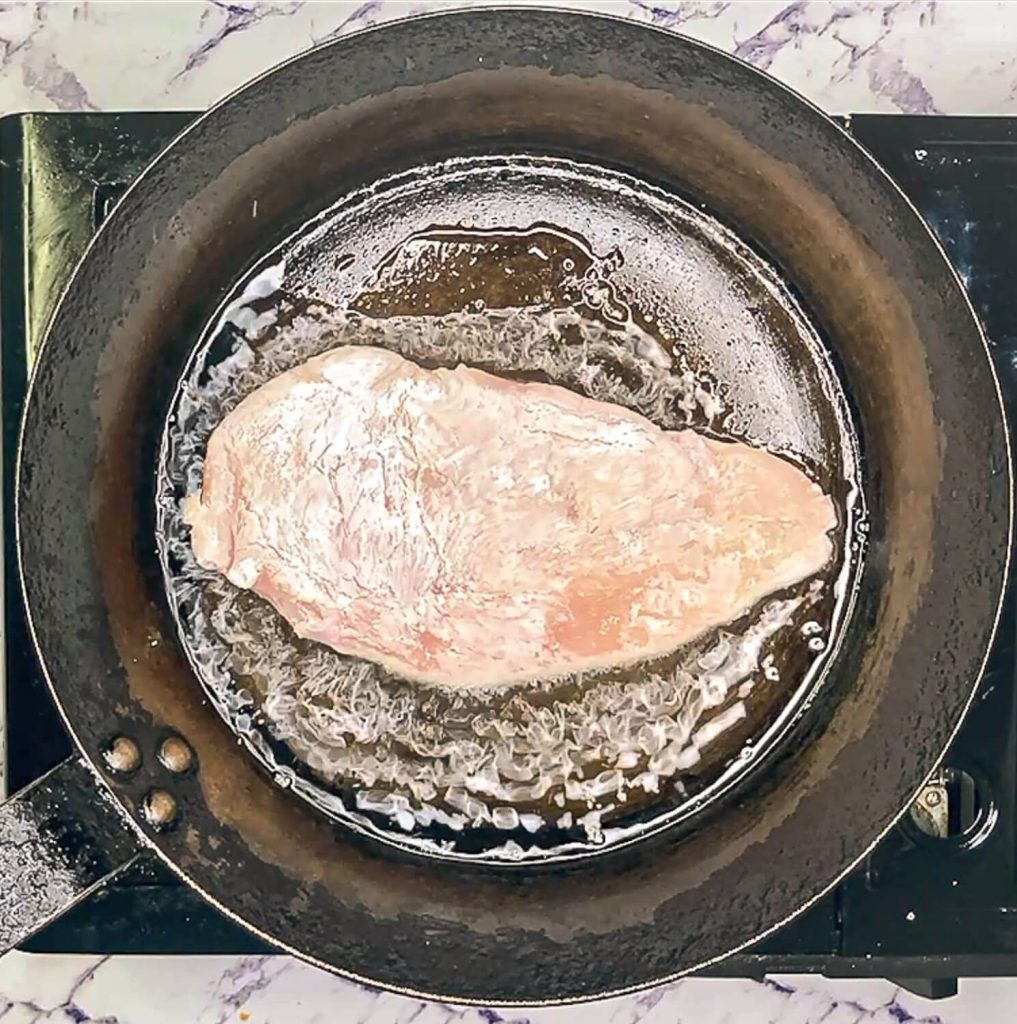
- Heat 1 tablespoon oil in a non-stick or cast-iron pan over medium-high heat.
- Sear for 1–2 minutes per side, until lightly golden.
If using skin-on breast:
- Place skin-side down first.
- Cook for 3–4 minutes until the skin crisps up beautifully.
- Flip and briefly sear the flesh side.
For Chicken Thigh
- Score the thickest part of the thigh lightly so it cooks evenly.
- If using skin-on thigh, dust only the non-skin side with cornflour/cornstarch. Keep the skin side dry so it can crisp properly.
- If using skinless thigh, dust both sides lightly with cornflour/cornstarch.
- Heat 1 tablespoon oil in the pan over medium-high heat.
- Sear skin-side down first if using skin-on thigh.
- Flip and cook the other side for 3–4 minutes, until golden.

Crispy chicken thigh seared skin-side down
Bonus Tips: You can lightly press down on the chicken with a spatula during the first sear to ensure even browning, especially if using skin-on cuts.
Step 3 – Glaze with the Sauce
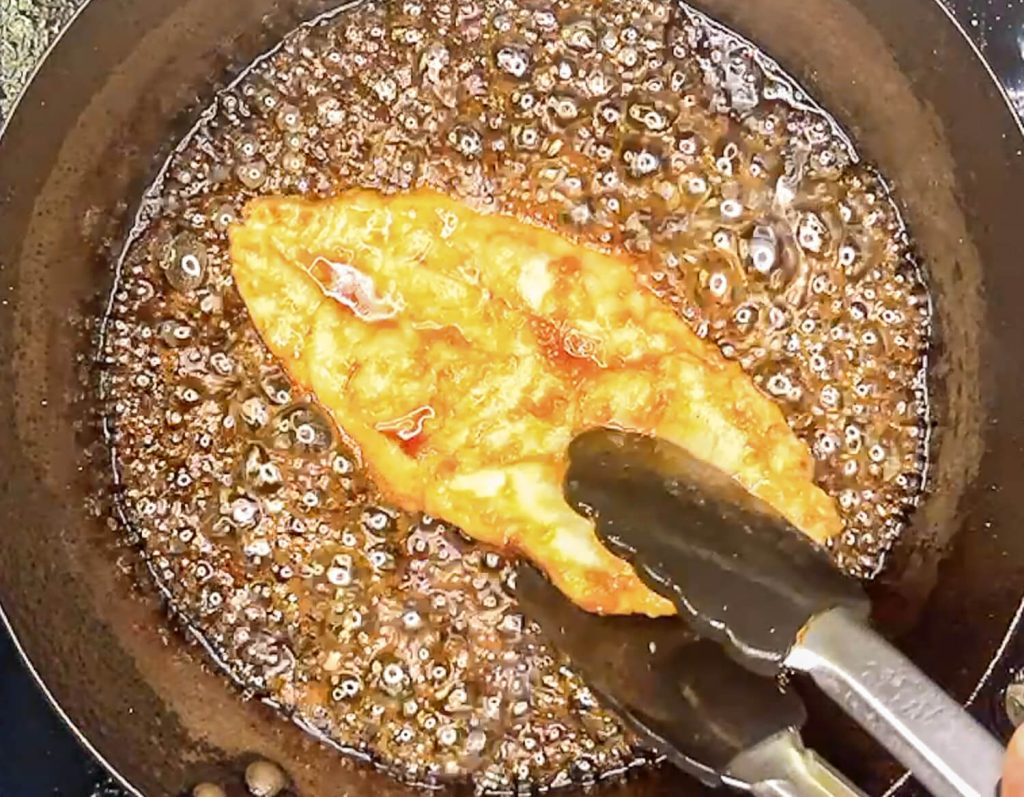
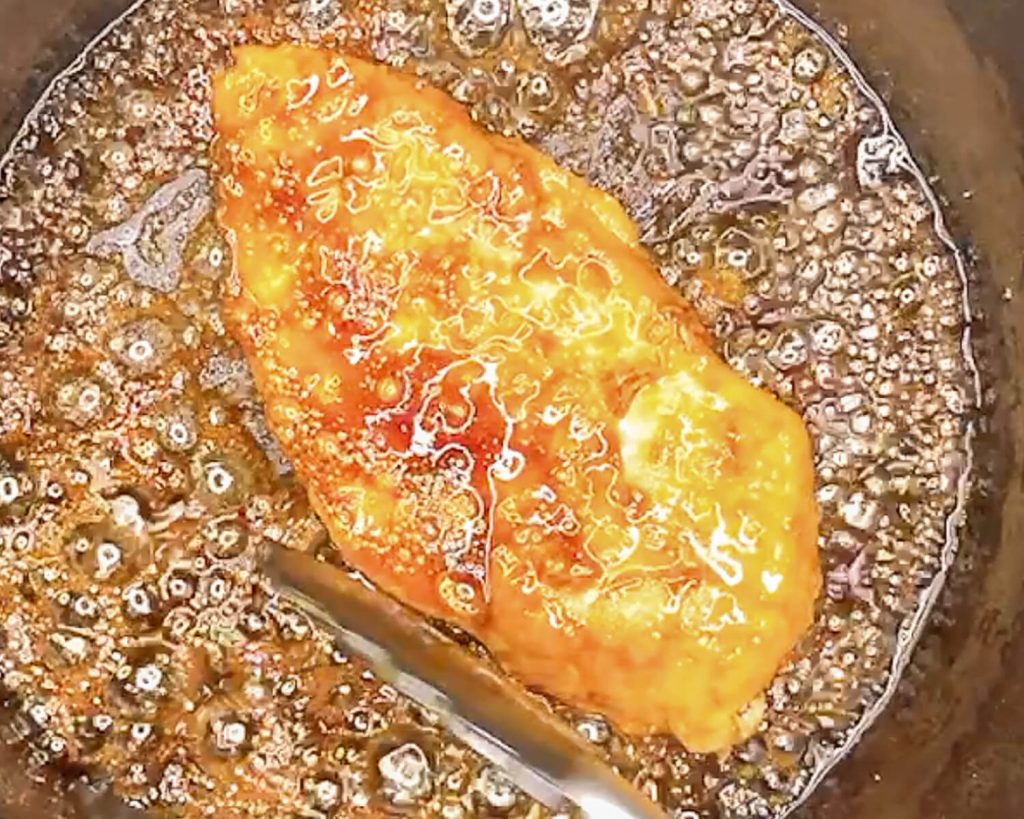
- Once the chicken is golden and almost cooked through, reduce the heat to medium-low.
- Stir the teriyaki sauce, then pour it around the chicken, not directly on top.
- Let it bubble and thicken gently, swirling the pan occasionally.
- Flip the chicken once or twice and spoon the sauce over the top until the chicken is cooked through and glossy.
- Turn off the heat when the sauce is syrupy and coats the chicken.
Pro Tips:
If you want a stronger glaze (especially for bento boxes), let the sauce reduce a little more after turning off the heat — it will thicken naturally as it cools!
If the sauce thickens too fast before the chicken is cooked, add a splash of water to loosen it.
🍴 Step 4 – Slice and Serve the Teriyaki Chicken
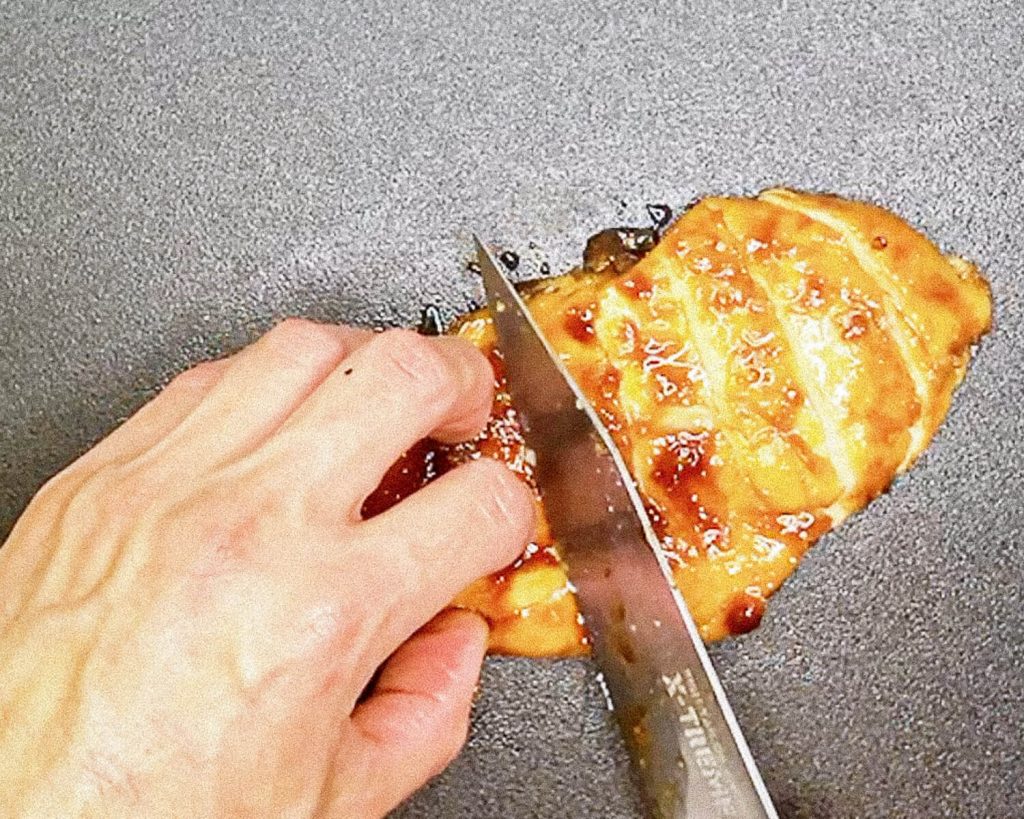
Top left: slicing the glazed chicken | Top right: chicken breast, skin off | Bottom left: chicken thigh, skin on | Bottom right: chicken thigh, skin off
- Transfer the chicken to a cutting board and let it rest for 2–3 minutes.
- Slice into bite-sized strips across the grain (especially important for chicken breast to keep it tender).
- Plate the chicken, then spoon the extra teriyaki sauce from the pan over the top.
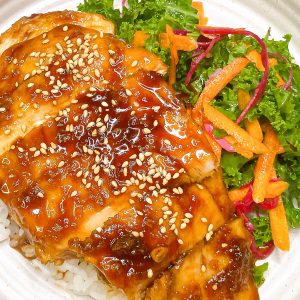
- Sprinkle with sesame seeds or chopped scallions for a fresh finish (optional but highly recommended).
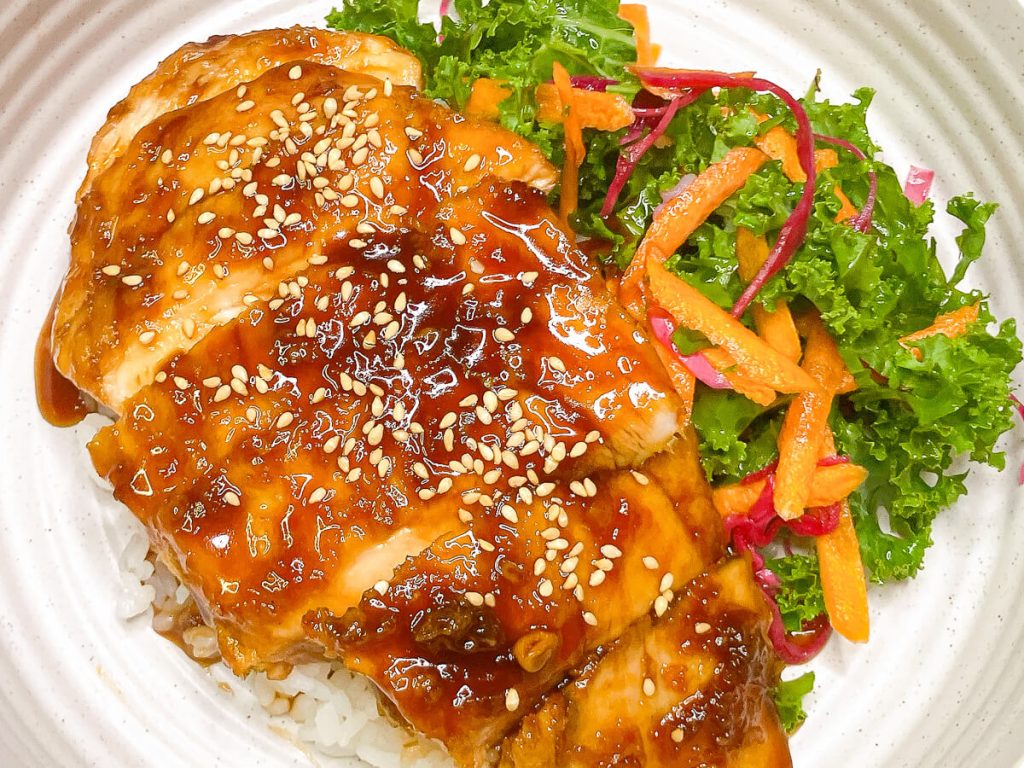
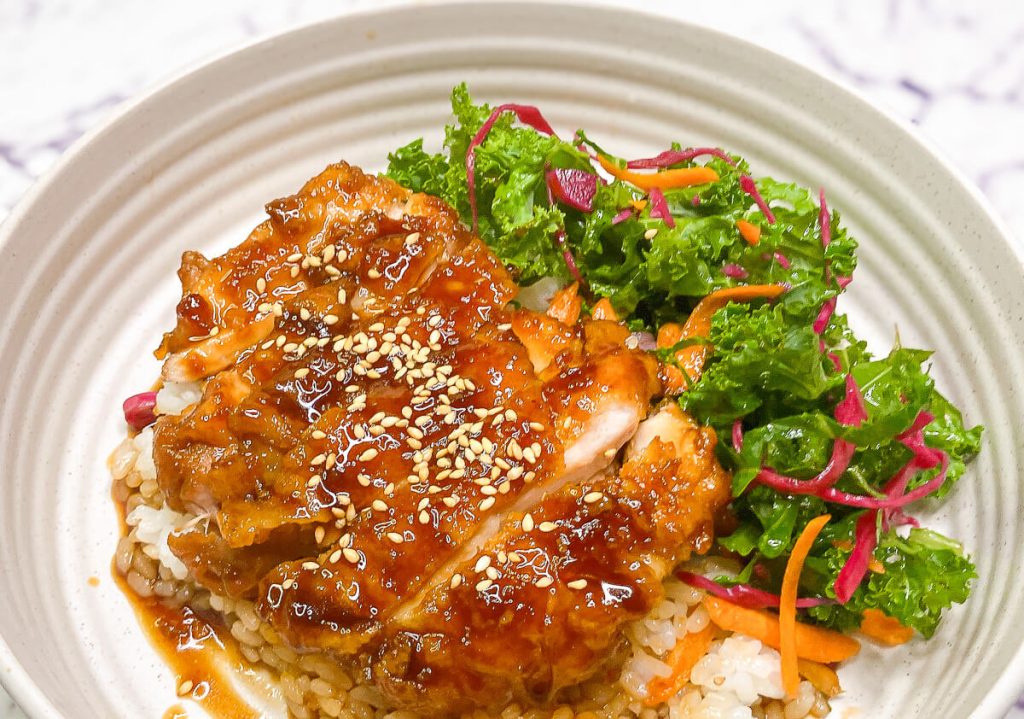
Serving Suggestions for Teriyaki Chicken

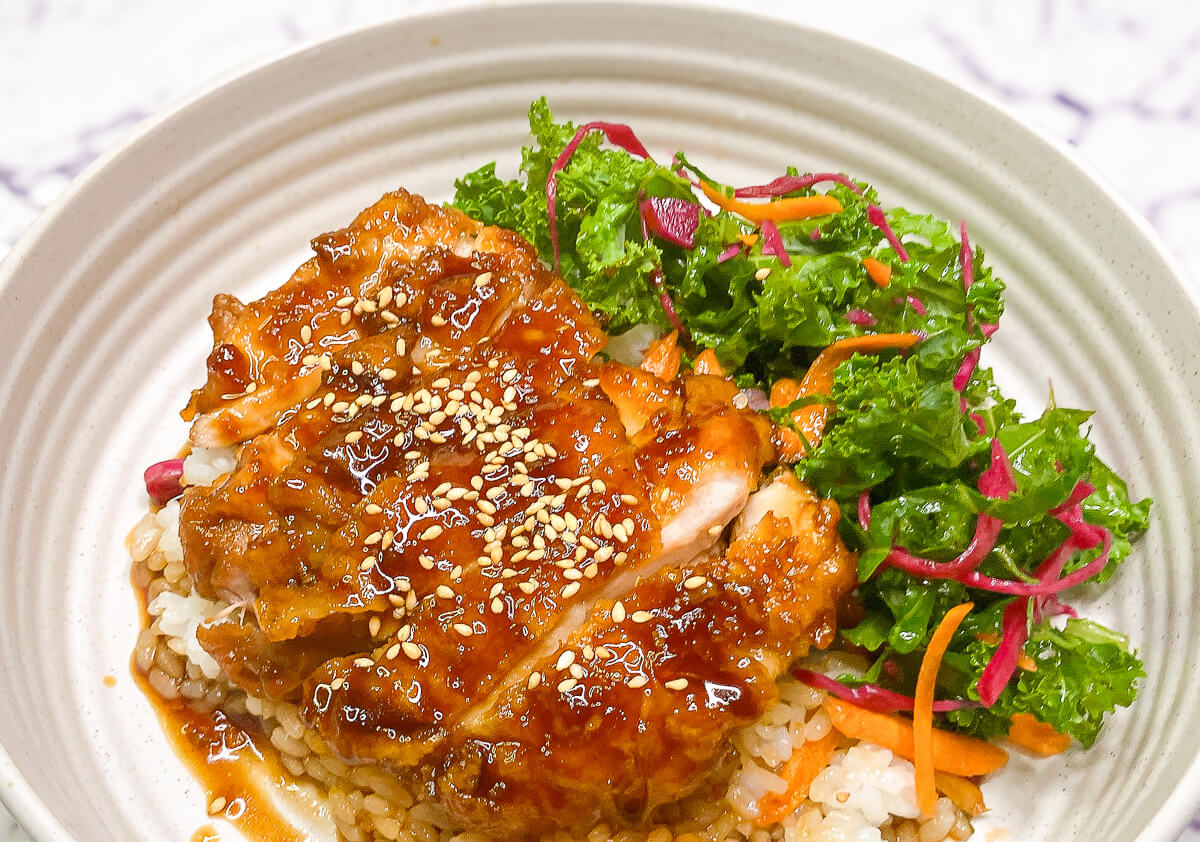
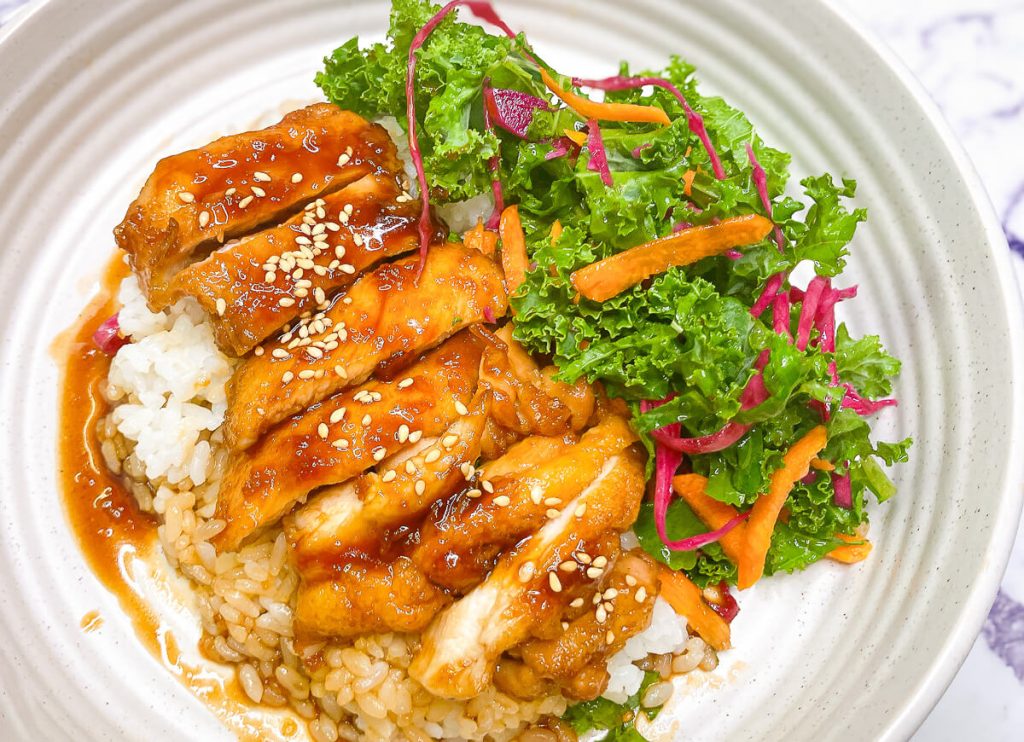
Skin-on teriyaki chicken breast served with rice and salad
Best Ways to Serve Teriyaki Chicken
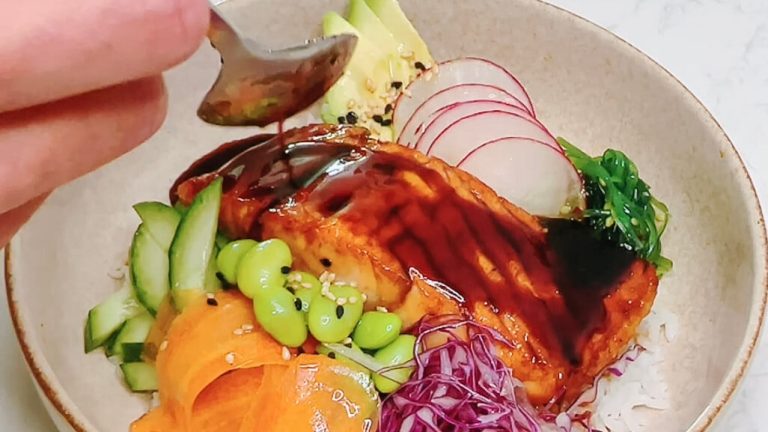
- Teriyaki chicken rice bowl: Serve over steamed rice with avocado, pickled radish, edamame, or salad.
- Fried rice with teriyaki chicken: A great way to use leftovers.
- Bento box: Pack sliced chicken with rice, tamagoyaki, broccoli, or pickles.
- Teriyaki chicken salad: Serve over kale, cabbage, or a grain bowl with sesame dressing.
- Teriyaki chicken sushi roll: Use chilled sliced chicken with avocado and cucumber.
Easy Side Dishes
- Steamed rice
- Japanese-style potato salad
- Steamed broccoli, snow peas, or carrots
- Miso soup
- Simple cabbage or kale salad
💡 Bonus Ideas
Burger or slider: Slice the chicken thinly and serve it in small brioche buns with cabbage slaw.
Bento box: Pack it with rice, broccoli, tamagoyaki, pickles, or a simple cabbage salad.
Leftover fried rice: Chop leftover teriyaki chicken and toss it through fried rice for a quick next-day meal.
Variations & Substitutions
Chicken thigh vs breast:
Both work. Chicken thigh is juicier and more forgiving, while chicken breast is leaner and cooks faster. For breast, slice it evenly and avoid overcooking.
No sake:
Replace sake with water. The flavour will be slightly lighter, but it still works well.
No mirin:
Use the pantry teriyaki sauce from my Ultimate Teriyaki Sauce Guide, or replace 100 ml mirin with 80 ml water + 20 g golden syrup.
Gluten-free:
Use tamari instead of regular soy sauce. Check your mirin label if needed.
Sweeter or less sweet:
Add a little extra sugar for a sweeter glaze, or reduce the sugar slightly for a more savoury finish.
Extra flavour:
Add a small splash of toasted sesame oil at the end for a nutty finish, or add a little grated ginger for a brighter flavour.
For keto, soy-free, gluten-free sauce testing, garlic and ginger add-ins, and glaze reduction tips, see my Ultimate Teriyaki Sauce Guide.
Storage Tips
Refrigerator:
Store leftover teriyaki chicken in an airtight container in the fridge for up to 3 days.
Reheating:
Reheat gently in a non-stick pan over medium-low heat with a splash of water if the sauce has thickened too much. You can also microwave it in short 30-second bursts, but the texture is best when reheated on the stove.
Freezing:
Freeze cooked teriyaki chicken for up to 1 month. Cool completely, wrap tightly or use a freezer-safe container, and label with the date. Thaw overnight in the fridge before reheating.
FAQ (Frequently Asked Questions)
Can I use frozen chicken?
Yes. Thaw it fully and pat it dry with paper towels before cooking. If the chicken is too wet, it won’t sear properly and the sauce may not cling as well.
Can I make this with tofu?
Yes. Use firm tofu, press it gently to remove excess moisture, then slice and pan-fry until golden. Glaze it with the teriyaki sauce the same way as the chicken.
Is this recipe kid-friendly?
Yes. The sweet-savory glaze is usually very family-friendly. For a lighter version, reduce the sugar slightly or replace the sake with water or apple juice.
Can I make it gluten-free?
Yes. Use tamari instead of regular soy sauce. Also check your mirin label, as some cheaper brands may contain wheat.
Final Thoughts
Whether you use chicken breast or thigh, this teriyaki chicken is all about the same thing: juicy chicken, a glossy sauce, and a simple method you can repeat on busy weeknights.
Serve it with rice, pack it into a bento, slice it for a salad, or turn leftovers into a quick rice bowl the next day.
If you try this recipe, I’d love to hear how it turned out. Leave a comment below or tag me on Instagram @seasonedwithflavor — I’d love to see your version.
Happy cooking,
— Kenji
Juicy Teriyaki Chicken – Breast or Thigh
Equipment
- 1 Nonstick or cast-iron frying pan
- 1 chopping board
- 1 Sharp knife
- 1 Small mixing bowl
- 1 Whisk
- 1 Tongs
- 1 Digital scale
Ingredients
For chicken
- 600 g chicken thigh or breast (your choice)
- 2 tbsp olive oil
- 60 g cornstarch
Teriyaki Sauce
- 100 g soy sauce
- 100 g mirin
- 100 g sake
- 70 g caster sugar / superfine sugar
Instructions
1. Make the Teriyaki Sauce (Makes ~370g total):
- In a small bowl, whisk together soy sauce, mirin, sake, and sugar until dissolved. Set aside.
2. Prepare the Chicken:
- Slice thick chicken breast horizontally to make even cutlets.For thighs, lightly score the flesh side.
- Coat with cornstarch.
3. Sear the Chicken:
- Heat 1 tbsp olive oil in a nonstick or cast-iron pan over medium-high heat.
- Place chicken in the pan and sear for 3–4 minutes until golden.
- Flip and cook the other side for 1–2 minutes.
4. Glaze with Sauce:
- Pour 240g of prepared teriyaki sauce into the pan.
- Simmer over medium-low heat, turning the chicken occasionally, until the sauce thickens and coats the chicken (about 3–5 minutes).
5. Slice and Serve:
- Rest the chicken for 2–3 minutes.
- Slice and serve over rice and drizzle extra sauce.Garnish with sesame seeds and spring onion if desired.
Notes
💡 Notes
- Gluten-Free: Use tamari instead of soy sauce.
- Soy-Free: Use the tested soy-free teriyaki sauce from my Ultimate Teriyaki Sauce Guide instead of swapping coconut aminos directly 1:1, as the saltiness and sweetness are very different.
- Leftover Sauce: Store unused sauce in the fridge for up to 2 weeks — great for stir-fries or rice bowls.
- Double Batch: Want to use all the sauce? Double the chicken quantity.
- Reheating: Gently reheat in a pan with a splash of water to keep it moist.
About the Author
Hi, I'm Kenji — a chef with over 25 years of experience in both Western and Asian cuisines, and a dad who loves creating easy, flavorful meals for busy families.
At Seasoned with Flavor, I share pro-tested recipes with real-world tips so anyone can cook delicious food at home — no complicated techniques required.
Want to master teriyaki? Check out my Ultimate Teriyaki Sauce Guide for variations, including gluten-free, keto-friendly, and budget options!