Bangers and Mash with Teriyaki Onion Gravy
This bangers and mash with teriyaki onion gravy is a cozy, flexible dish where comfort food meets a Japanese twist. With air fryer sausages, fluffy mashed potatoes, steeped peas, and a pantry-friendly sauce, this recipe brings weeknight ease with restaurant-worthy flavor — especially when there’s no time to make a time-consuming gravy. It’s fast, flavorful, and built for real-life dinners.
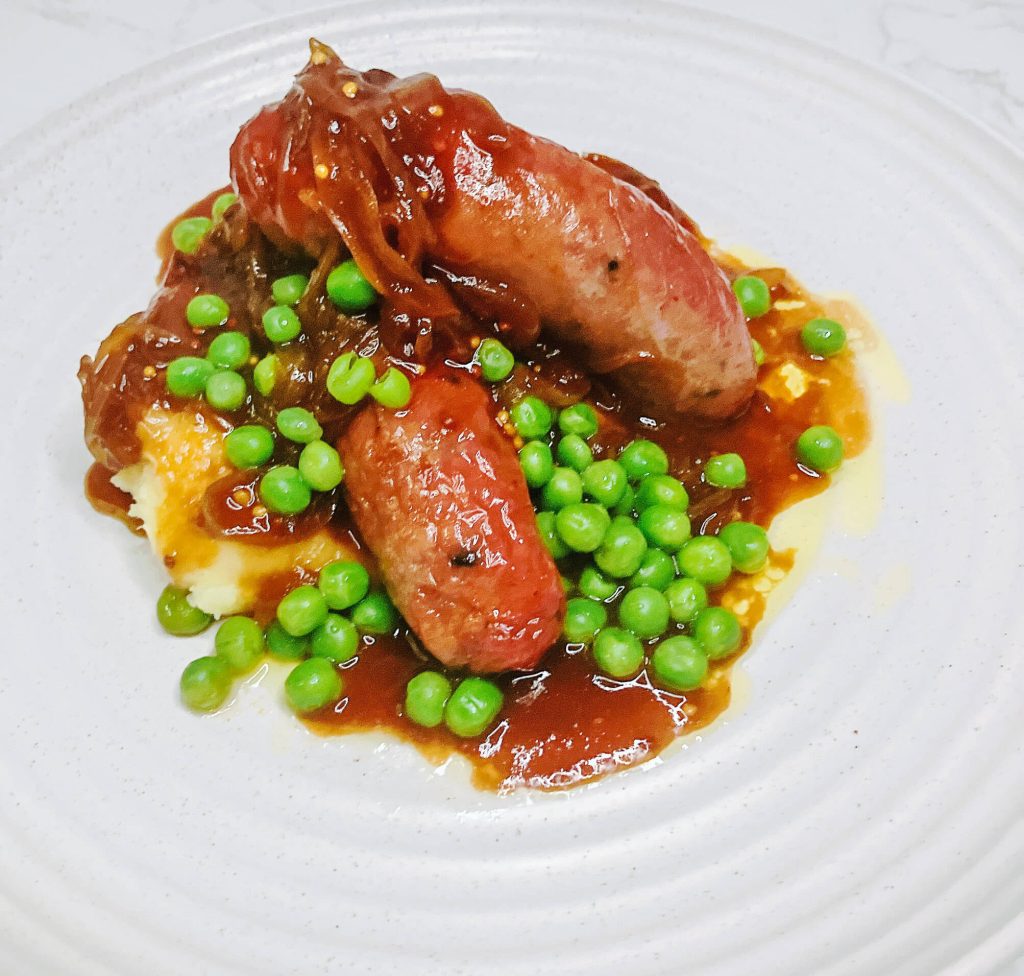 Cozy comfort meets Japanese flavor: sausages, buttery mash, and sticky-sweet teriyaki onion gravy — ready in 30 minutes
My Kitchen Story: Restaurant Roots, Home Twist
When I trained in a Western kitchen, the idea of making a rich, glossy sauce without stock felt impossible. In restaurants, I always had veal stock or chicken jus on hand — it was a given.
Later, working in a modern Japanese restaurant, the head chef — Japanese, but trained in France — taught me something that stuck: “A proper jus is good,” he said, “but a well-balanced Japanese sauce like teriyaki or miso based sauce can be just as deep, and much easier to make.”
That changed how I viewed sauces forever. Tasting restaurant-style sauces again and again, I started noticing how similar their richness was to teriyaki — sweet and salty, balanced and deep.
One day at home, I was out of sake and mirin but wanted to make teriyaki. I improvised with soy, sugar, golden syrup — and it worked. Another time, I stirred in butter and realized it reminded me of restaurant jus: smooth, glossy, rich.
Then one night, with only onions and meat in the fridge, I made this gravy. Teriyaki base, caramelized onions, glossy finish. It was perfect. I was so happy. Since then, this has been my go-to gravy when I want flavor without fuss. No stock? No worries.
Why You’ll Love This Bangers and mash with Teriyaki Onion Gravy Recipe
- Easy pantry gravy — no stock needed
- Quick air fryer method for sausages
- Diet-flexible — includes keto and vegetarian options, with a keto teriyaki onion gravy variation in the recipe card notes.
- Make-ahead friendly for batch cooking
- Budget-wise and family-approved
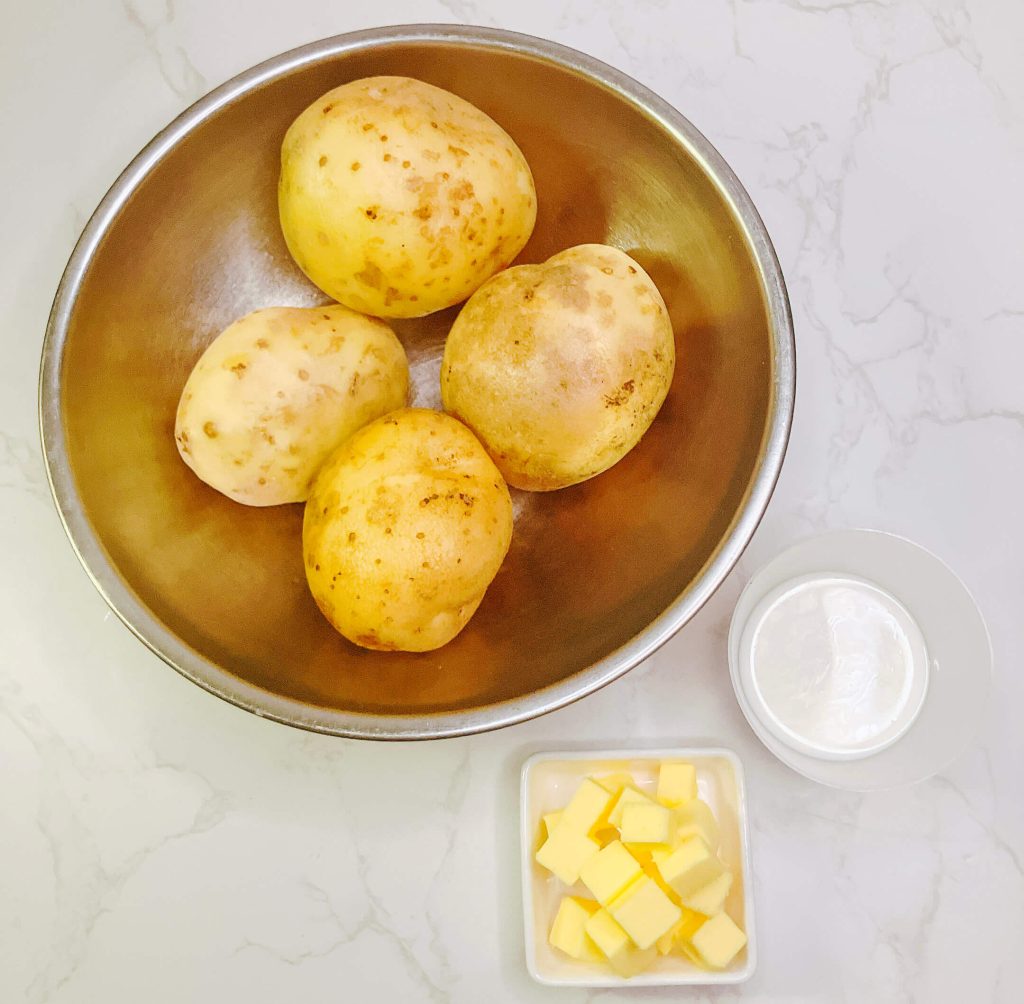
What you will need for Bangers and Mash with Teriyaki Onion Gravy
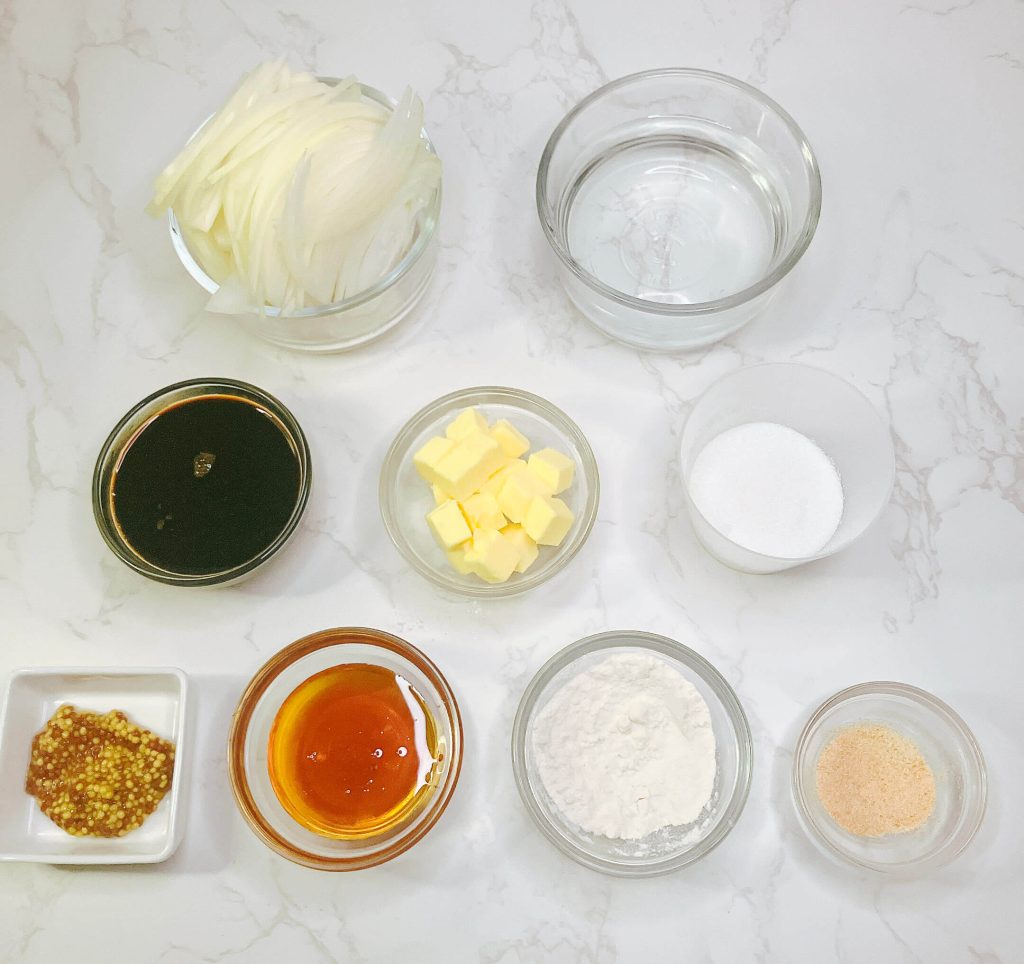
Ingredients for teriyaki onion gravy: sliced onions, salted butter, plain flour , soy sauce, water, golden syrup, caster sugar, garlic powder, and optional seeded mustard — a rich, pantry-friendly sauce with no mirin or sake required. 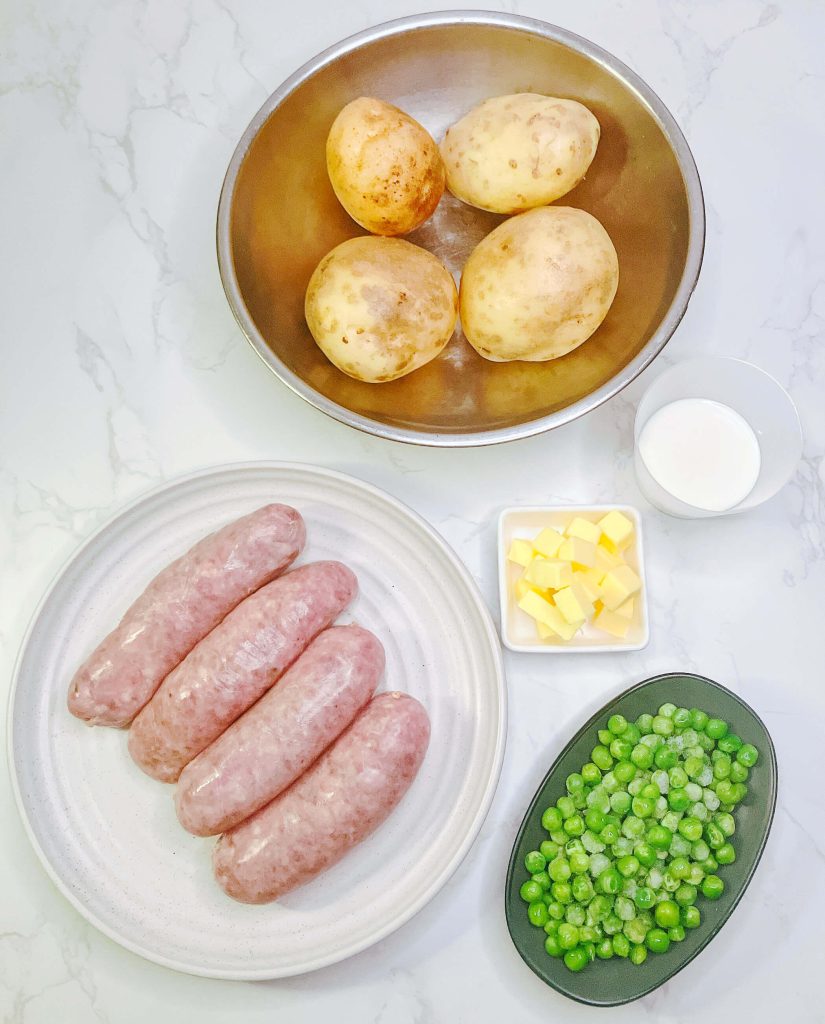
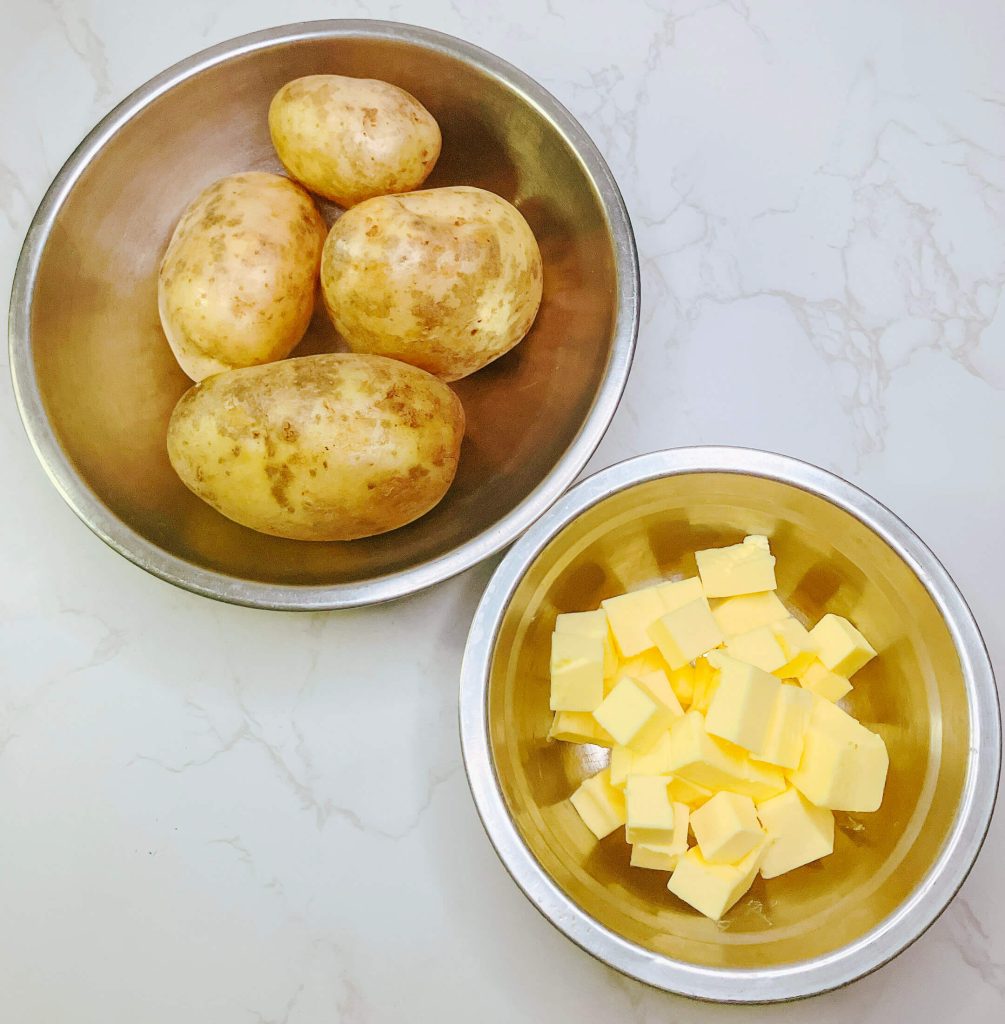
Everything you need for this cozy classic: sausages, potatoes, onions, butter, and peas — simple pantry staples for a weeknight favorite.
🧅 Teriyaki Onion Gravy Ingredients
- Sliced onion
- Salted butter
- Plain flour or cornflour
- Soy sauce
- Water
- Golden syrup
- Caster sugar
- Seeded mustard (optional)
- Garlic powder (optional)
🥔 Main Dish Ingredients
- Pork sausages (or your preferred type)
- Potatoes (unpeeled)
- Milk
- Butter
- Salt
- Frozen peas
Bangers and Mash With Teriyaki Onion Gravy Step By Step Summary
Mash Potato
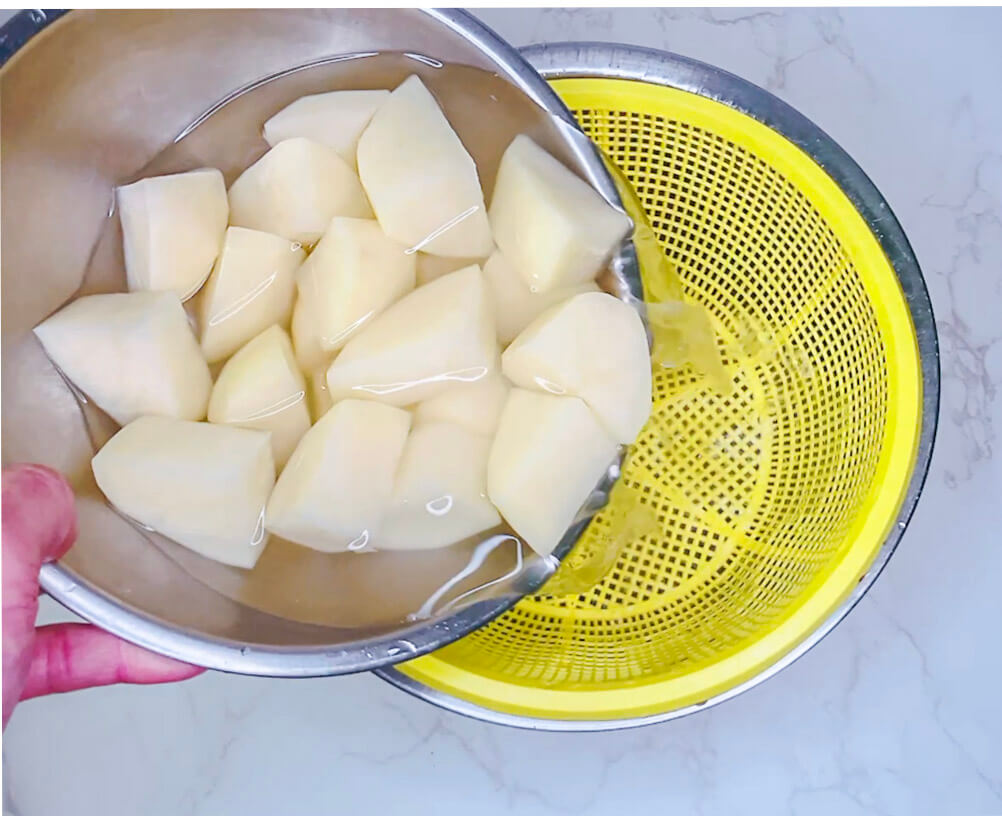
Step 1- Peeled and cut potatoes being rinsed in a yellow colander — the first step to fluffy, lump-free mashed potatoes. 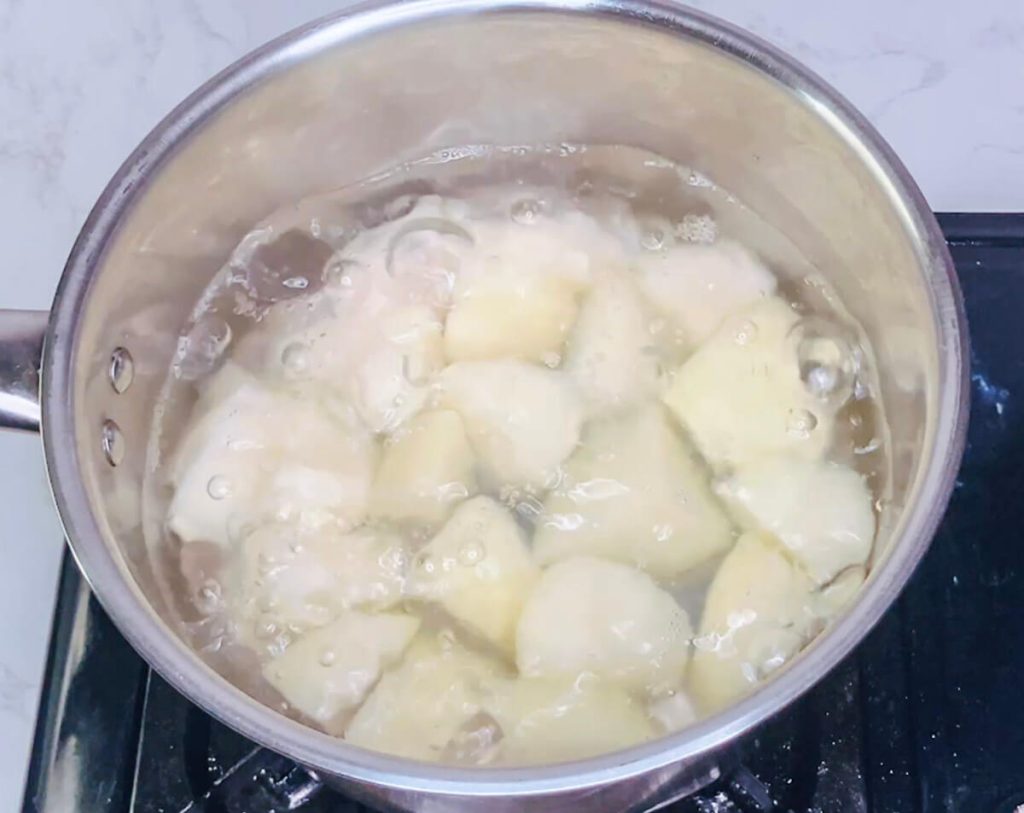
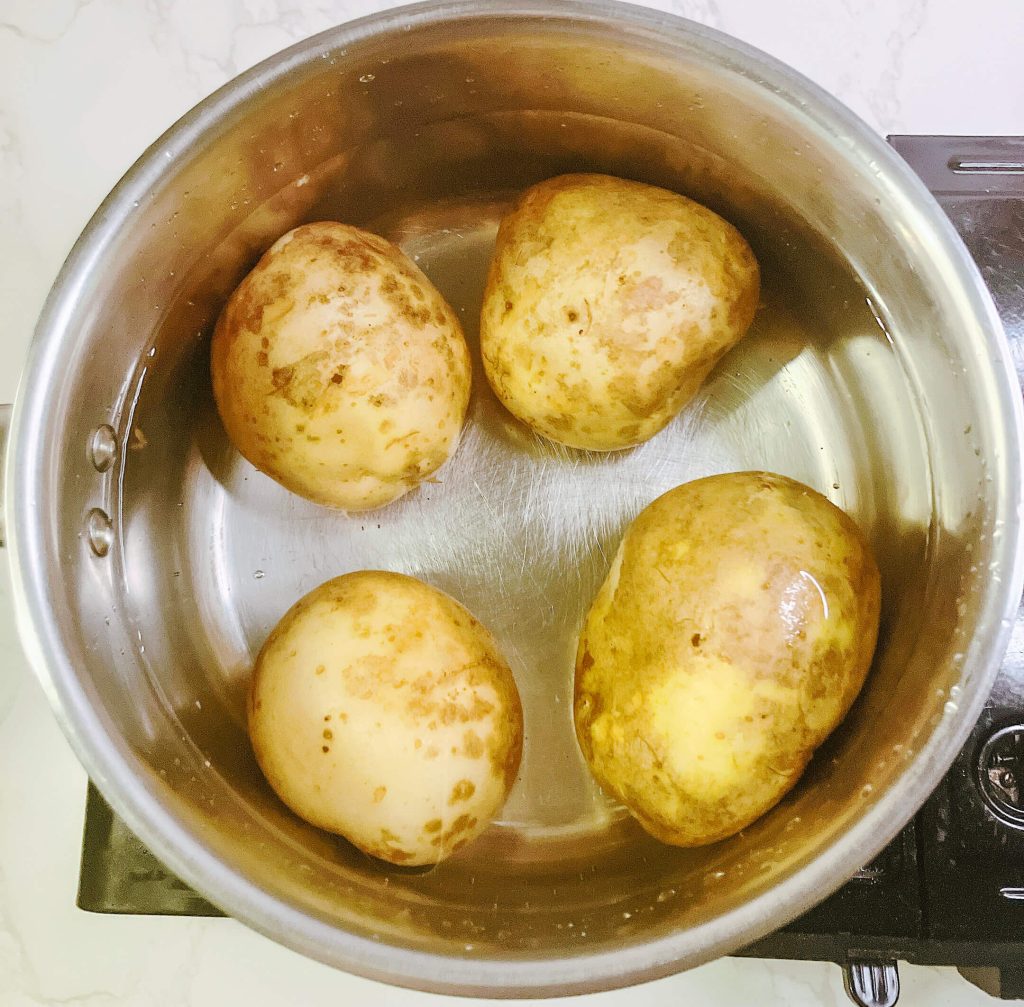
Step 2 – Boil the chopped potatoes until fork-tender — this step is key for smooth, fluffy mashed potatoes. 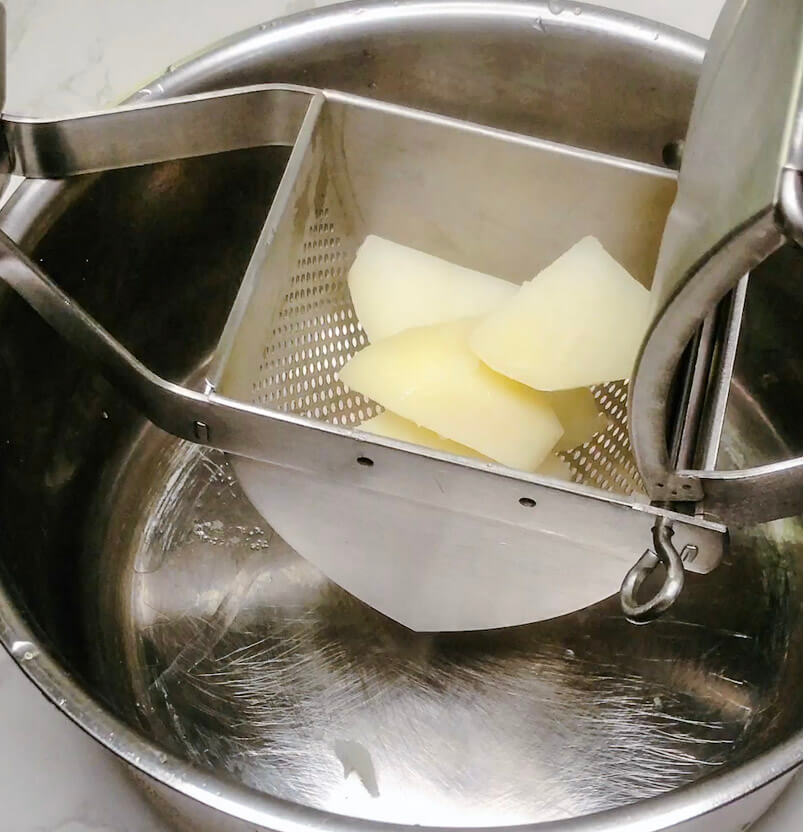
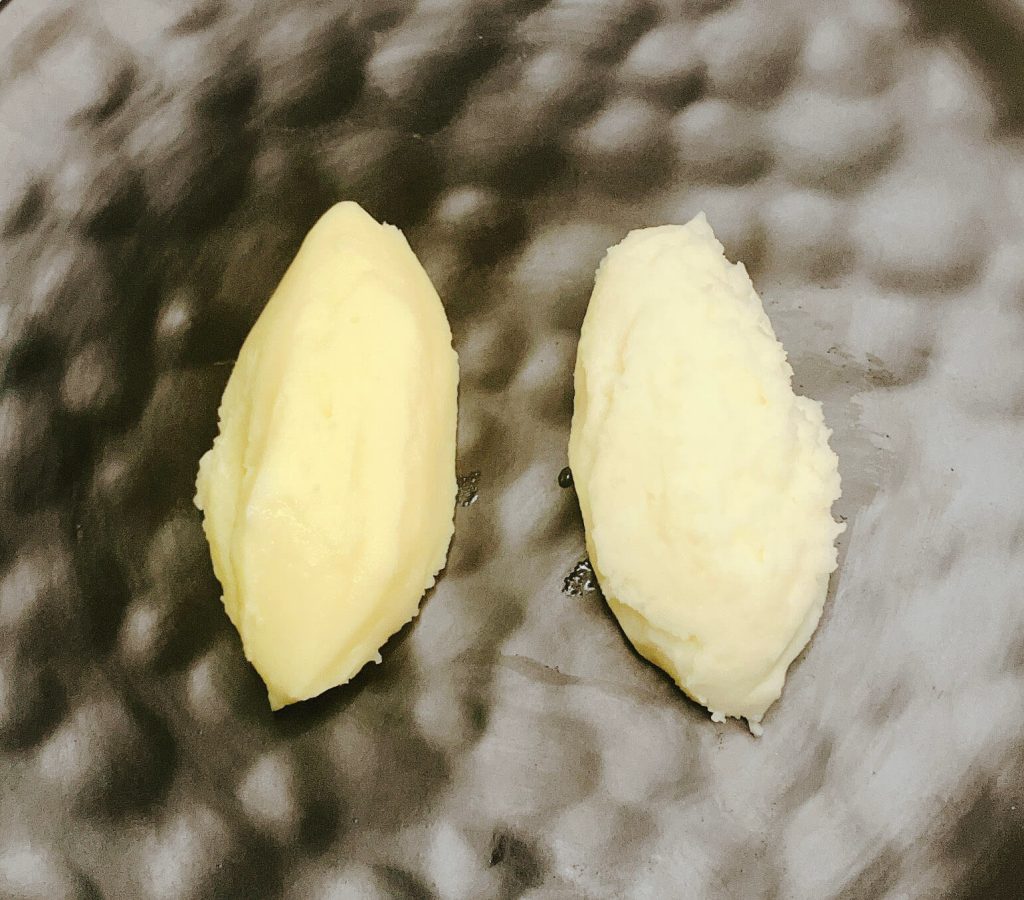
Step 3 – Use a potato ricer for the fluffiest mash — press while hot for smooth, lump-free results. 
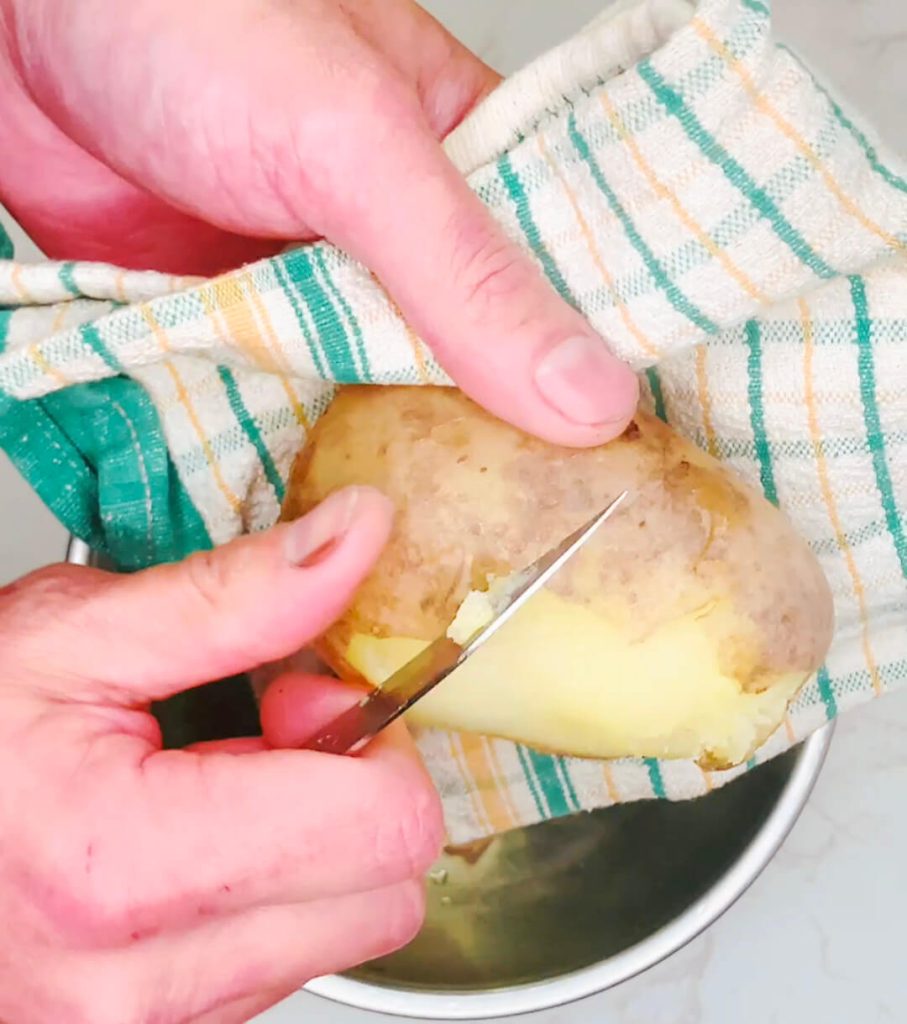
Step 4 – Use a knife to test if the potatoes are soft — they’re ready when you can pierce them with little resistance. 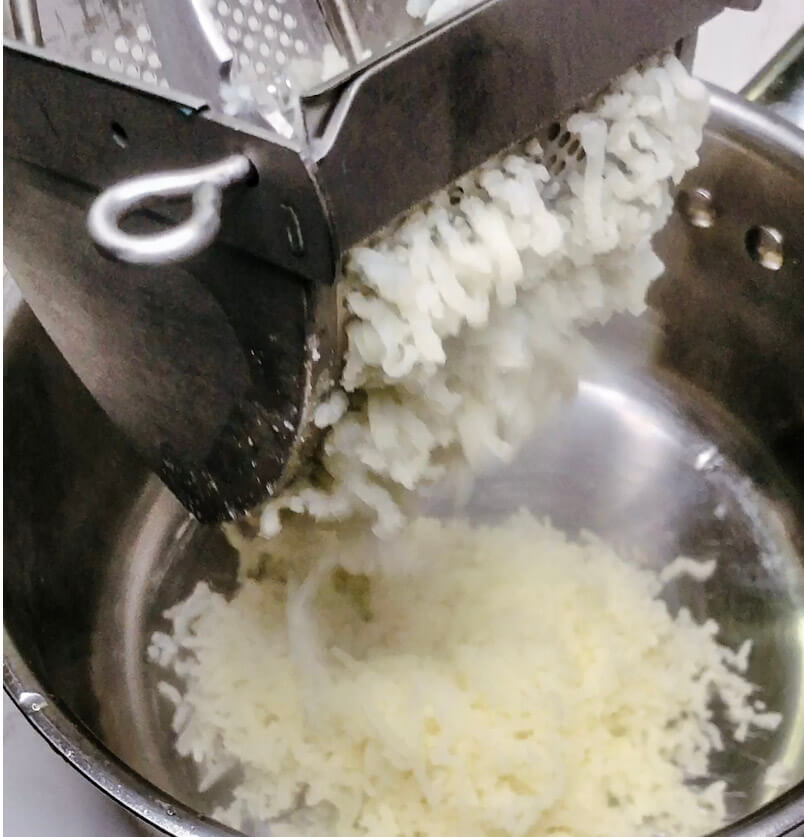
Step 5 – Riced potatoes ready to be mixed — combining with melted butter gives the mash a rich, smooth finish. 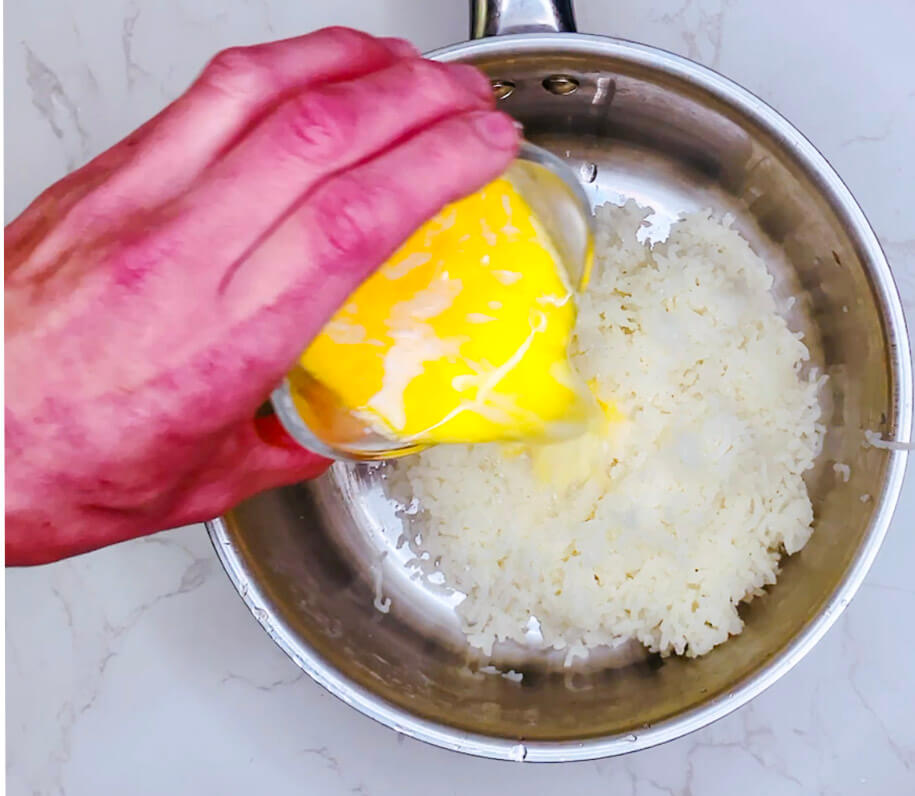
Step 6 – Add butter and warm milk to the riced potatoes for ultra-smooth, rich mashed potatoes — the perfect base for teriyaki onion gravy. 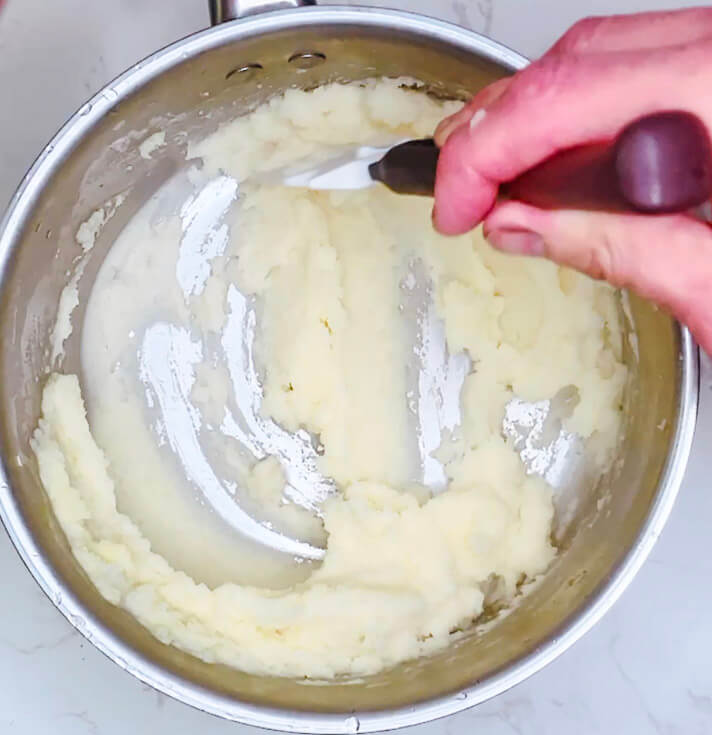
Step 7 – Mash until silky and smooth — this is the final step before plating your bangers and mash. 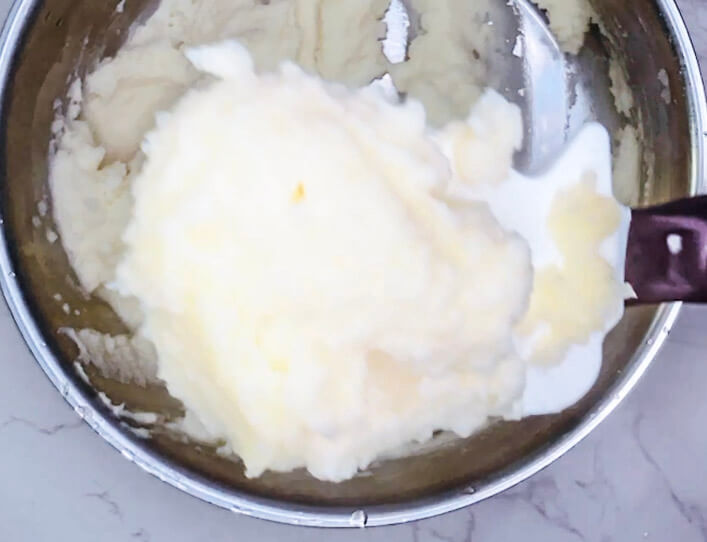
Step 8 – Creamy mashed potatoes, fully mixed and smooth — the perfect base for teriyaki onion gravy. 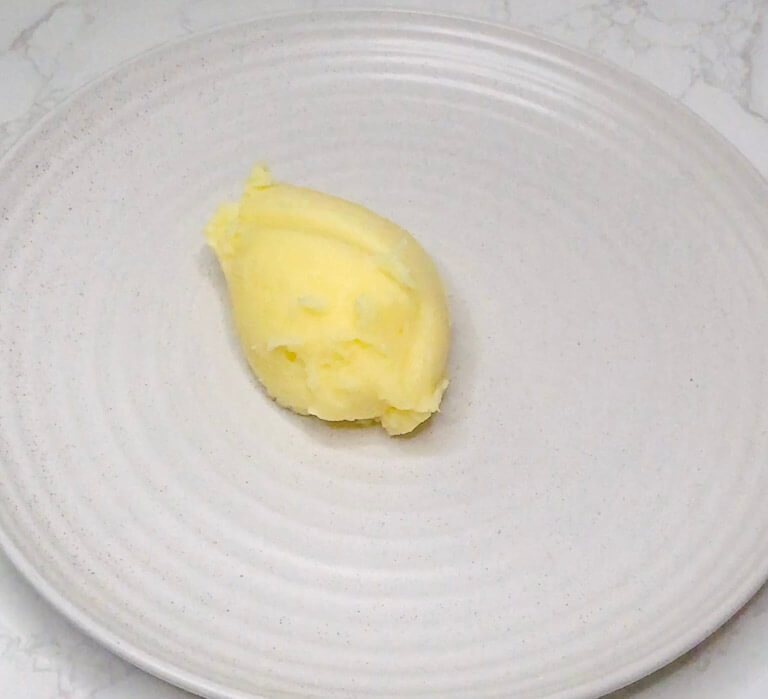
Step 9 – Fluffy mashed potatoes plated and ready for serving — the base layer for your bangers and teriyaki onion gravy.
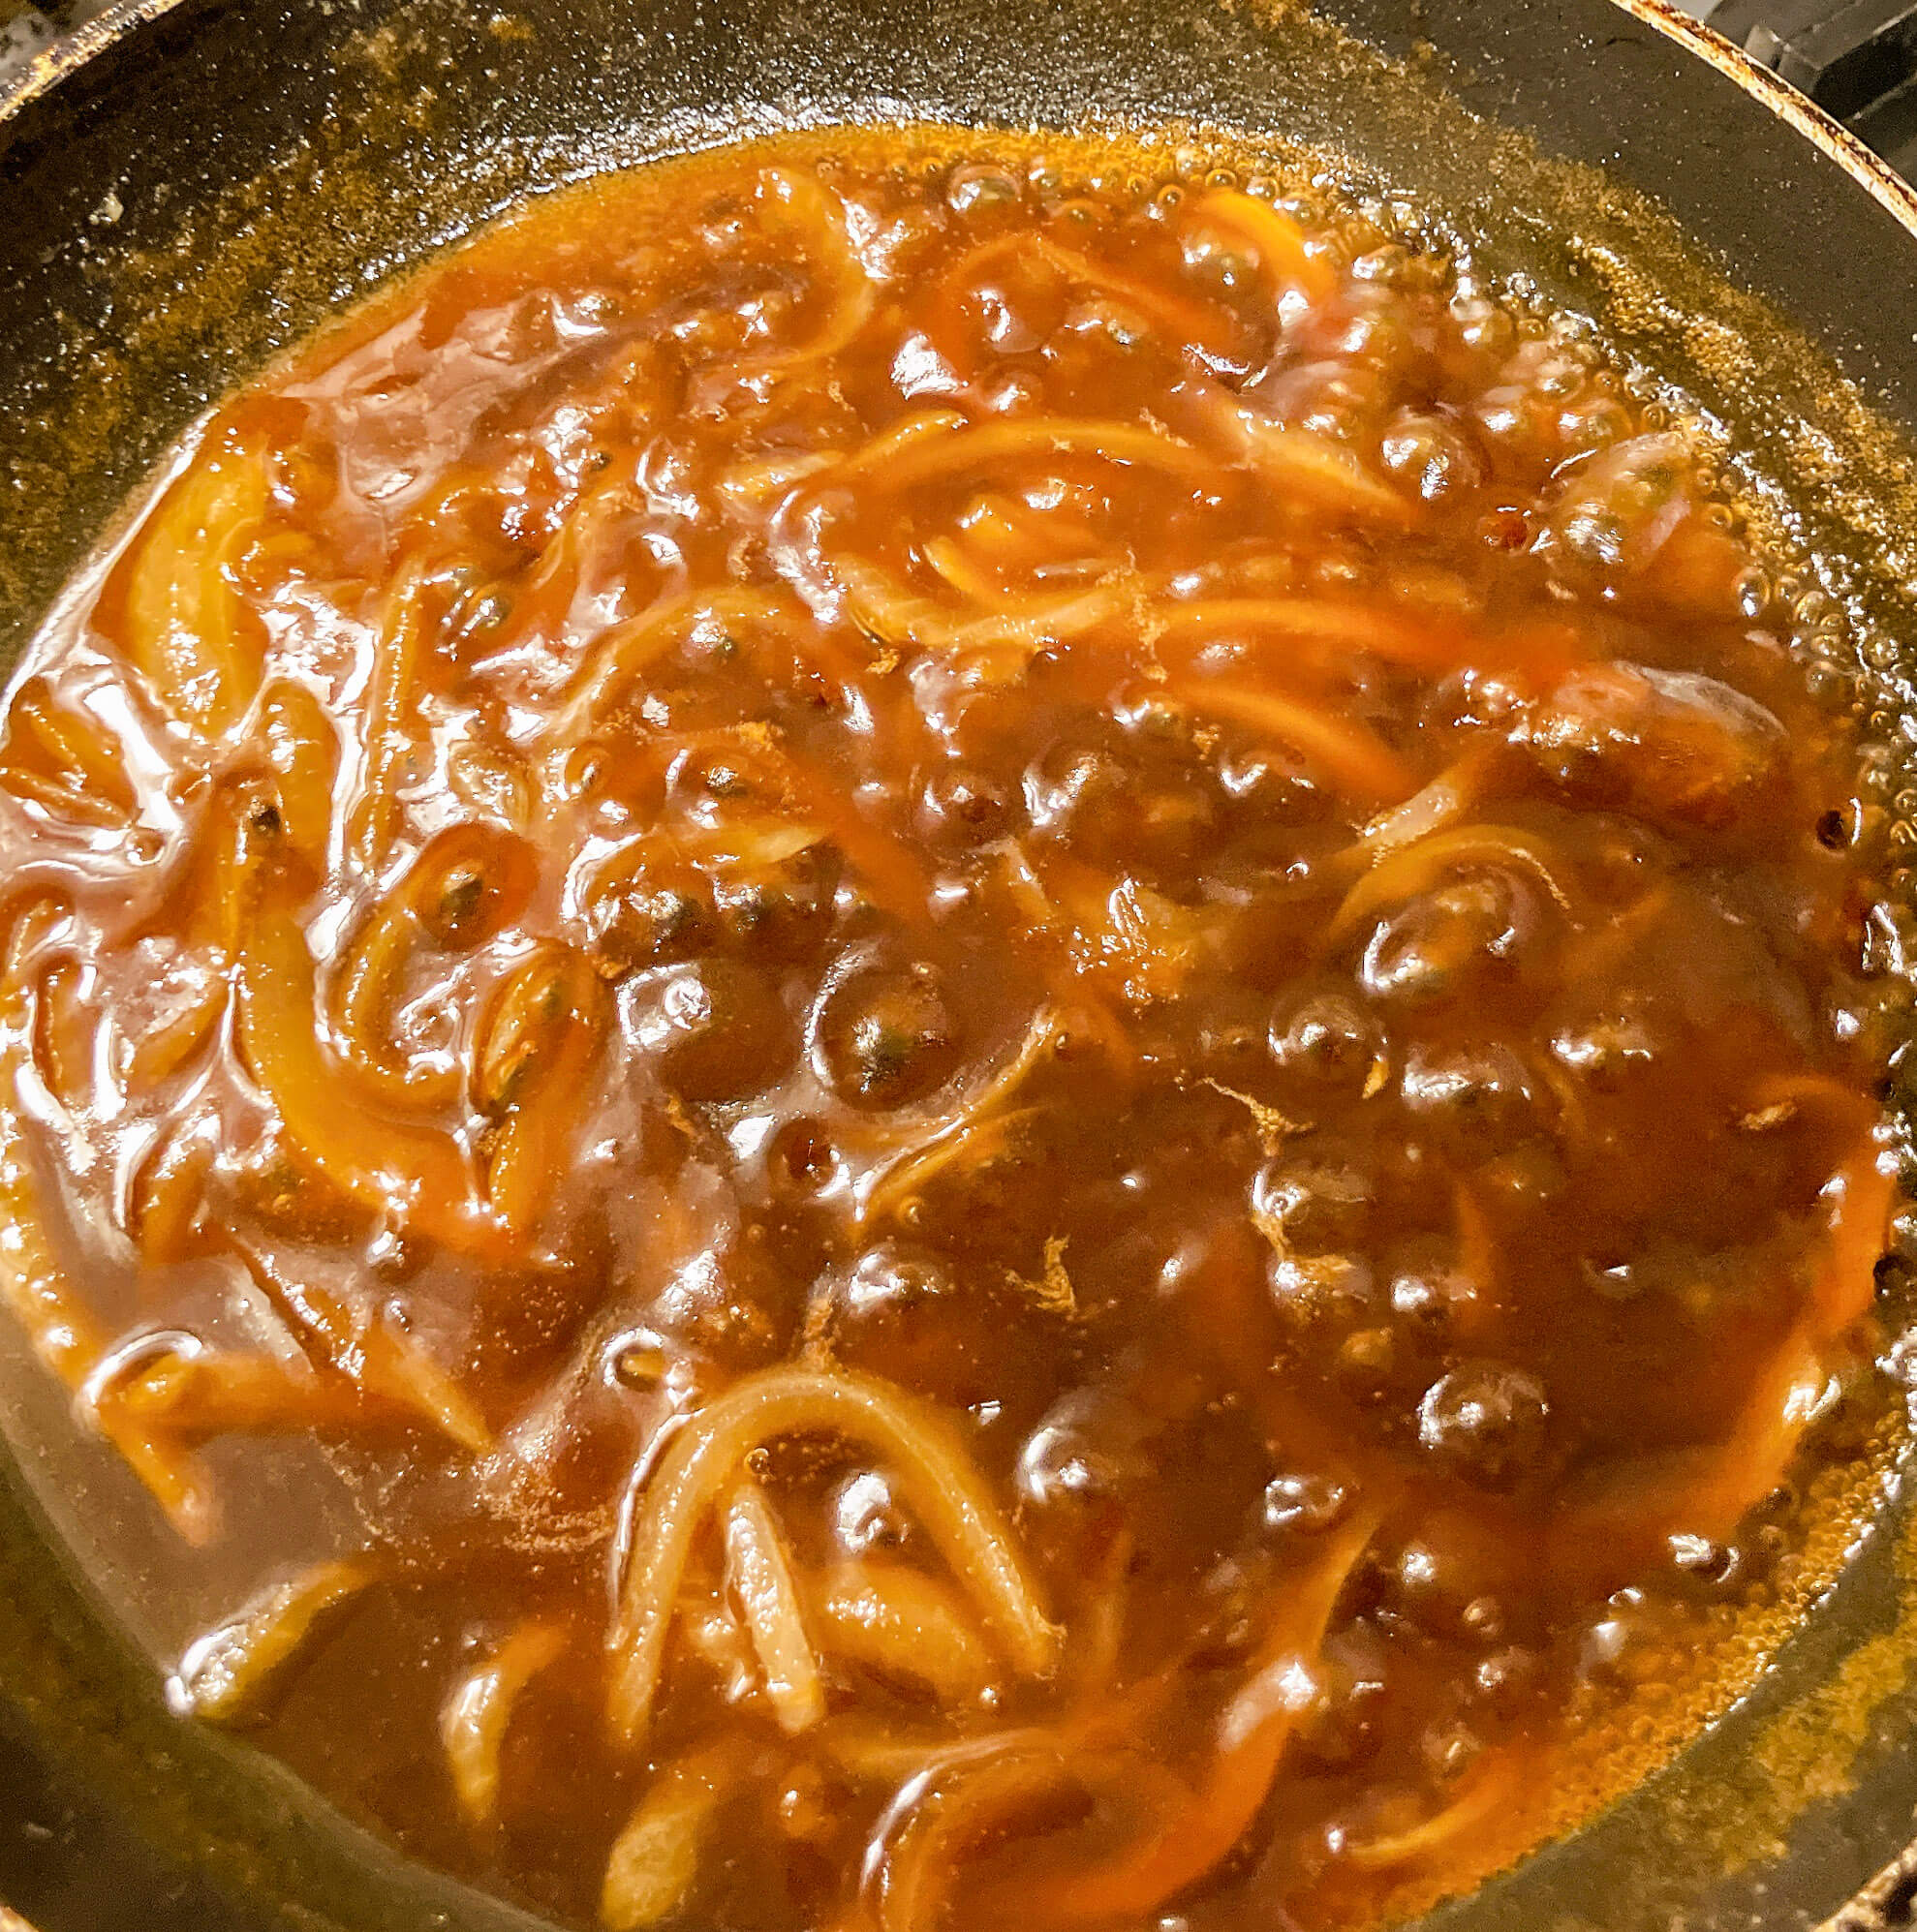
Teriyaki Onion gravy
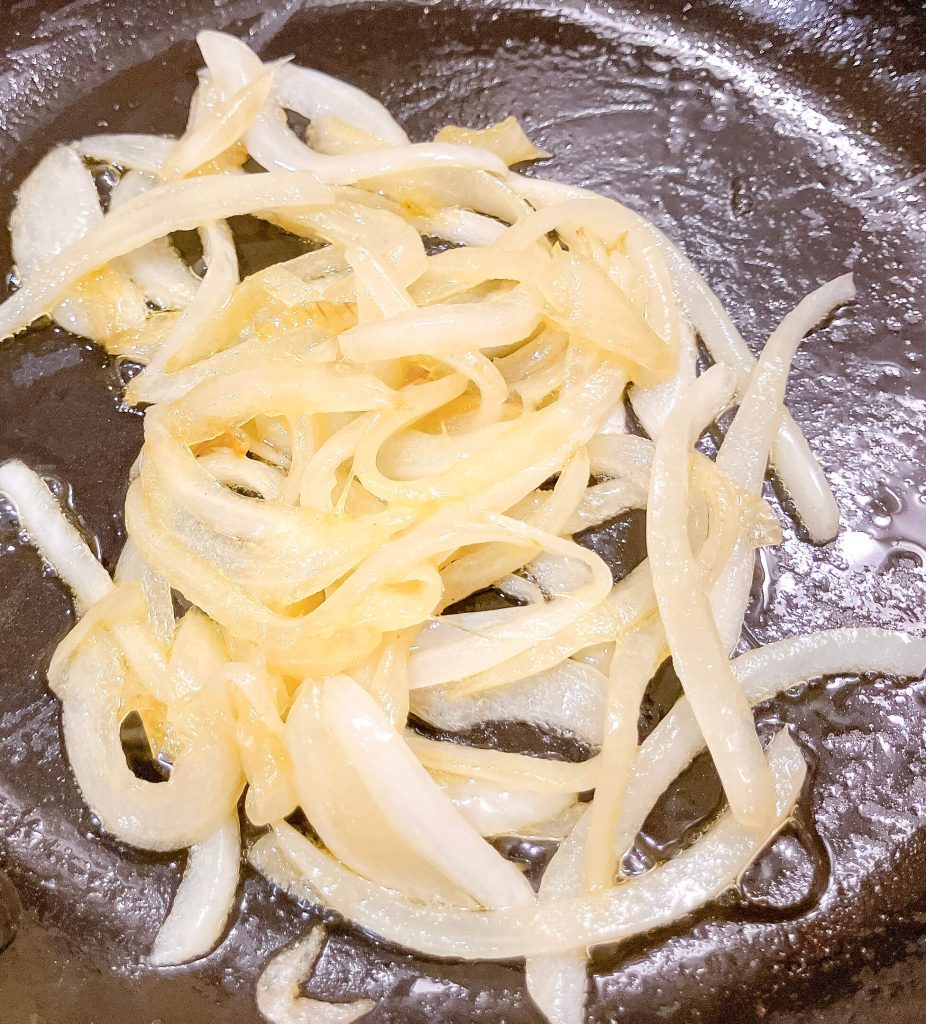
Step 1 – Sauté onions until soft and translucent 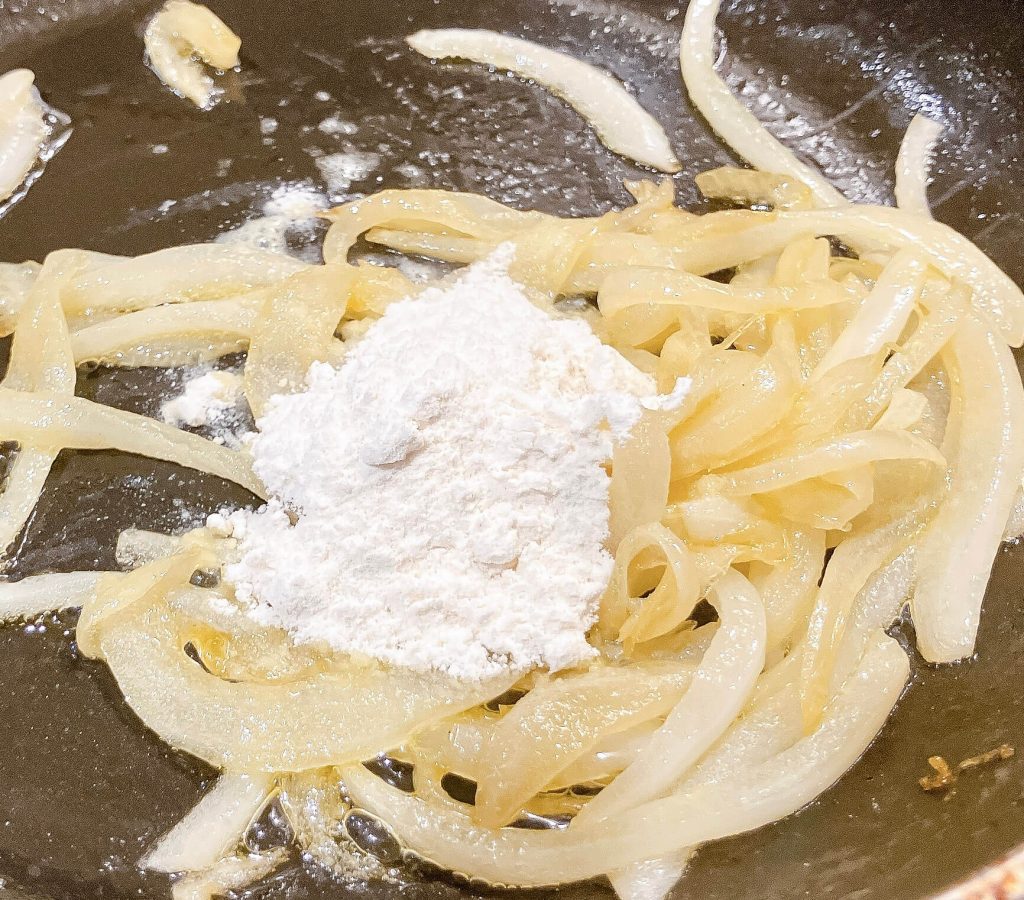
Step2 – Add flour and stir to coat the onions 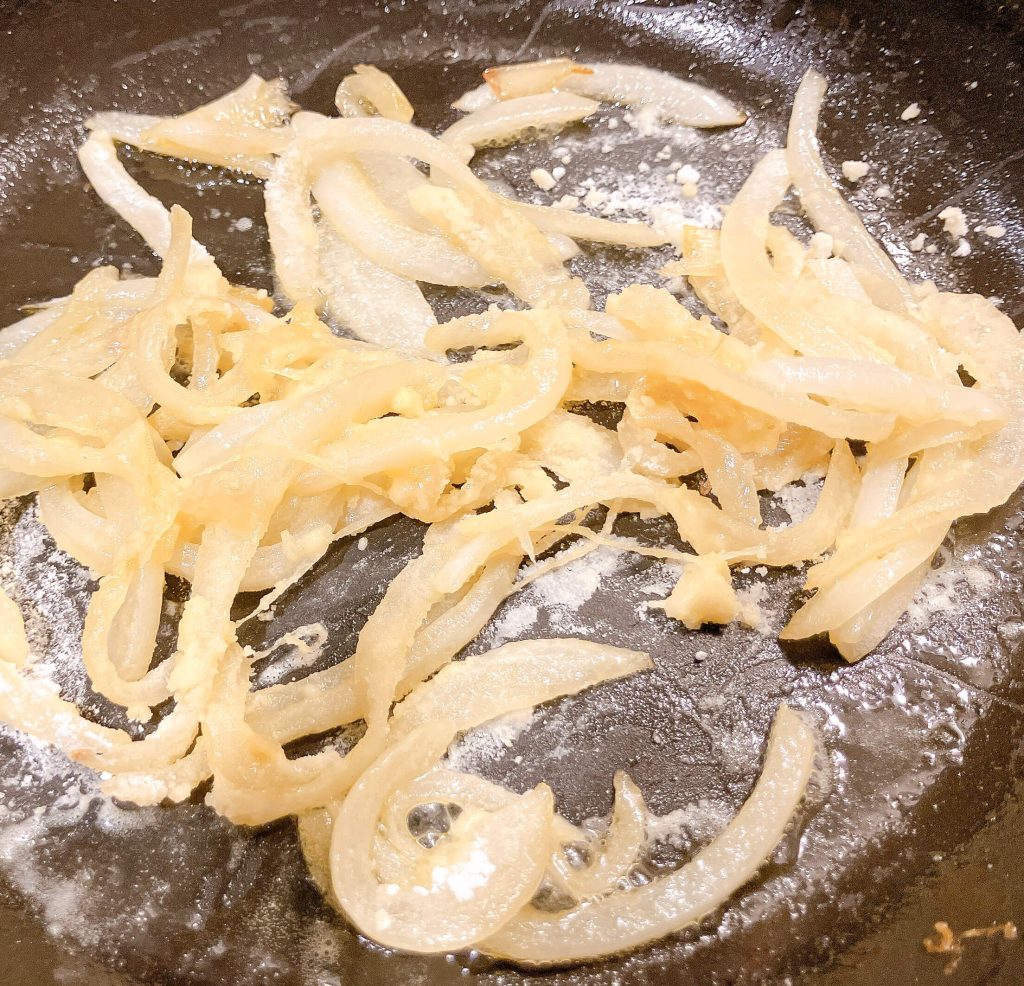
Step 3 – Cook out the flour for 1–2 minutes 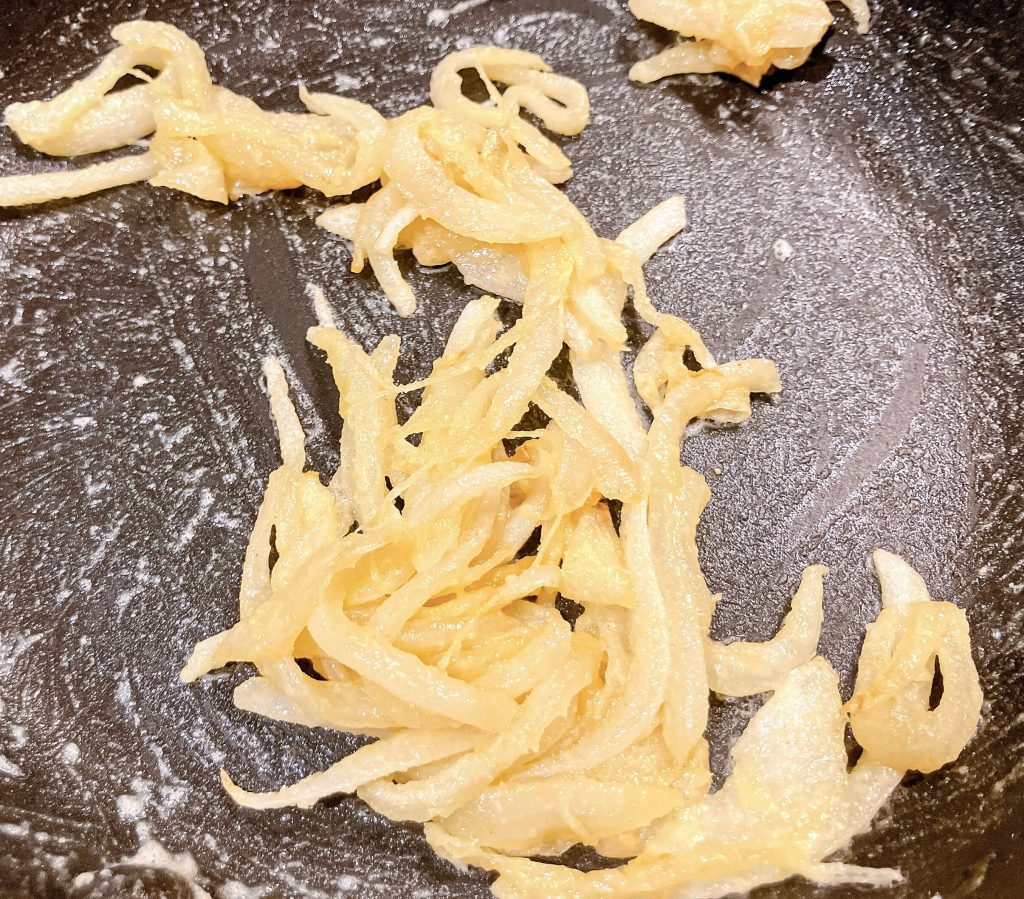
Step 4 – Roux is ready and onions are coated evenly 
Step 5 – Simmer with teriyaki sauce until glossy and thick 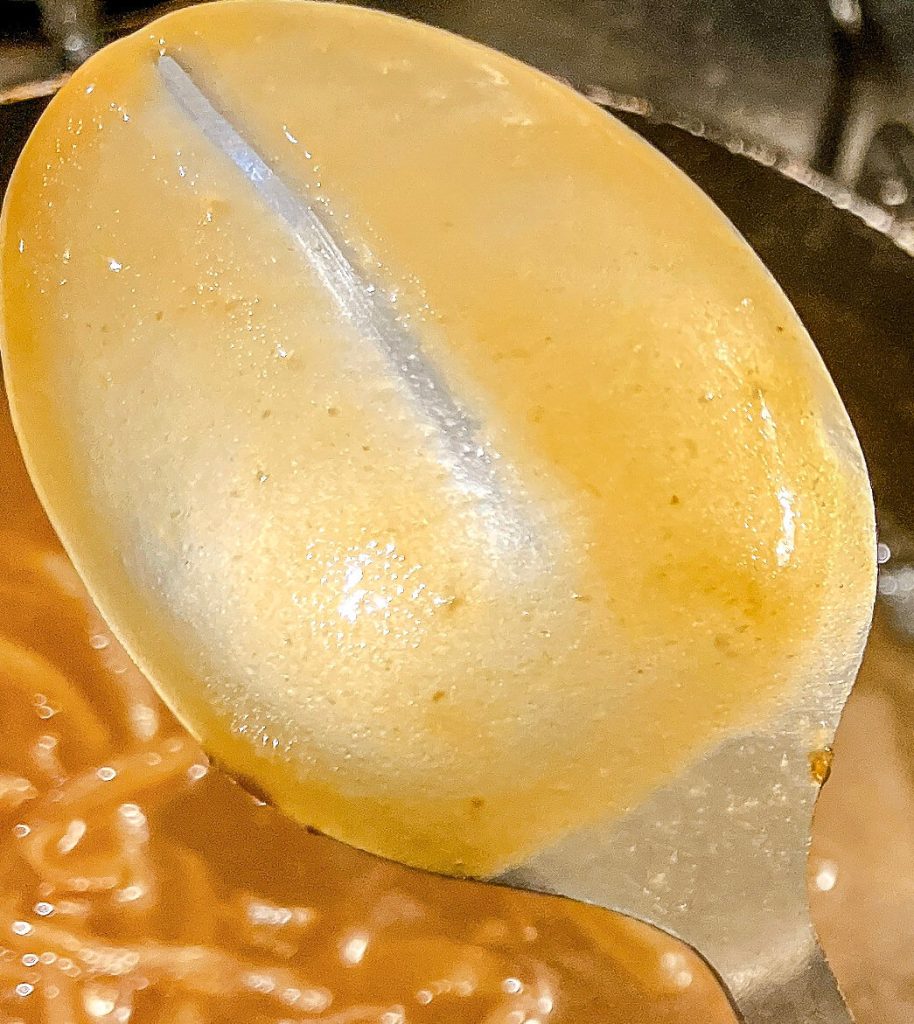
Gravy should coat the back of a spoon when done
The rest
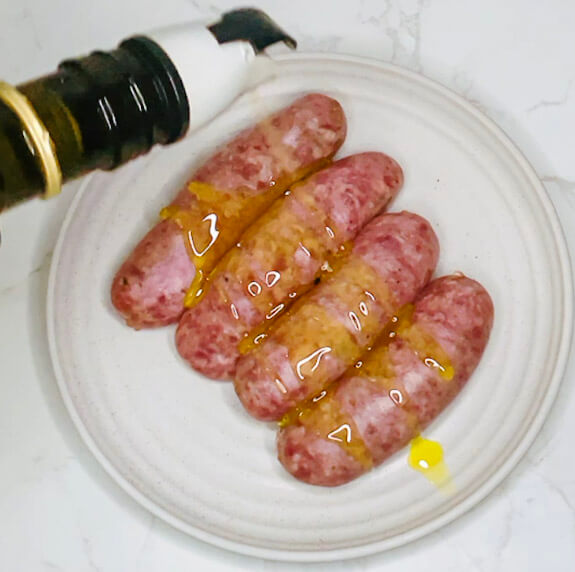
Step 1 – Lightly coat the sausages with oil — it helps them crisp up beautifully in the air fryer. 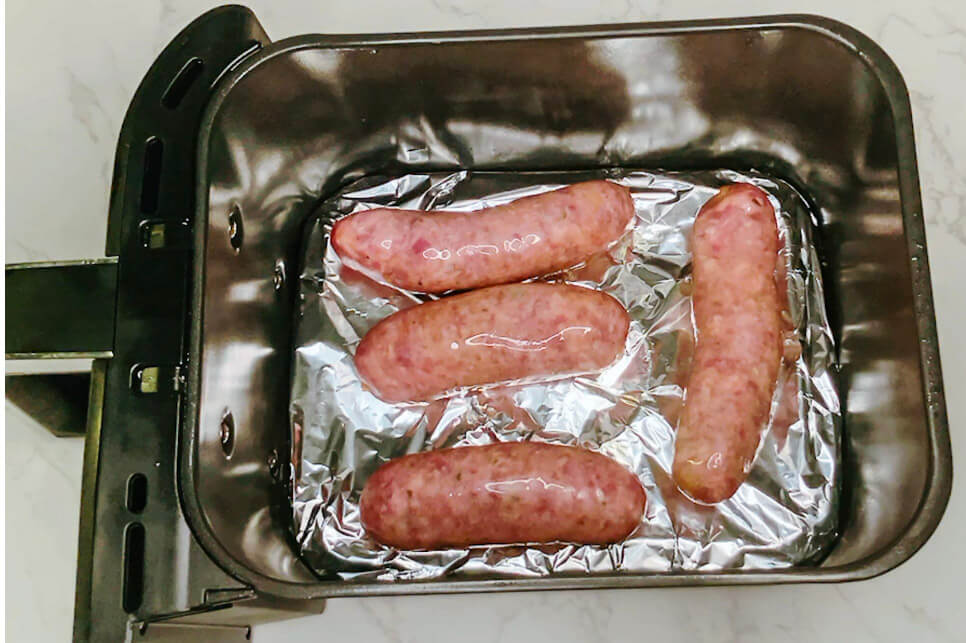
Step 2 – Arrange the sausages in a single layer — this helps them cook evenly in the air fryer. 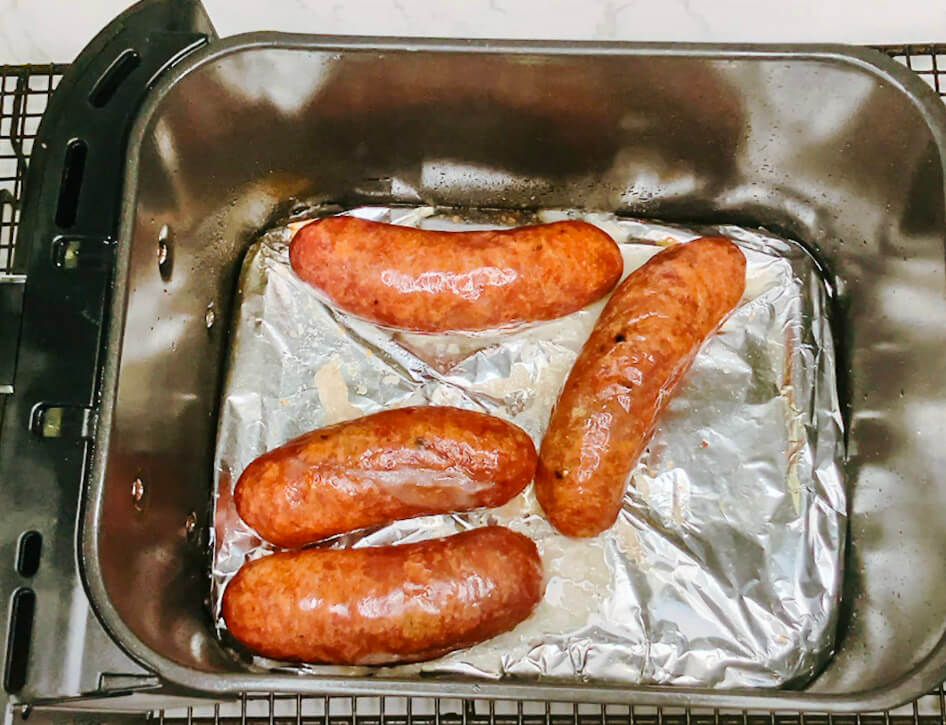
Step 3 – Golden, crisp sausages straight from the air fryer — juicy and ready to serve with creamy mash and rich teriyaki onion gravy. 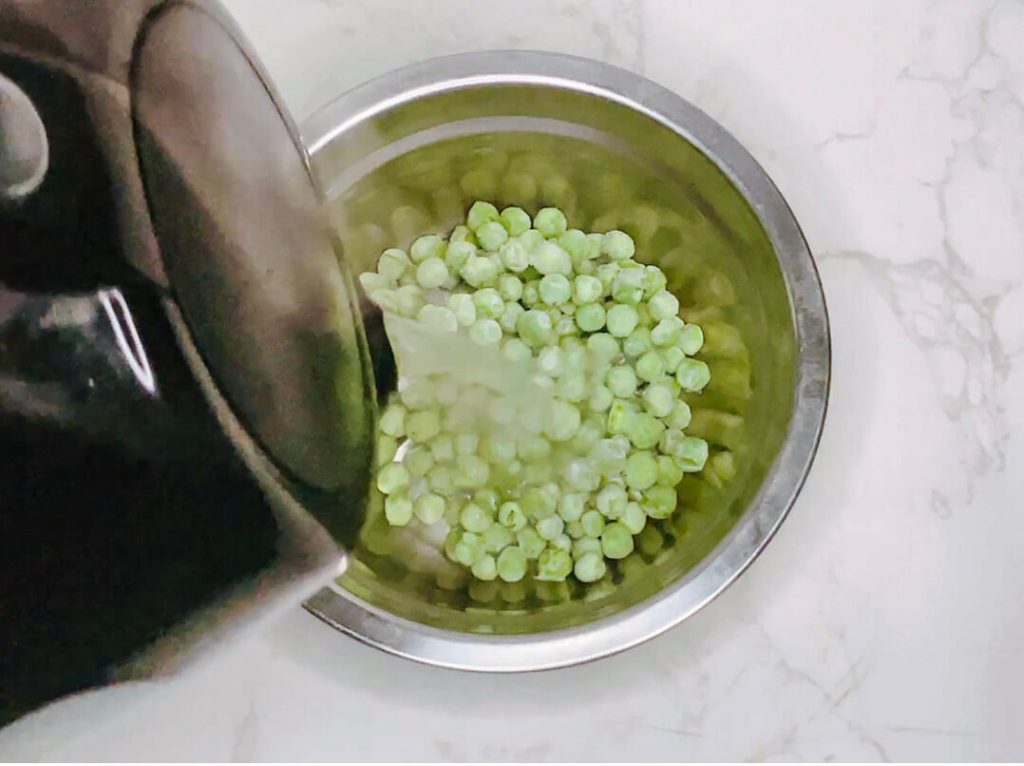
Step 1 – Warm frozen peas in hot water just before serving — quick, easy, and keeps their vibrant color. 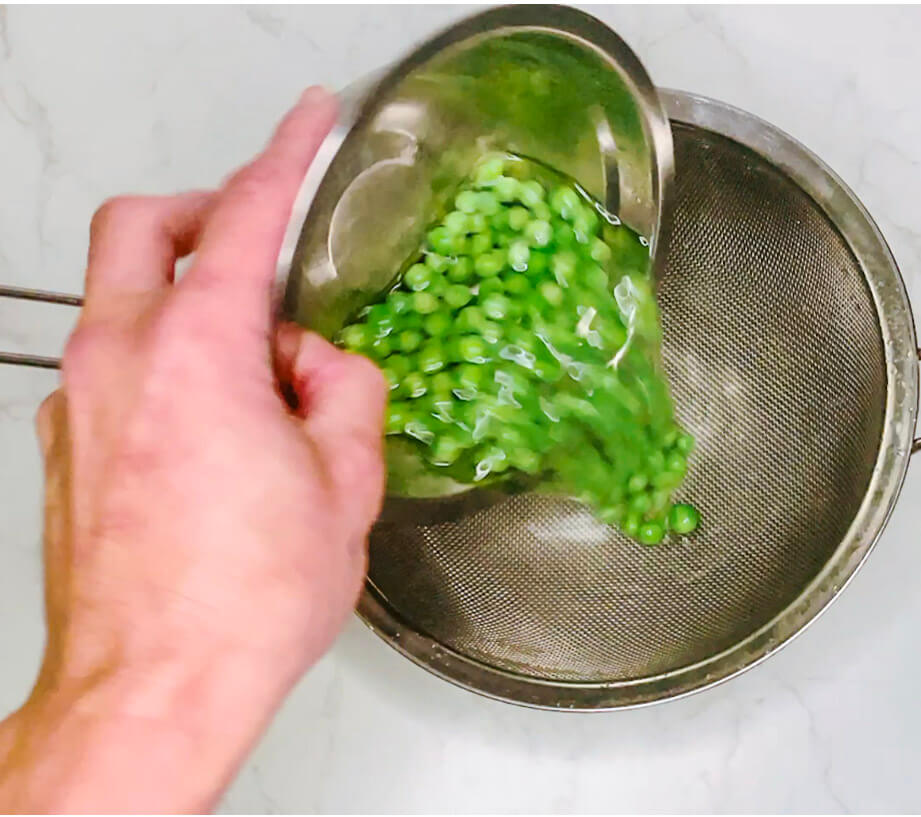
Step 2 – Drain the warmed peas just before plating — they stay bright, sweet, and ready to serve. Step 1 – Fluffy mashed potatoes plated and ready for serving — the base layer for your bangers and teriyaki onion gravy. 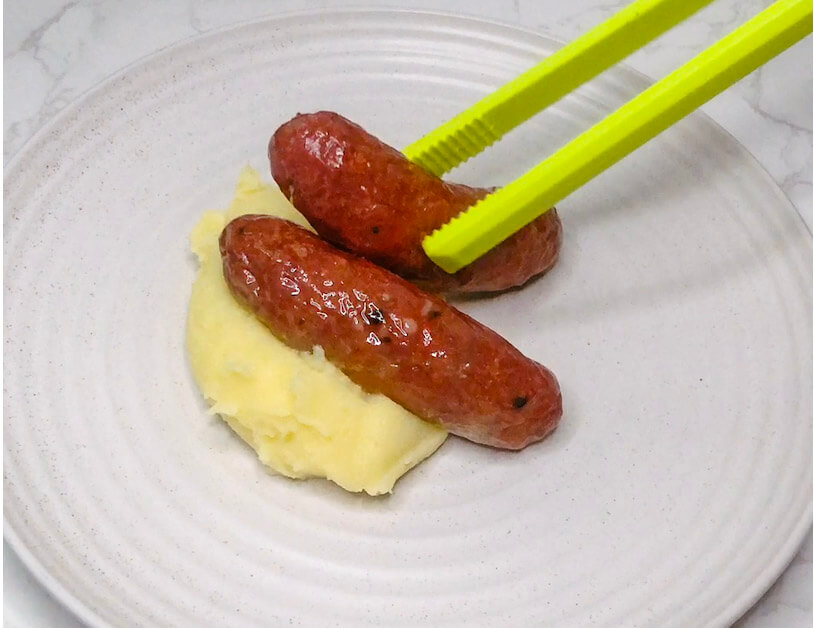
Step 2 – Use tongs to gently plate the sausages over the mash — almost ready to ladle on that glossy teriyaki onion gravy. 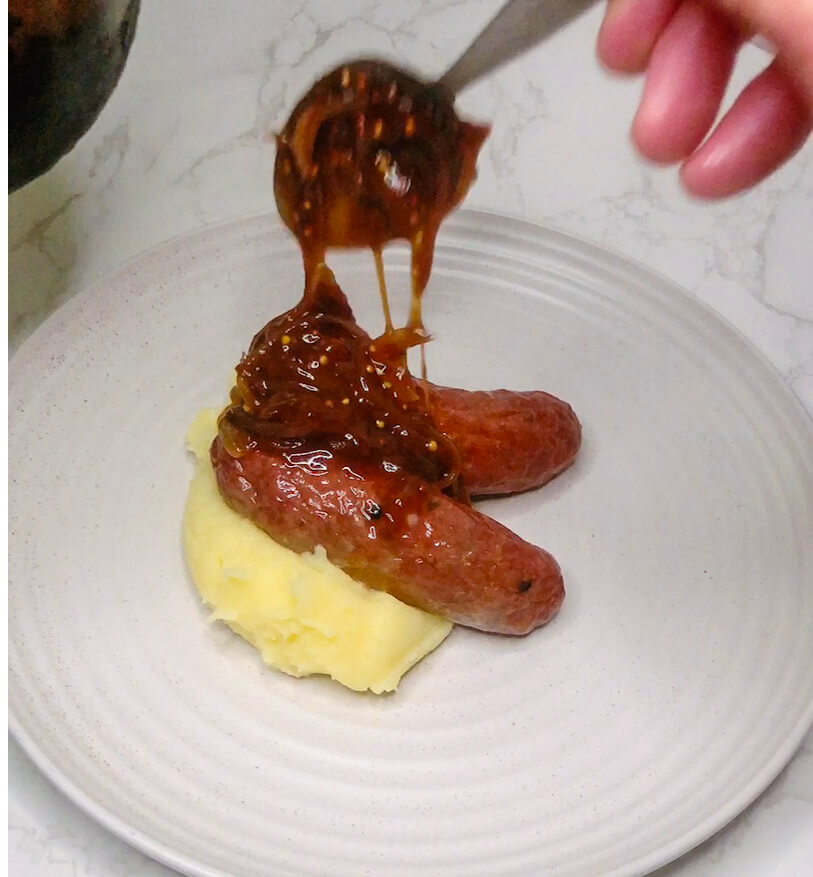
Step 3 – Spoon over the warm, glossy teriyaki onion gravy to finish — it ties everything together with sweet, savory depth. 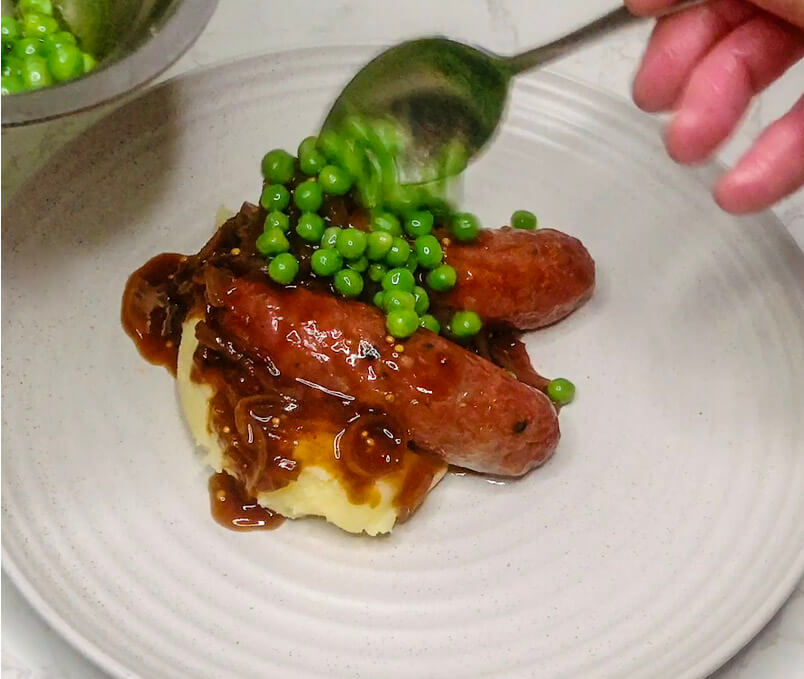
Step4 – Top with bright green peas for a pop of color and a sweet, classic finish.
Bangers And Mash With Teriyaki Onion Gravy Workflow Overview
- Start with the mash — it takes the longest.
- Peel and cut potatoes, rinse once, place in pot with cold water. Bring to boil and cook until tender.
- While potatoes are cooking, start the gravy.
- Slice onions and cook slowly in butter.
- Add flour, then liquids. Let it simmer until glossy.
- Once gravy is simmering, put sausages in air fryer.
- 190°C (375°F), 12–15 mins, flip halfway.
- Steam the peas just before serving.
- Strain and mash potatoes, then mix with warm milk, butter, and salt.
- Assemble: plate mash, top with sausages, pour over gravy, serve with peas.
🥔 Mash Potato Tips from a Chef
I’ll be honest — when I cook at home, I actually prefer the classic milk and butter mash. It’s light, comforting, and my kids love it. In the restaurant, though, I was trained to make the ultra-silky, buttery version. Here’s how I approach both — and how you can choose the right one for your meal.
🏠 Home-Style Mash (What I Use at Home)
This is the mash I use in this recipe. It’s fluffy, creamy, and easy to make with supermarket potatoes.
- Boil rinsed, peeled and diced Sebago potatoes (sold as “brushed potatoes” in most Aussie supermarkets).
- Drain well and push through a ricer.
- Beat in butter and a splash of milk .
- Season with salt to taste .
Pro Tip: If you peel and dice potatoes before boiling, rinse them once before cooking — this removes excess starch and helps prevent gluey mash.
👨🍳 Restaurant-Style Mash (What I Was Taught in Pro Kitchens)
This version is richer and smoother — and honestly, a bit of a production. But the texture is amazing.
I was taught to bake whole potatoes on a bed of salt (which helps draw out moisture), then cut them in half and push the flesh through a fine sieve while still hot.
No peeling needed — the skins stay behind in the sieve.
We’d then beat in touch of milk and loads of butter over low heat —
(at work I used way more than the recipe below — at home I stop at 140g 😊).
Then we’d push it through the sieve one more time for that super-silky finish.
🔄 How I Adjusted It for Home
In this recipe, I’ve simplified the method:
- I boil whole potatoes with the skin on
- Peel them while hot
- Push them through a potato ricer, not a sieve
- Then beat in butter and season
It’s still smooth and creamy, but without the fuss. Perfect for home kitchens — and honestly, it’s what I use for my friends come over.
🍽 Restaurant-Style Mash (Home Version)
Want to try a simplified version at home? Here’s the basic formula:
- 700g unpeeled potatoes
- 140g butter
- Salt to season
That’s it. No milk, no fuss — just rich, buttery mash that feels a little fancy.
🥔 Why Potato Type Matters
More important than technique is the potato itself:
- Sebago potatoes (brushed potatoes) are great for home use — they hold less water and absorb milk and butter well.
- Dutch Cream potatoes (similar to Yukon Gold) are what I used in restaurants — they’re naturally rich and creamy even without any dairy added.
🔥 Why You Should Mash While Hot
Cold mashed potatoes = trouble. Here’s why:
- Starch sets as they cool → mash turns grainy, lumpy, or gluey
- Butter and milk won’t absorb properly → mash turns greasy or broken
- Harder to mash → you overwork the potato → gummy texture
So: Always mash while hot or warm, and work quickly for the best results.
💧 Why You Should Start Potatoes in Cold Water
Boiling potatoes from hot water might seem faster, but it causes the outside to cook too quickly while the inside stays undercooked — especially with larger chunks.
Always start your potatoes in cold, salted water and bring them up to a boil gradually. This ensures they cook evenly from edge to center, giving you the perfect creamy mash every time.
🥦 Cauliflower Mash (Keto-Friendly Mash Alternative)
Creamy, low-carb, and ultra-easy — this cauliflower mash is my go-to side when I want something lighter than potato but still rich enough to hold its own with saucy mains. Just two ingredients, one pot, and no draining.

Cauliflower Mash Recipe Ingredients
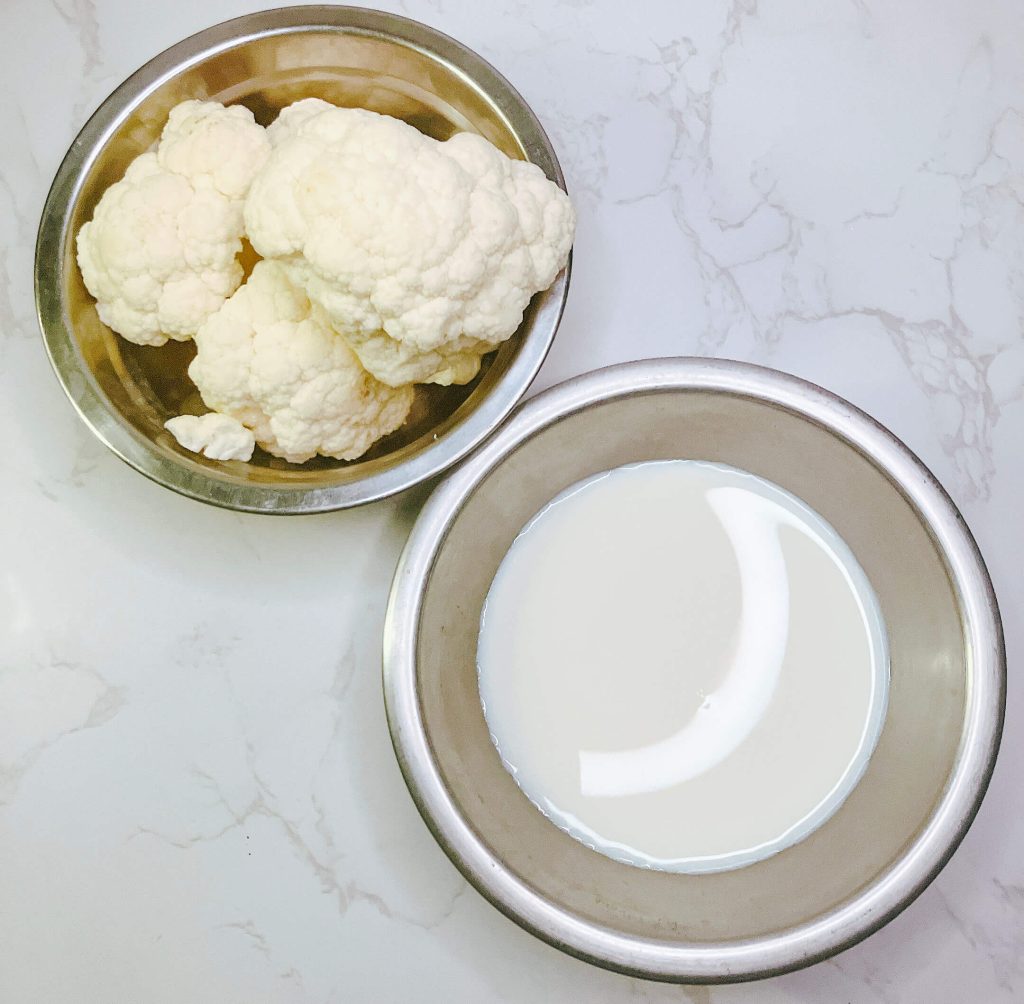
- 320g cauliflower florets (stems removed)
- 150ml cream (or just enough to barely cover the cauliflower)
🔪 Instructions
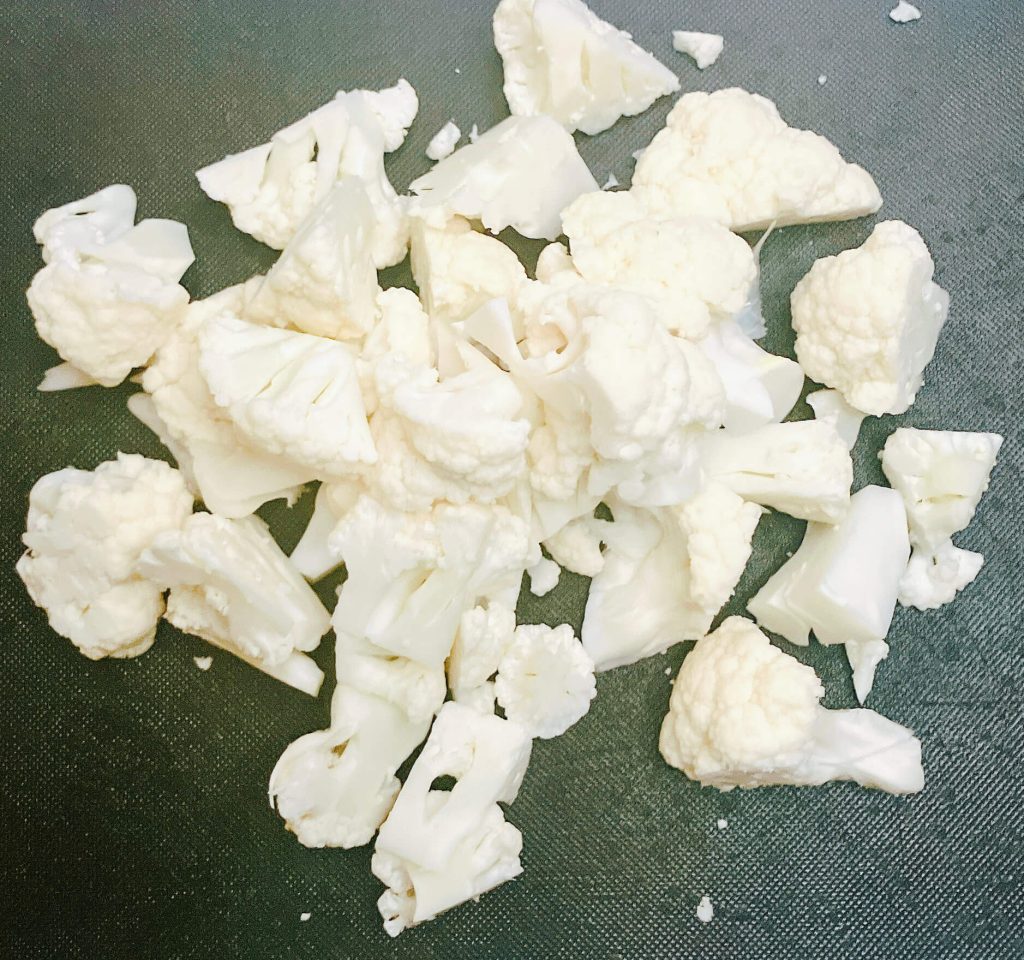
- Chop the cauliflower into even-sized florets for quick, even cooking.
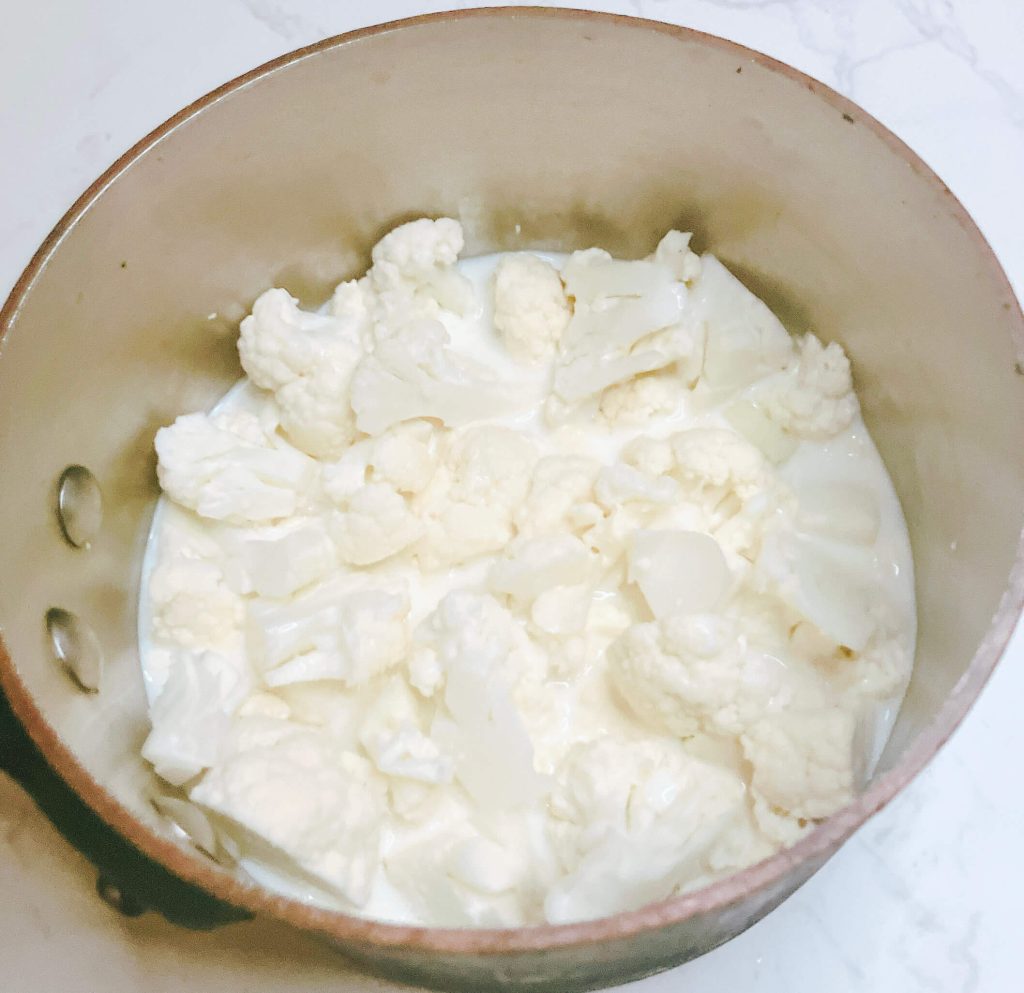
- Simmer in a saucepan with just enough cream to almost cover the florets (around 150ml). Keep it uncovered.
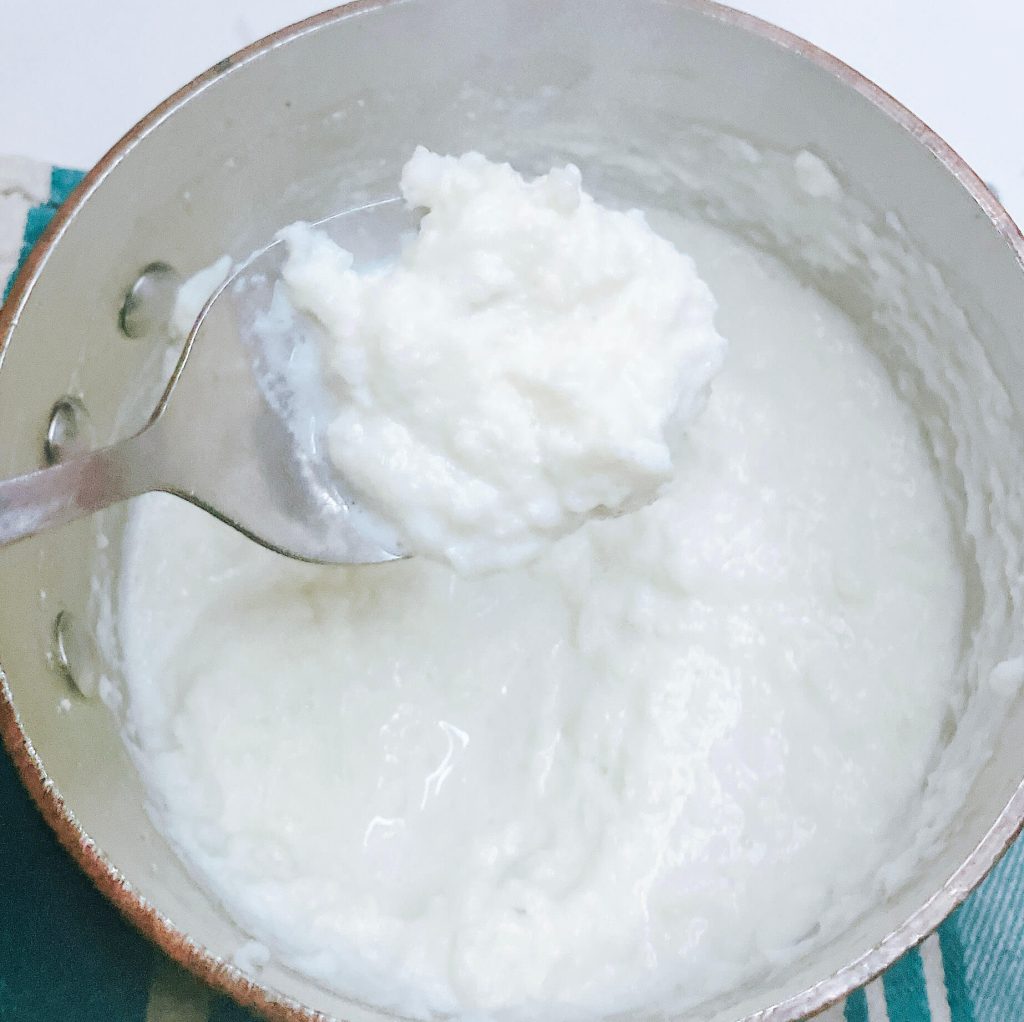
- Cook gently until the cauliflower is very soft — about 10–12 minutes.
- Blend directly in the pot with a stick blender:
- A short blitz = rustic, mashed potato-style texture
- A longer blend = smooth, creamy purée
- Season to taste with salt. Optional: finish with a knob of butter for extra richness.
👨🍳 From the Chef
If you’re making a keto, soy-free, or gluten-free meal, you can easily swap the sauce to fit your dietary needs. I break it all down in my Ultimate Teriyaki Sauce Guide — including a pantry-friendly version and dietary variations.
Serving Variations
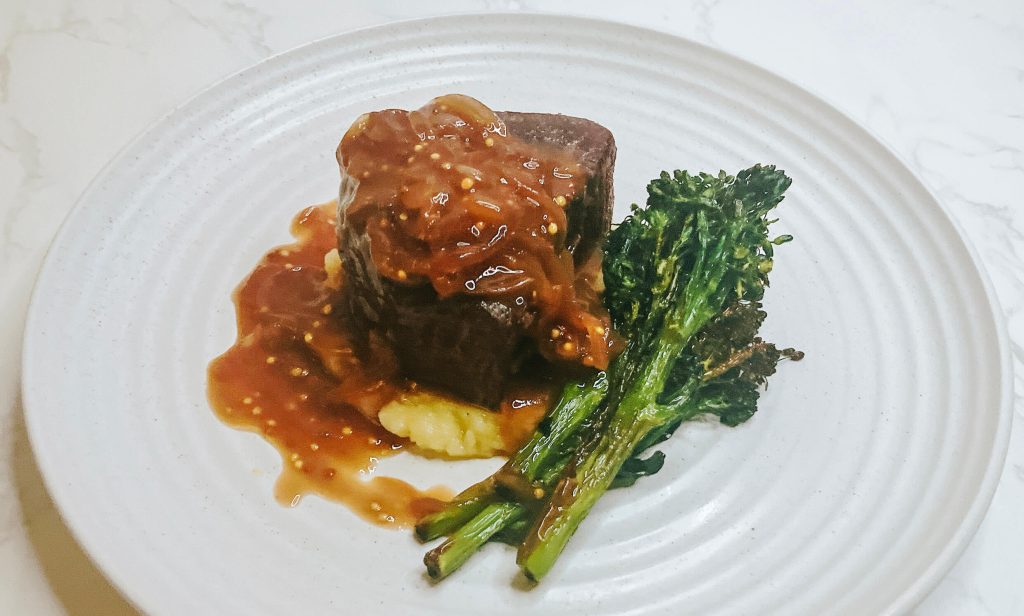 Steak variation: tender beef steak with fluffy mashed potatoes and air fried broccolini, finished with a drizzle of savory teriyaki onion gravy.
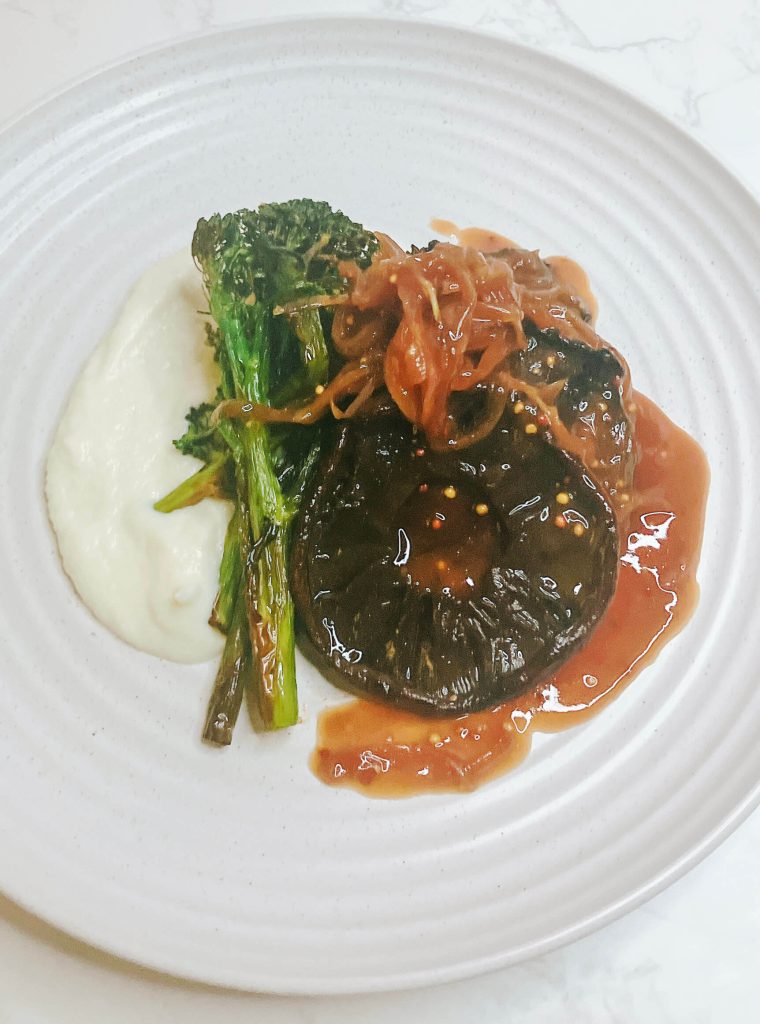 A refined vegetarian plate with mushroom steak, silky cauliflower mash, crispy air-fried broccolini, and a drizzle of teriyaki onion gravy.
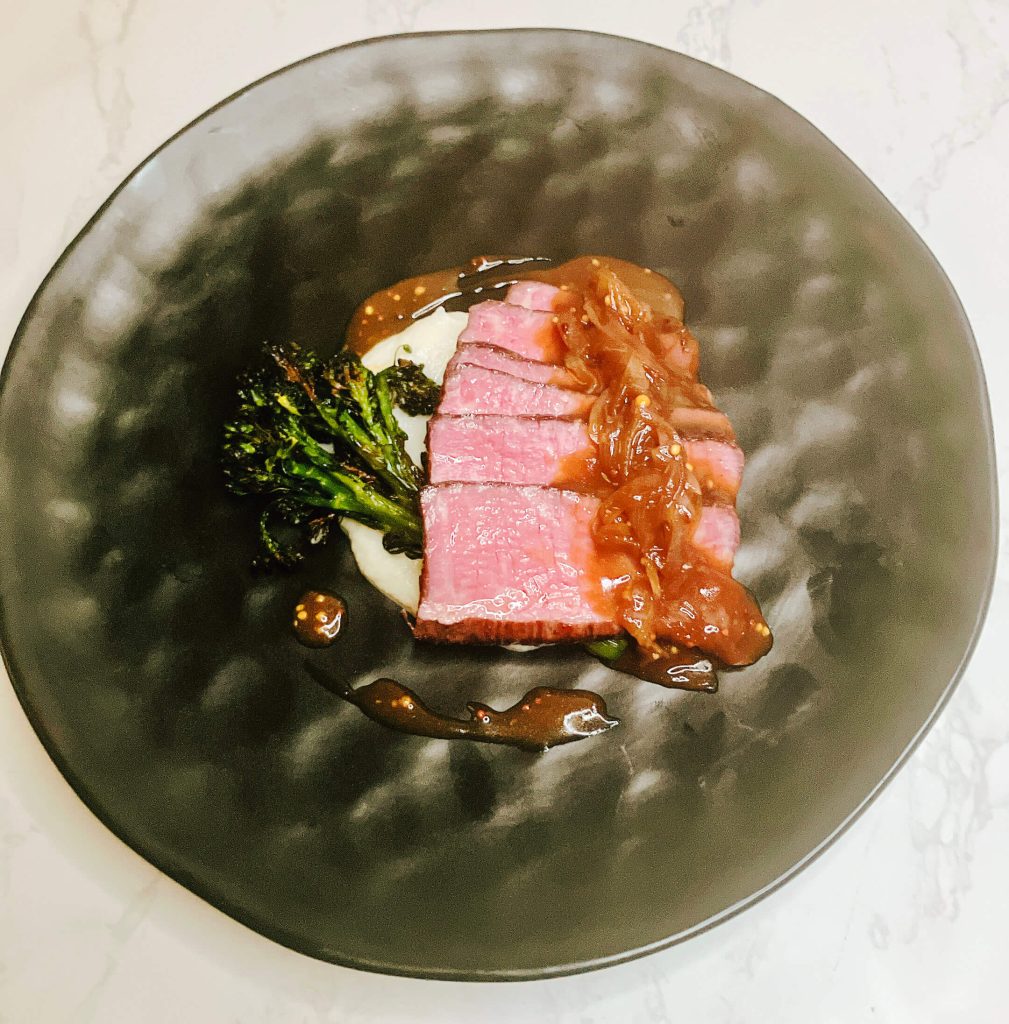 Refined variation: juicy steak with silky cauliflower mash and crisp air-fried broccolini, finished with a glossy teriyaki onion gravy.
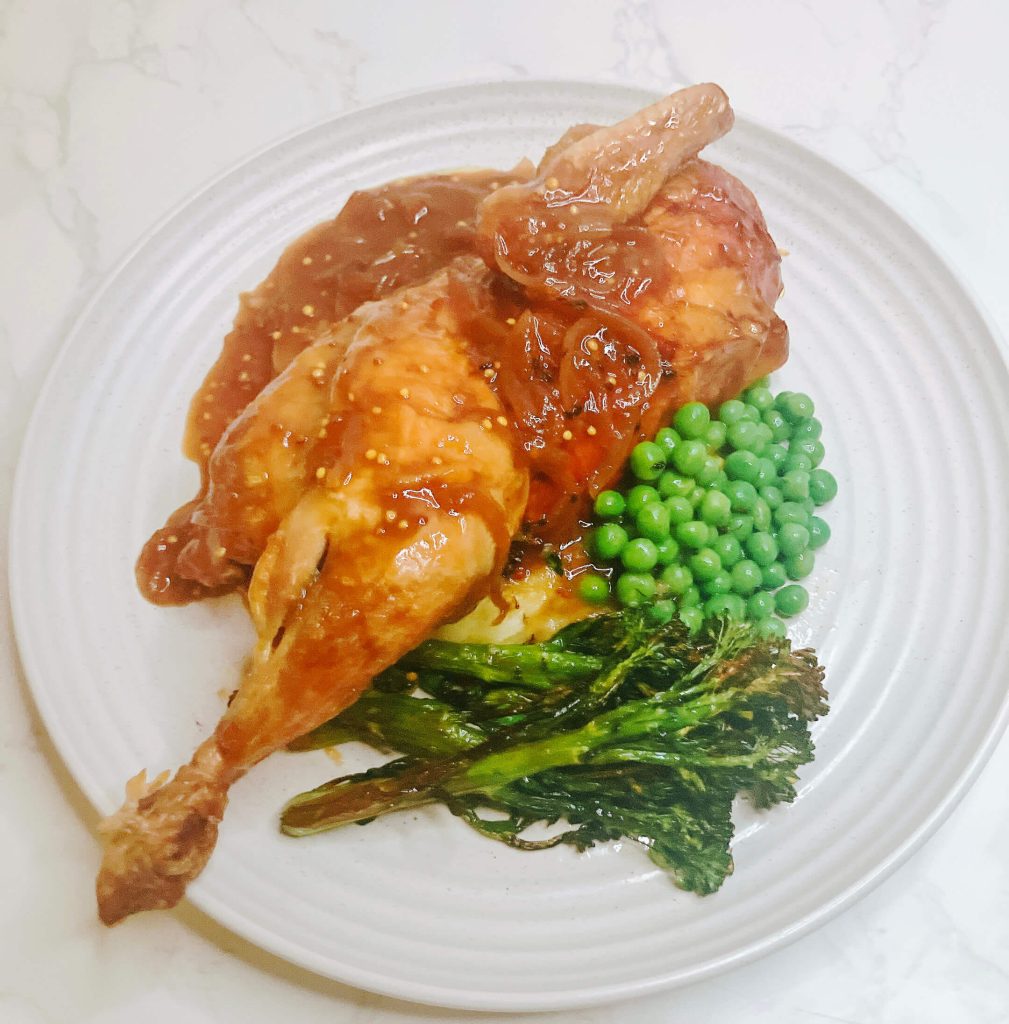 Serving variation: roast chicken with creamy mashed potatoes, peas, and broccolini, all brought together with rich teriyaki onion gravy.
Whether you’re using fluffy mashed potatoes or silky cauliflower mash, this dish is incredibly versatile — perfect with everything from juicy steak and roast chicken to mushroom steaks.
For a lighter option, try it with cauliflower mash, which is naturally keto, gluten-free, soy-free, and pantry-friendly. Just swap the sauce to match your needs — for example, use the Keto Onion Gravy variation (see recipe card notes) for a rich but low-carb twist..
This cauliflower mash is the perfect canvas for any dietary style — just adjust the sauce and sides to suit your needs. You’ll find all the variations, including gluten-free and pantry-friendly options, in my Ultimate Teriyaki Sauce Guide.
Final Thoughts
Bangers and Mash with Teriyaki Onion Gravy is one of those rare dishes that ticks all the boxes: quick (30 minutes!), pantry-friendly, adaptable to almost any protein, and built for real-life dinners.
Sometimes I’ll use steak, roast chicken, or even a mushroom steak — whatever I’ve got. The teriyaki onion gravy adds bold, umami depth without needing stock or specialty ingredients. And whether you go for classic mashed potatoes or the cauliflower mash, the base is simple, comforting, and flexible.
Honestly, I make this Bangers and Mash With Teriyaki Onion Gravy at home on weeknights with very minimal effort — especially when I’m short on time or ingredients. It’s quick, satisfying, and endlessly adaptable.
Dietary options are always a priority in my cooking, since my daughters have (and had) food allergies. That’s why this recipe includes keto, soy-free, and gluten-free variations — so everyone can enjoy it.
And between us? In restaurants, making mashed potatoes was never my favorite job 😅 — but at home, it’s become one of the most comforting parts of dinner.
If you want to explore more teriyaki sauce options, don’t miss the Ultimate Teriyaki Sauce Guide — it covers everything from pantry swaps to dietary-friendly versions.

Bangers and Mash with Teriyaki Onion Gravy
Equipment
- 1 air fryer For sausages and air-fried broccolini (variation)
- 2 sauce pan For boiling potatoes or simmering cauliflower and make the teriyaki onion gravy
- 1 potato ricer Recommended for fluffy, lump-free mashed potatoes and less effort
- 1 Colander To rinse and drain potatoes and drain peas
Ingredients
Mash Potato
- 500 g Unpeeled potato Sebago (Idaho)
- 40 ml Milk Full cream
- 30 gram Butter
- Salt to taste
Teriyaki Onion Gravy
- 150 g Onion sliced
- 30 g Butter
- 8 g Plain flour
- 50 g Soy sauce
- 120 g water
- 25 g Golden Syrup see note
- 20 g Sugar
- 1 g Garlic powder optional
- 10 g Seeded mustard optional but give nice acidity in sauce (recommended)
The rest
- 4 pieces Sausages Your choice of sausges
- 60 g Frozen peas
Instructions
the Mashed Potatoes
- Peel and chop potatoes into even pieces.
- Rinse briefly, then boil in salted water until fork-tender (10–12 minutes).
- Drain and immediately press through a potato ricer.
- Stir in butter and warm milk.
- Season with salt and mix until smooth.
Make the Teriyaki Onion Gravy
- Melt butter in a skillet over medium heat.
- Add sliced onions and cook until soft and golden (about 8–10 minutes).
- Stir in flour and cook for 1–2 minutes to form a light roux.
- Add soy sauce, water, golden syrup, sugar, and (optional) garlic powder and mustard.
- Cook until thick and glossy. Set aside.
Cook the Sausages
- Lightly coat sausages with oil.
- Place in an air fryer at 190°C (375°F) and cook for 12–15 minutes, flipping halfway.
- Rest for a few minutes before serving.
Prepare the Peas
- Heat frozen peas in hot water just before serving (do not overcook).
- Drain and set aside.
Assemble the Dish
- Plate mashed potatoes in the center.
- Top with cooked sausages.
- Spoon teriyaki onion gravy generously over the top.
- Finish with bright green peas.
Notes
The closest substitute is honey, which matches the sweetness and texture well. Or another substitute is light corn syrup — use 40 g corn syrup in place of 25 g golden syrup. This matches the sweetness and texture. Dietary Options: For a lighter or keto-friendly version, swap the mashed potatoes with cauliflower mash. And use this keto recipe below.
Keto Teriyaki Onion Gravy (≈300 g)
Ingredients
- 50 g Soy Sauce (≈3.5 oz)
- 120 g Water (≈5.3 oz)
- 19 g Monk Fruit Sweetener (golden syrup swap)
- 19 g Water (golden syrup swap)
- 2.8 g Rice Vinegar (optional, for brightness)
- 19 g Monk Fruit Sweetener (sugar swap)
- 150 g Sliced Onion (≈5.3 oz)
- 25 g Salted Butter (≈1.1 oz)
- 0.5 g Garlic Powder (≈¼ tsp)
- 10 g Seeded Mustard (optional) (≈2 tsp)
Method
- Melt butter in a saucepan over medium heat.
- Add onions and cook slowly until soft and golden (10–15 minutes).
- Stir in garlic powder (and mustard if using).
- Add soy sauce, water, monk fruit sweeteners, and simmer gently for 8–10 minutes.
- For thickness (keto option): Remove about one-third of the onion sauce, blend until smooth, then stir it back into the pan. Simmer 1–2 minutes until glossy.
- Stir in rice vinegar at the end (optional) for extra brightness. Adjust seasoning to taste
About the Author
Hi, I’m Kenji — a chef with over 25 years of experience in both Western and Asian cuisines, and a dad who loves creating easy, flavorful meals for busy families.
At Seasoned with Flavor, I share pro-tested recipes with real-world tips so anyone can cook delicious food at home — no complicated techniques required.
Want to master teriyaki? Check out my Ultimate Teriyaki Sauce Guide for variations, including gluten-free, keto-friendly, and budget options!